
2010 Acura Tsx Serpentine Belt Diagram
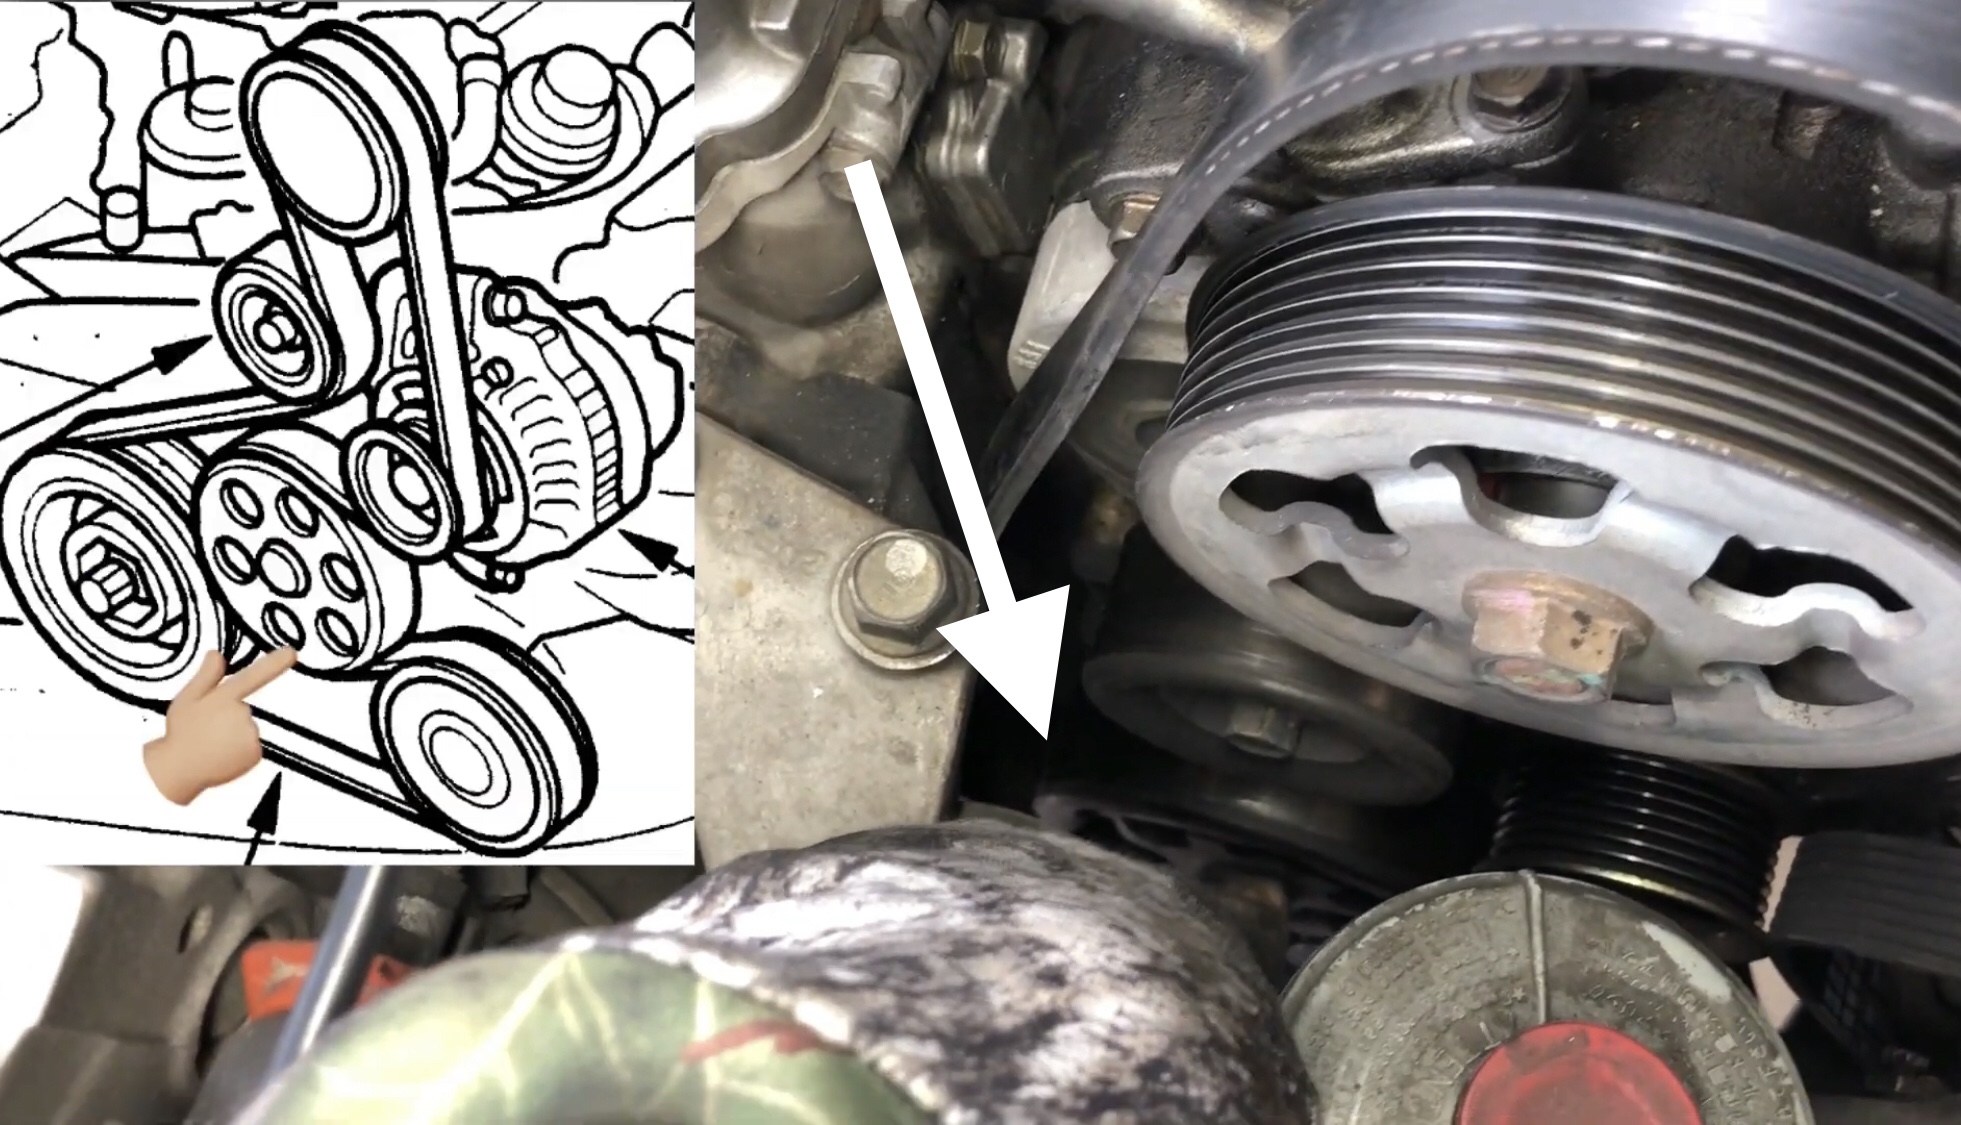
For the experienced DIYer tackling maintenance or repairs on a 2010 Acura TSX, understanding the serpentine belt system is crucial. This guide will break down the serpentine belt diagram, explaining its components, function, and how to use it for effective troubleshooting. We'll cover the key aspects you need to know to keep your TSX running smoothly.
Purpose of the Serpentine Belt Diagram
The serpentine belt diagram is essentially a roadmap for the belt’s path around the various engine accessories. Its primary purpose is to:
- Assist in belt replacement: Knowing the correct routing is essential when installing a new belt. An incorrectly routed belt can damage components or fail prematurely.
- Aid in troubleshooting: A visual representation of the system helps diagnose issues like squealing belts, power steering problems, or a failing alternator.
- Provide a reference for inspection: You can use the diagram to ensure the belt is correctly seated on all pulleys and to identify potential alignment issues.
- Understand the system's operation: Even if you're not actively repairing something, the diagram helps you understand how the engine accessories are driven.
Think of it as the electrical schematic for the accessory drive system. It removes the guesswork and ensures you're working with accurate information.
Key Specs and Main Parts of the 2010 Acura TSX Serpentine Belt System
The 2010 Acura TSX, equipped with the K24Z3 2.4L inline-4 engine, uses a single serpentine belt to drive multiple accessories. The specific belt length and tension specifications will vary slightly based on factors like whether the vehicle is equipped with A/C and if it's an automatic or manual transmission, but the general routing principle remains the same. Refer to your vehicle's repair manual or the sticker often found in the engine bay for the exact belt length and tension required. This information is critical for proper belt installation and function. Using the wrong belt can lead to slippage, noise, and even component damage.
The main components in the serpentine belt system include:
- Crankshaft Pulley: This pulley, driven directly by the engine's crankshaft, is the power source for the entire system.
- Alternator Pulley: The alternator generates electricity to power the vehicle's electrical system and charge the battery.
- Power Steering Pump Pulley: The power steering pump provides hydraulic assistance for steering, making it easier to turn the wheel.
- Air Conditioning (A/C) Compressor Pulley: The A/C compressor circulates refrigerant to cool the vehicle's cabin. Not all vehicles will have this.
- Idler Pulley(s): These pulleys provide belt guidance and tension. They are smooth and do not drive any accessories.
- Tensioner Pulley: The tensioner pulley maintains proper belt tension. It's spring-loaded or hydraulically damped to automatically adjust for belt stretch and wear. A failing tensioner is a common cause of belt noise.
- Serpentine Belt: The rubber belt itself, typically made of EPDM (Ethylene Propylene Diene Monomer) rubber for heat and wear resistance.
Understanding Serpentine Belt Diagram Symbols
Serpentine belt diagrams use specific symbols to represent components and belt routing. Common symbols include:
- Solid Lines: Indicate the belt itself, showing its path around the pulleys. The thickness of the line doesn't typically denote anything specific; it's just for visual clarity.
- Circles: Represent pulleys. Sometimes these are labeled with abbreviations (ALT for Alternator, PS for Power Steering, AC for Air Conditioning, CRANK for Crankshaft).
- Arrows: Indicate the direction of belt travel. Following these arrows is critical for understanding the belt routing.
- Dashed Lines or Different Colors: Some diagrams may use dashed lines or different colors to highlight specific sections of the belt or the tensioner arm's range of motion. However, this is not standardized and can vary between diagrams. Always refer to the legend or key if present.
- Tensioner Symbol: The tensioner is usually represented by a pulley symbol with an arrow indicating the direction of its spring-loaded movement. It might also include a representation of the spring mechanism itself.
Pay close attention to the arrows indicating belt direction. Incorrectly interpreting these arrows can lead to incorrect belt routing, resulting in system malfunction.
How the Serpentine Belt System Works
The serpentine belt system is a relatively simple but crucial part of the engine. The crankshaft pulley, driven by the engine's rotation, turns the serpentine belt. The belt, in turn, drives all the accessory pulleys. The tensioner pulley keeps the belt taut, ensuring good contact with all the pulleys. Without proper tension, the belt can slip, causing the accessories to function poorly or not at all.
The serpentine belt's ribbed design increases surface area and friction, allowing it to efficiently transfer power to the various accessories. The direction of belt rotation is determined by the layout of the pulleys. The tensioner pulley's role is to maintain the correct amount of force on the belt, compensating for belt stretch and changes in engine speed.
Real-World Use: Troubleshooting with the Diagram
Here's how you can use the serpentine belt diagram for basic troubleshooting:
- Squealing Belt: Check the belt tension. If the tensioner is at its limit of travel or if the belt is visibly loose, it may need replacement. Also, inspect the pulleys for damage or contamination (oil, coolant). Misalignment of the pulleys will also cause the belt to squeal.
- Accessory Malfunction: If the power steering, alternator, or A/C is not working correctly, check the belt routing to ensure it's properly engaged with the corresponding pulley. Look for signs of belt slippage (shiny spots on the belt or pulleys).
- Belt Damage: Visually inspect the belt for cracks, fraying, or missing ribs. Refer to the diagram to ensure the belt is not rubbing against any engine components.
- Difficulty Installing a New Belt: The diagram is your best friend here. Follow the routing carefully, and use a serpentine belt tool to relieve tension on the tensioner pulley during installation.
A common mistake is to overlook the routing around the idler pulley. This seemingly minor detail can significantly affect belt tension and performance.
Safety Considerations
Working on the serpentine belt system can be hazardous. Here are some key safety points:
- Disconnect the Battery: Always disconnect the negative battery terminal before working on any electrical components, including the alternator.
- Hot Engine: Never work on the serpentine belt system when the engine is hot. Allow it to cool completely to avoid burns.
- Moving Parts: Keep your hands, hair, and clothing away from the moving belt and pulleys when the engine is running. Even at idle, the belt moves quickly and can cause serious injury.
- Tensioner Spring: The tensioner spring is under significant tension. Use the correct tools to relieve the tension safely. Avoid using makeshift tools, as they can slip and cause injury.
- Alternator Terminals: The alternator terminals can carry a high voltage. Be extremely careful when working around them, even with the battery disconnected.
The alternator, specifically, can store a charge even after the battery is disconnected. Handle it with extreme caution.
We have access to the 2010 Acura TSX Serpentine Belt Diagram file. Contact us for a downloadable version of the diagram in PDF format to keep with you for easy reference during your projects.