
2010 Honda Cr V Serpentine Belt Diagram
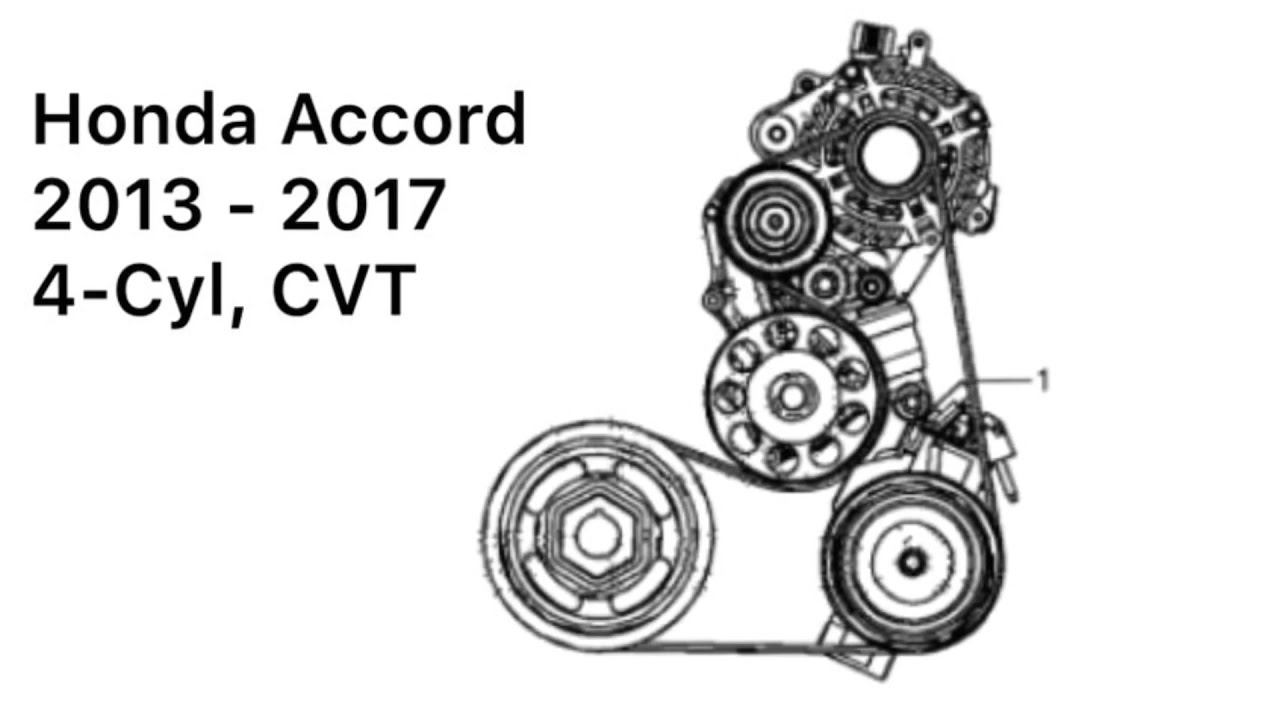
Alright, let's dive into the serpentine belt diagram for a 2010 Honda CR-V. Understanding this diagram is crucial for any intermediate DIYer looking to tackle maintenance or repairs on their vehicle. This isn't just about replacing a worn belt; it's about understanding the entire accessory drive system and preventing potentially costly damage.
Purpose of the Serpentine Belt Diagram
Why bother with a diagram? Simple: Accuracy. When dealing with a serpentine belt, you're dealing with a single, long belt that snakes its way around multiple components. The diagram illustrates the precise routing of the belt around these components. Without it, you risk incorrect installation, which can lead to:
- Belt Slippage: Reduces the efficiency of driven components.
- Component Damage: Strained bearings and premature failure.
- Complete System Failure: Leaving you stranded.
Furthermore, the diagram is invaluable for troubleshooting. If you notice squealing or other unusual noises, the diagram can help you pinpoint which component might be causing the issue. It's also useful for verifying that the belt is properly aligned after a repair or component replacement. You can also utilize the diagram to learn about the routing path before you start removing anything from the engine.
Key Specs and Main Parts
Let's get into the specifics for the 2010 CR-V. While there can be slight variations depending on engine type (usually a 2.4L inline-4 in the US market), the core components remain consistent:
- Crankshaft Pulley (Crank Pulley): Driven directly by the engine, it's the power source for the entire accessory drive.
- Alternator Pulley: Driven by the belt to generate electricity for the vehicle.
- Power Steering Pump Pulley: Drives the power steering pump, providing hydraulic assistance for steering.
- Air Conditioning (A/C) Compressor Pulley: Engages to drive the A/C compressor, cooling the cabin.
- Idler Pulley(s): Smooth pulleys used to guide the belt and maintain proper tension. Some may have a slight shoulder to ensure the belt stays properly aligned.
- Tensioner Pulley: Spring-loaded pulley that automatically maintains the correct tension on the belt. This is a *critical* component.
The belt length itself is a key spec. For a 2010 CR-V, you'll typically find belt lengths ranging from approximately 82 to 83 inches, but it's always best to verify the exact length specified for your specific vehicle configuration using the parts catalog or owner's manual. Using the wrong length will cause tension issues.
Material: Serpentine belts are generally made of EPDM (Ethylene Propylene Diene Monomer) rubber, which offers excellent heat and wear resistance.
Decoding the Serpentine Belt Diagram: Symbols and Conventions
Diagrams use a standard set of conventions to convey information efficiently. Here's what to look for:
- Solid Lines: Represent the main path of the serpentine belt. The thicker the line, the more prominent the belt's routing in that area.
- Dotted Lines: May indicate the back side of the belt or less critical routing details.
- Arrows: Indicate the direction of rotation of each pulley. This is vital for understanding how the belt should be oriented.
- Component Labels: Each pulley is labeled with its corresponding component (e.g., ALT for Alternator, P/S for Power Steering, A/C for Air Conditioning, CRANK for Crankshaft).
- Tensioner Indicator: The tensioner is often depicted with an arrow or symbol indicating the direction in which to apply force to release tension for belt removal and installation. It often shows the location to insert a wrench.
You might also see specific torque specifications noted on the diagram, usually near the tensioner or other adjustable components. These specs are crucial for proper installation.
How the Serpentine Belt System Works
The serpentine belt system is a relatively simple yet elegant design. The crankshaft pulley, driven by the engine's rotation, transfers power to all the other components via the serpentine belt. The belt wraps around each pulley, causing them to rotate. The tensioner maintains the correct amount of tension on the belt, preventing slippage and ensuring efficient power transfer. The A/C compressor pulley engages when the A/C system is turned on, placing an additional load on the engine.
The key to its efficiency lies in the single-belt design. This eliminates the need for multiple belts and pulleys, simplifying the system and reducing maintenance requirements. However, a failure in any one component can affect the entire system.
Real-World Use: Basic Troubleshooting Tips
Here are some common issues and how the diagram can help you diagnose them:
- Squealing Noise: Often caused by a worn, glazed, or loose belt. Check the belt's condition (cracks, fraying) and the tensioner's operation. The diagram confirms proper routing and allows visual inspection of all pulleys.
- Battery Not Charging (Alternator Issues): The diagram verifies the belt is properly routed around the alternator pulley. If the belt is slipping, the alternator won't generate enough power.
- Power Steering Failure: Similar to the alternator, the diagram confirms proper routing to the power steering pump. A slipping belt will reduce or eliminate power steering assist.
- A/C Not Working: Check the A/C compressor pulley. The diagram shows the belt path, and you can verify if the pulley is engaging when the A/C is turned on. If the belt is damaged, the pulley won't turn.
When troubleshooting, always start with a visual inspection. Look for cracks, fraying, missing chunks, or excessive wear on the belt. Also, check the alignment of the pulleys. Misaligned pulleys can cause premature belt wear and noise. Use a straight edge to check alignment. You can also use a belt dressing, however this is often a temporary fix.
Safety Precautions
Working on the serpentine belt system can be hazardous. Here are some critical safety precautions:
- Disconnect the Battery: Always disconnect the negative battery cable before working on any electrical components or near moving parts.
- Engine Off and Cool: Never work on the engine while it's running or hot. Allow the engine to cool completely before starting any repairs.
- Moving Parts: Be extremely cautious around the belt and pulleys while the engine is running. Keep your hands, clothing, and tools clear of these moving parts.
- Tensioner Spring: The tensioner spring is under significant force. Use the correct tools and techniques to release the tension safely. Refer to your repair manual for specific instructions.
The alternator, in particular, carries a high voltage. Disconnecting the battery eliminates the risk of electrical shock.
Finally, improper belt installation can lead to component damage or personal injury. If you're not comfortable performing this repair yourself, it's best to consult a qualified mechanic.
We have a high-resolution PDF version of the 2010 Honda CR-V serpentine belt diagram available for download. It provides even greater detail and clarity for your repair needs.