2010 Nissan Pathfinder Fuse Box Diagram
For the intermediate car owner, modder, or DIY mechanic tackling electrical issues in a 2010 Nissan Pathfinder, understanding the fuse box diagram is absolutely critical. Think of it as the Rosetta Stone for your vehicle's electrical system. Without it, you're just poking around in the dark, likely to cause more damage than good. This document will walk you through interpreting that diagram, covering key specs, symbols, functionality, troubleshooting, and essential safety precautions. We have the complete 2010 Nissan Pathfinder Fuse Box Diagram available for download, which will greatly assist you in the described procedures.
Purpose of the Fuse Box Diagram
The fuse box diagram serves several crucial purposes:
- Troubleshooting Electrical Issues: The most common reason to consult the diagram is to diagnose and fix electrical problems. Is a headlight out? Is the radio not working? The diagram helps you pinpoint the corresponding fuse, test it, and replace it if necessary.
- Locating Components: The diagram identifies the physical location of each fuse and relay, saving you the headache of blindly searching for the correct one.
- Understanding Circuit Function: By studying the diagram, you can gain a better understanding of how different electrical circuits in your Pathfinder are interconnected.
- Modification and Upgrades: If you're planning to add aftermarket accessories (lights, sound systems, etc.), the diagram helps you identify safe points to tap into the electrical system and choose appropriately rated fuses to protect the new circuits.
- Preventing Further Damage: A blown fuse is a safety device. Replacing it with a higher-rated fuse can overload the circuit and potentially cause a fire. The diagram ensures you use the correct replacement.
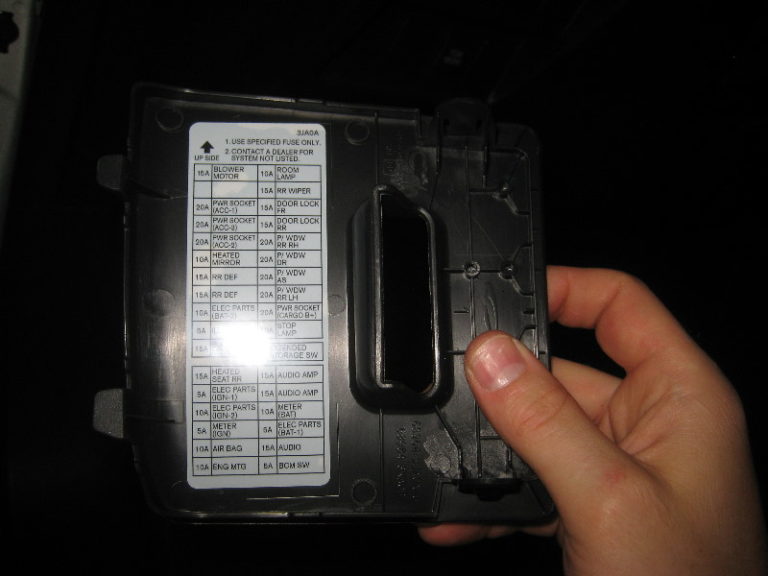
Key Specs and Main Parts
The 2010 Nissan Pathfinder typically has multiple fuse boxes:
- Interior Fuse Box (Located inside the cabin): Usually found on the driver's side, near the dashboard or under the steering wheel. This box houses fuses for interior lights, power windows, radio, climate control, and other cabin-related systems.
- Engine Compartment Fuse Box (Located in the engine bay): Contains fuses and relays for critical engine components such as the fuel pump, ignition system, engine control unit (ECU), headlights, and cooling fan. There might be more than one fusebox in the engine compartment.
Within each fuse box, you'll find:
- Fuses: These are the sacrificial links in the electrical circuits. They contain a thin wire that melts and breaks the circuit when an overcurrent condition occurs. Fuses are rated in amperes (amps), indicating the maximum current they can handle before blowing.
- Relays: Electrically operated switches that control high-current circuits using a low-current signal. For example, the headlight relay allows a small switch in the cabin to control the high current needed to power the headlights.
- Connectors: Points where wiring harnesses connect to the fuse box and distribute power to various components.
- Wiring Harnesses: Bundles of wires that carry electrical signals and power throughout the vehicle.
Understanding the Symbols in the Diagram
Fuse box diagrams use a standardized set of symbols and conventions. Here's a breakdown:
- Lines: Represent wires. Different line thicknesses may indicate different wire gauges (thicker lines generally represent wires carrying higher current).
- Boxes: Represent fuses or relays. The label inside the box indicates the component's function and its amperage rating (for fuses).
- Circles: Can represent various components, such as switches or sensors. Look for labels within or near the circle to identify its function.
- Color Coding: Wiring diagrams often use color-coded lines to represent different wire colors. This helps you trace circuits through the vehicle. The legend should state the wire color for each colored line.
- Fuse Amperage Ratings: Fuses are labeled with their amperage rating followed by "A" (e.g., "10A" for a 10-amp fuse). Using the wrong amperage fuse can be dangerous. Always replace a blown fuse with one of the same amperage rating.
- Relay Symbols: Relays are usually represented by a square with internal symbols that depict the coil and switch contacts.
How It Works: Tracing a Circuit
Let's say you want to troubleshoot a non-functional cigarette lighter. Here's how to use the diagram:
- Locate the Diagram: Refer to the owner's manual or a repair manual to find the fuse box diagram. We have a copy ready for download, specific to the 2010 Pathfinder.
- Identify the Cigarette Lighter Fuse: Look for the fuse labeled "CIG LTR" or "ACCESSORY POWER" in the diagram. The diagram will also indicate the fuse's location within the fuse box and its amperage rating.
- Physically Locate the Fuse: Open the corresponding fuse box and use the diagram to pinpoint the physical location of the cigarette lighter fuse.
- Inspect the Fuse: Visually inspect the fuse. If the thin wire inside is broken or blackened, the fuse is blown and needs to be replaced.
- Test the Circuit: Even if the fuse looks good, it's always a good idea to test the circuit with a multimeter. Set the multimeter to measure voltage and check for voltage at the cigarette lighter socket. If there's no voltage, the problem may lie elsewhere (e.g., a faulty wiring connection or a damaged cigarette lighter socket).
Real-World Use: Basic Troubleshooting Tips
Here are some practical troubleshooting tips using the fuse box diagram:
- Start Simple: Before diving into complex diagnostics, always check the fuses first. A blown fuse is the most common cause of electrical problems.
- Use a Test Light or Multimeter: A test light or multimeter is essential for testing fuses and circuits. A test light indicates whether voltage is present, while a multimeter can measure voltage, current, and resistance.
- Check Ground Connections: Many electrical problems are caused by poor ground connections. Make sure the ground wires connected to the chassis are clean and secure.
- Inspect Wiring for Damage: Look for frayed wires, corroded connectors, and signs of rodent damage. Repair any damaged wiring before proceeding.
- Isolate the Problem: If multiple electrical components are not working, try to isolate the problem to a specific circuit or system. The fuse box diagram can help you trace the affected circuits.
- Consult Repair Manuals: For more complex electrical problems, consult a repair manual specific to your 2010 Nissan Pathfinder. These manuals provide detailed wiring diagrams and troubleshooting procedures.
Safety Precautions
Working with automotive electrical systems can be dangerous. Always follow these safety precautions:
- Disconnect the Battery: Before working on any electrical components, disconnect the negative terminal of the battery to prevent accidental short circuits.
- Use Insulated Tools: Use tools with insulated handles to protect yourself from electrical shock.
- Avoid Water: Never work on electrical systems in wet conditions.
- Don't Replace Fuses with Higher Amperage: Replacing a blown fuse with a higher-amperage fuse can overload the circuit and cause a fire. Always use the correct amperage rating specified in the fuse box diagram.
- Be Careful with Airbags: The airbag system is a high-voltage system. Avoid working near airbag components unless you are specifically trained to do so. Improper handling of airbags can cause serious injury.
- Exercise Caution around Relays: While generally lower voltage, relays can still spark when activated. Avoid touching the contacts while the relay is powered.
With a solid understanding of your 2010 Nissan Pathfinder's fuse box diagram and a bit of caution, you can confidently troubleshoot and repair many common electrical issues. Remember to always prioritize safety and consult a qualified mechanic if you're unsure about any procedure. For easy access, we have the complete 2010 Nissan Pathfinder Fuse Box Diagram available for download. Use it wisely, and happy wrenching!