2010 Nissan Sentra Fuse Box Diagram
Alright, let's dive into the fuse box diagram for a 2010 Nissan Sentra. Understanding this diagram is absolutely crucial whether you're diagnosing electrical issues, adding aftermarket accessories, or simply trying to learn more about your car's inner workings. Think of it as the Rosetta Stone for your Sentra's electrical system.
Purpose: The Why of Knowing Your Fuses
Why bother with a fuse box diagram? The most obvious reason is for troubleshooting electrical problems. When a component like your headlights, radio, or power windows stops working, the first thing you should suspect is a blown fuse. The diagram will tell you exactly which fuse to check, saving you a ton of time and potential headaches. Beyond repairs, the diagram is invaluable for installing aftermarket accessories. Need to tap into a power source for your new dashcam? The diagram will help you find a suitable circuit. Lastly, having a good understanding of your car’s fuse layout is a great way to simply expand your knowledge of vehicle electrical systems. It empowers you to understand the inner workings of your car, allowing for more informed decisions about repairs and maintenance.
Key Specs and Main Parts
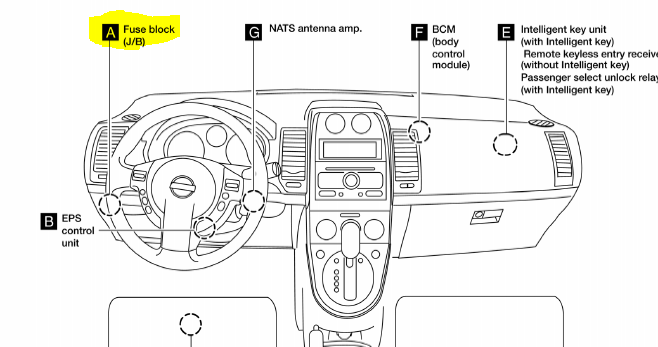
The 2010 Nissan Sentra typically has two fuse boxes. One is located inside the cabin, usually under the dashboard on the driver's side. The other resides in the engine compartment, near the battery. Each fuse box houses a collection of fuses and relays. Let's break down the main components:
- Fuses: These are sacrificial devices designed to protect electrical circuits from overcurrent. They contain a thin wire that melts and breaks the circuit if the current exceeds a safe level. Think of them as the electrical system's weak link, intentionally designed to fail before more expensive components do.
- Relays: These are electrically operated switches that allow a low-current circuit to control a high-current circuit. They're used to control components like headlights, horns, and starter motors, which draw a significant amount of power.
- Fuse Box Housing: This is the physical enclosure that holds the fuses and relays. It's usually made of plastic and provides protection from the elements.
- Fuse Puller: A small plastic tool included in the fuse box (or with your car's toolkit). Use it to safely remove and install fuses without damaging them.
Symbols, Lines, Colors, and Icons: Deciphering the Diagram
The fuse box diagram isn't just a random assortment of numbers and lines. It uses a specific language of symbols, colors, and icons to convey information about each fuse and relay. Let's break down the common ones:
- Fuse Ratings (Amps): Fuses are rated in amps (A), which indicates the amount of current they can handle before blowing. The diagram will typically list the amperage rating next to each fuse. Common ratings include 5A, 7.5A, 10A, 15A, 20A, 25A, and 30A. Always replace a blown fuse with one of the same amperage rating. Using a fuse with a higher rating can damage the circuit it's supposed to protect.
- Lines and Colors: Lines indicate the electrical circuits connected to each fuse. Colors can sometimes be used to differentiate between different types of circuits, but this is less common on fuse box diagrams than on full wiring schematics. Solid lines generally denote the main circuit.
- Icons: Icons are used to represent the component that each fuse protects. Common icons include:
- Headlight Symbol: Protects the headlight circuit.
- Radio Symbol: Protects the radio circuit.
- Cigar Lighter Symbol: Protects the cigar lighter/accessory power outlet circuit.
- Window Symbol: Protects the power window circuit.
- ABS Symbol: Protects the Anti-lock Braking System (ABS) circuit.
- Engine Symbol: Protects various engine control circuits.
It's important to note that the exact symbols and layout can vary slightly depending on the specific trim level and options package of your 2010 Sentra. Always refer to the diagram that's specific to your vehicle, often found in your owner's manual or inside the fuse box cover.
How It Works: A Simplified Explanation
The basic principle is simple: electrical current flows from the battery, through the fuse, and then to the component it powers. If the current exceeds the fuse's rating, the fuse blows, breaking the circuit and preventing damage to the component. Relays, on the other hand, act as intermediaries. A small amount of current is sent from the control circuit to the relay's coil. This energizes the coil, creating an electromagnetic field that pulls the relay's switch closed, allowing the larger current to flow through the main circuit to the component.
Real-World Use: Basic Troubleshooting
Let's say your cigarette lighter (accessory power outlet) stops working. Here’s a basic troubleshooting approach:
- Consult the Fuse Box Diagram: Locate the diagram (owner's manual or fuse box cover) and find the fuse labeled "Cigar Lighter" or "Accessory Power Outlet."
- Identify the Fuse Location: The diagram will tell you which fuse number corresponds to the cigarette lighter circuit, and whether that fuse is in the cabin or engine compartment.
- Inspect the Fuse: Use the fuse puller to remove the fuse. Hold it up to the light and look for a break in the thin wire inside. If the wire is broken, the fuse is blown.
- Replace the Fuse: Replace the blown fuse with a new fuse of the same amperage rating.
- Test: Turn on the ignition and test the cigarette lighter. If it works, you've solved the problem. If the fuse blows again immediately, there's likely a short circuit in the wiring or the cigarette lighter itself. This requires further investigation.
Important Note: If a fuse blows repeatedly, there's a underlying electrical problem that needs to be addressed. Simply replacing the fuse without fixing the root cause is a temporary solution and could potentially lead to more serious damage or even a fire.
Safety: Handling Risky Components
Working with electrical systems can be dangerous if you're not careful. Here are some key safety precautions:
- Disconnect the Battery: Before working on any electrical system, disconnect the negative terminal of the battery. This will prevent accidental shorts and electrical shocks.
- Never Replace a Fuse with a Higher Amperage Rating: Doing so can overload the circuit and cause a fire.
- Avoid Working on Wet Surfaces: Water is a conductor of electricity. Avoid working on electrical systems in wet conditions.
- Be Cautious Around the Airbag System: The airbag system contains potentially explosive components. Refer to your owner's manual for specific safety precautions before working near the airbag system. Incorrectly handling airbag-related wiring or fuses could cause accidental deployment.
- If in Doubt, Consult a Professional: If you're not comfortable working on electrical systems, or if you encounter a complex problem, it's always best to consult a qualified mechanic.
Remember, electricity is invisible and can be dangerous. Take your time, be careful, and always prioritize safety.
We have the 2010 Nissan Sentra fuse box diagrams available for download. This comprehensive PDF document contains detailed information on both the interior and engine compartment fuse box layouts, fuse amperages, and the components they protect. It is an invaluable resource for diagnosing electrical issues and undertaking car electrical projects.