
2011 Ford F150 Serpentine Belt Diagram
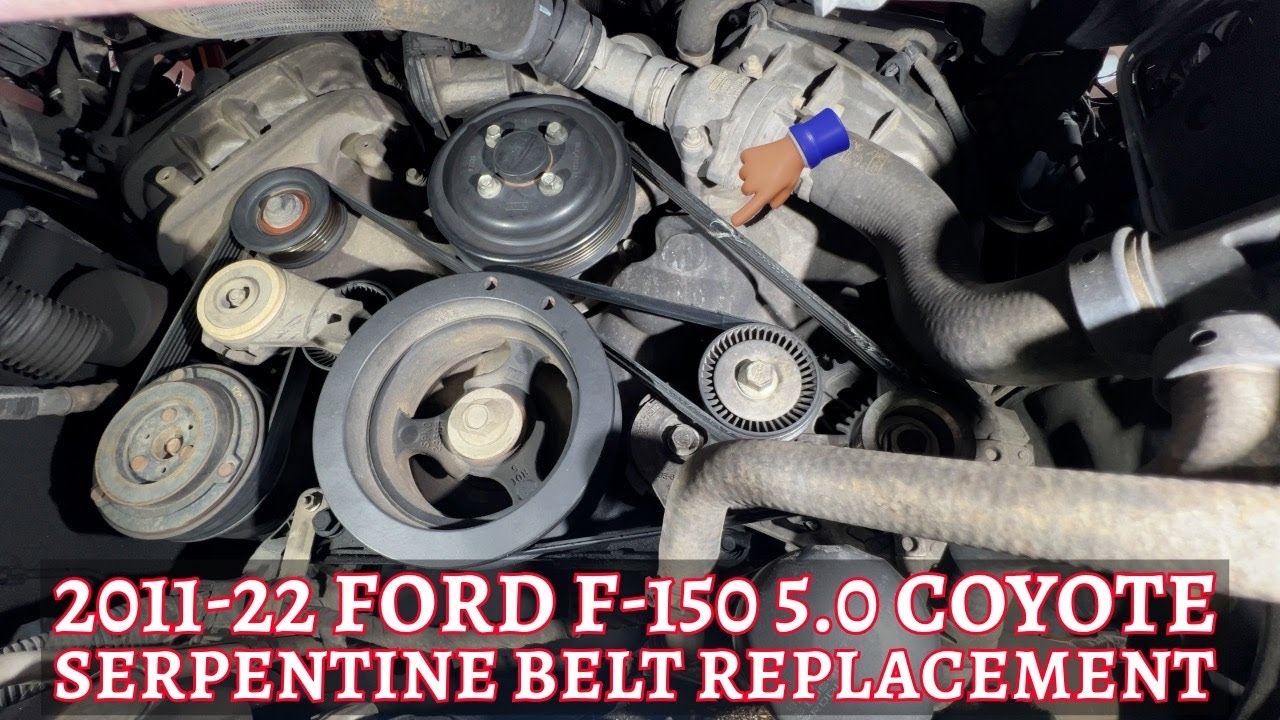
Alright, let's dive into the serpentine belt diagram for your 2011 Ford F-150. This isn't just some pretty picture; it's a crucial roadmap for maintaining your truck's accessory drive system. Whether you're tackling a routine belt replacement, diagnosing a squealing noise, or just trying to understand how all those pulleys work together, understanding this diagram is essential.
Purpose of the Serpentine Belt Diagram
Why bother with a diagram? Simple: accuracy and safety. A serpentine belt drives multiple components – alternator, power steering pump, air conditioning compressor, and sometimes even the water pump. Incorrect belt routing can lead to system failure, overheating, and even engine damage. The diagram ensures you install the belt correctly and can diagnose issues based on proper component functionality. It's also incredibly helpful when replacing pulleys or tensioners.
Key Specs and Main Parts for the 2011 Ford F-150
The specific layout of the serpentine belt varies slightly depending on your engine. The 2011 F-150 came with several engine options, the most common being the 3.7L V6, 5.0L V8, and the 3.5L EcoBoost V6. While the core components remain the same, the positioning and routing of the belt differ. Therefore, always consult the specific diagram for your engine type.
Here's a breakdown of the typical components you'll find in the diagram:
- Crankshaft Pulley (or Harmonic Balancer): This is the driving pulley, connected directly to the engine's crankshaft. It's the source of power for the entire system.
- Alternator Pulley: Drives the alternator, which recharges the battery and powers the electrical system.
- Power Steering Pump Pulley: Powers the hydraulic power steering system.
- Air Conditioning Compressor Pulley: Engages when the AC is turned on, driving the AC compressor.
- Water Pump Pulley: Circulates coolant through the engine to prevent overheating. (Note: on some configurations, the water pump is driven by the timing chain inside the engine, not the serpentine belt).
- Idler Pulley(s): Smooth, unpowered pulleys used to guide the belt and maintain proper tension.
- Tensioner Pulley: Spring-loaded pulley that automatically maintains the correct tension on the belt. A faulty tensioner is a common cause of belt squealing.
- Serpentine Belt: The rubber belt itself, responsible for transferring power between all the pulleys.
Understanding the Symbols in the Diagram
Serpentine belt diagrams are generally straightforward, but understanding the symbols is crucial:
- Solid Lines: These represent the path of the belt. Pay close attention to the direction of the arrows on the line. These indicate which direction the belt should be routed.
- Dotted Lines: Often indicate the back side of the belt running against a pulley. If you see a pulley with a dotted line indicating the belt is running on the back side, it implies that the pulley will rotate in the opposite direction of pulleys with the belt running on the grooved side.
- Arrows: Indicate the direction of belt travel. Following the arrows ensures correct rotation of each component.
- Component Icons: Each component (alternator, power steering pump, etc.) is represented by a simplified icon. These are usually labeled for clarity.
How the Serpentine Belt System Works
The serpentine belt system is a brilliantly simple yet effective way to power multiple accessories from a single engine source. The crankshaft pulley, driven directly by the engine, rotates the serpentine belt. This belt, in turn, wraps around the pulleys of various components, transferring rotational force. The tensioner pulley ensures the belt remains taut, preventing slippage and maintaining optimal performance. When a component, like the AC compressor, is engaged, it adds load to the system, requiring the belt to work harder. A properly functioning tensioner maintains the necessary tension to handle these fluctuating loads.
Real-World Use: Basic Troubleshooting
The serpentine belt diagram is an invaluable tool for troubleshooting:
- Squealing Noise: A common symptom. Use the diagram to visually inspect the belt's path. Check for misaligned pulleys, worn belts, or a failing tensioner. If the belt is glazed or cracked, replace it. If the tensioner is wobbly or doesn't maintain tension, replace it as well.
- Component Failure: If, for example, your power steering suddenly stops working, use the diagram to confirm the belt is properly routed around the power steering pump pulley. If the belt is intact but the pump isn't turning, the pump itself may be faulty.
- Belt Replacement: Before removing the old belt, carefully note its routing and compare it to the diagram. Take a picture or make a sketch for extra assurance. When installing the new belt, double-check the diagram to ensure it's routed correctly.
Important: When replacing the belt, inspect all the pulleys for wear and tear. A worn or damaged pulley can quickly destroy a new belt. Replace any questionable pulleys to avoid future problems.
Safety Considerations
Working on the serpentine belt system involves some risks. Here are a few key safety points:
- Disconnect the Battery: Before working on any electrical components (especially the alternator), disconnect the negative battery cable. This prevents accidental shorts and potential injury.
- Hot Engine: Never work on the serpentine belt system while the engine is hot. Allow it to cool down completely to avoid burns.
- Moving Parts: Keep your hands and tools clear of the belt and pulleys while the engine is running. Serious injury can occur if your hand gets caught in the system.
- Tensioner Spring: The tensioner pulley is spring-loaded. Use the correct tool (usually a serpentine belt tool) to relieve the tension before removing or installing the belt. Releasing the tension without the proper tool can cause injury.
Be extra cautious around the crankshaft pulley. This pulley is directly connected to the engine and has a lot of torque, and is harder to stop if the engine were to start inadvertently.
Remember, this article provides general guidance. Always refer to the specific repair manual for your 2011 Ford F-150 engine type for detailed instructions and torque specifications.
We have a downloadable version of the serpentine belt diagram available for your 2011 F-150. This will provide a clear and easily accessible reference for your repairs and maintenance.