
2011 Kia Forte Serpentine Belt Diagram
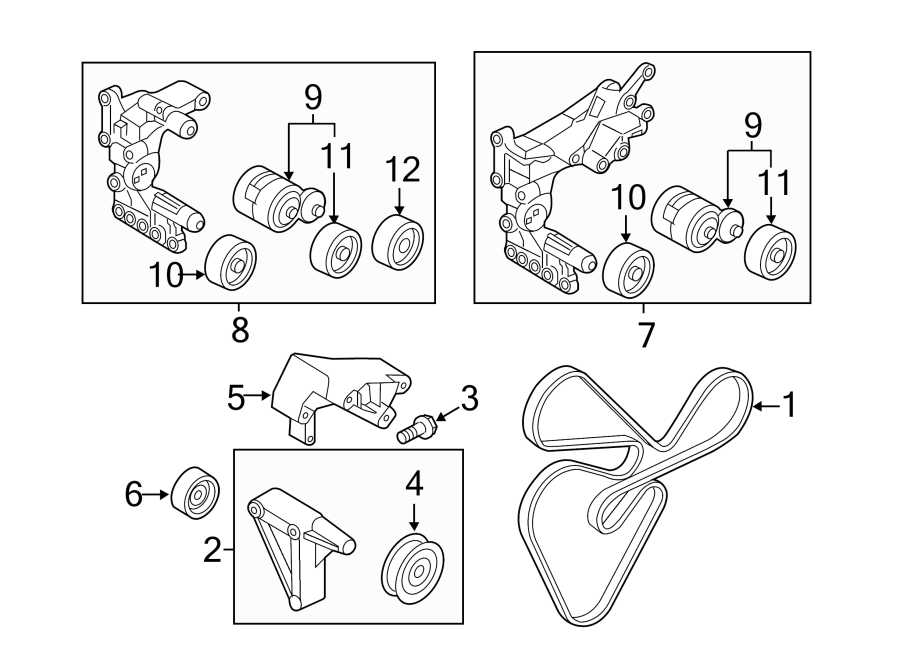
The serpentine belt in your 2011 Kia Forte is a critical component responsible for driving several vital engine accessories. Understanding its routing and condition is essential for routine maintenance, troubleshooting, and performing repairs. This article provides a detailed overview of the 2011 Kia Forte serpentine belt diagram, empowering you to handle related tasks with confidence.
Purpose of the Serpentine Belt Diagram
A serpentine belt diagram is essentially a roadmap for the belt's path around various pulleys in your engine bay. Its primary purpose is to illustrate the correct routing of the belt, ensuring it engages with each component properly. This diagram is invaluable when:
- Replacing a worn or broken belt: The correct routing is crucial for proper function. Incorrect routing can lead to accessory failure, engine damage, and even belt breakage.
- Diagnosing accessory issues: If your alternator, power steering pump, or AC compressor isn't working correctly, the diagram helps you verify that the belt is correctly tensioned and properly engaging these components.
- Performing engine repairs: During certain engine repairs, the serpentine belt may need to be removed and reinstalled. The diagram ensures correct reinstallation.
- General understanding of your vehicle: Familiarizing yourself with the belt's routing contributes to a better overall understanding of your car's mechanics.
Key Specs and Main Parts
Before diving into the diagram, let's identify the key components driven by the serpentine belt in a 2011 Kia Forte, both the 2.0L and 2.4L engines:
- Crankshaft Pulley: The engine's crankshaft drives this pulley, providing the rotational force for the entire serpentine belt system.
- Alternator Pulley: The alternator is responsible for charging the battery and powering the electrical system. The serpentine belt spins the alternator, enabling it to generate electricity.
- Power Steering Pump Pulley: The power steering pump provides hydraulic pressure to assist with steering. The serpentine belt drives this pump.
- Air Conditioning (A/C) Compressor Pulley: The A/C compressor circulates refrigerant to cool the cabin. The serpentine belt provides the rotational force for the compressor.
- Water Pump Pulley: The water pump circulates coolant through the engine to regulate temperature. In some configurations, the water pump is driven by the serpentine belt.
- Tensioner Pulley: This spring-loaded pulley maintains the correct tension on the serpentine belt. Proper tension is essential for preventing slippage and ensuring optimal accessory performance. It is typically a single pulley and is often called the automatic belt tensioner.
- Idler Pulley(s): These smooth pulleys guide the belt around the engine, ensuring proper engagement with the driven components.
- Serpentine Belt: This is the long, continuous belt that wraps around all the pulleys. It's made of reinforced rubber and is designed to withstand high temperatures and constant flexing.
Belt Length: While specific length can vary slightly based on engine and options, a typical serpentine belt for a 2011 Kia Forte will fall in the range of 80-85 inches. Always verify the correct part number for your specific vehicle using the VIN (Vehicle Identification Number) to ensure a proper fit.
Understanding the Serpentine Belt Diagram Symbols
Serpentine belt diagrams use a standardized set of symbols to represent the various components and the belt's routing. Here's a breakdown of common symbols:
- Solid Lines: These represent the serpentine belt itself. The thicker the line, the easier it is to see the routing.
- Pulleys: Pulleys are depicted as circles. Some diagrams may include labels indicating which accessory each pulley is connected to (e.g., ALT for alternator, P/S for power steering).
- Arrows: Arrows indicate the direction of belt travel. Following the arrows helps you visualize the belt's path around the pulleys.
- Tensioner Pulley Symbol: The tensioner pulley is often represented with a unique symbol, sometimes resembling a pulley with a spring or arm attached. This indicates its tensioning function.
- Text Labels: Diagrams typically include text labels to identify each component clearly.
Colors: While not always present, some diagrams use color-coding to further differentiate components. For example, the belt might be represented in blue, while the pulleys are depicted in gray or black.
How the Serpentine Belt System Works
The serpentine belt system operates on a simple principle: transferring rotational force from the engine's crankshaft to various accessories. Here's how it works:
- The engine's crankshaft rotates, turning the crankshaft pulley.
- The serpentine belt, wrapped tightly around the crankshaft pulley and other accessory pulleys, is driven by the crankshaft's rotation.
- As the serpentine belt moves, it causes the accessory pulleys (alternator, power steering pump, A/C compressor, etc.) to rotate.
- The rotation of these accessory pulleys powers their respective components, enabling them to perform their functions.
- The tensioner pulley maintains the correct tension on the belt, preventing slippage and ensuring efficient power transfer.
The tensioner pulley is critical. Too little tension causes the belt to slip, reducing accessory performance and potentially damaging the belt. Too much tension can overstress the bearings in the accessories and lead to premature failure.
Real-World Use: Basic Troubleshooting Tips
Here are some basic troubleshooting tips related to the serpentine belt system:
- Squealing Noise: A squealing noise, especially when starting the engine or turning the steering wheel, often indicates a slipping serpentine belt. Check the belt tension and condition.
- Accessory Failure: If your alternator, power steering, or A/C isn't working, inspect the serpentine belt to ensure it's properly routed and not broken.
- Visible Cracks or Wear: Inspect the serpentine belt regularly for signs of cracking, fraying, or excessive wear. Replace the belt if you find any damage.
- Belt Dust: Excessive belt dust around the pulleys can indicate misalignment or wear.
Troubleshooting Steps:
- Visually inspect the belt for damage.
- Check belt tension. If equipped with a tensioner gauge, ensure the indicator is within the specified range.
- Inspect pulleys for damage or misalignment.
- Use the serpentine belt diagram to verify proper routing.
Safety Precautions
Working on the serpentine belt system can be dangerous if proper precautions aren't taken. Here are some safety considerations:
- Disconnect the Battery: Always disconnect the negative battery terminal before working on the serpentine belt system. This prevents accidental starting of the engine.
- Hot Engine: Never work on the serpentine belt system when the engine is hot. Allow the engine to cool completely before starting any repairs.
- Moving Parts: Keep your hands and clothing away from the serpentine belt and pulleys when the engine is running. The belt can cause serious injury if it catches on anything.
- Proper Tools: Use the correct tools for the job. Using makeshift tools can damage components and increase the risk of injury. A serpentine belt tool kit is especially helpful for releasing tension on the tensioner pulley.
- Eye Protection: Wear safety glasses to protect your eyes from debris.
The area near the crankshaft pulley is particularly risky due to its proximity to the engine and its rapid rotation. Exercise extreme caution when working in this area.
We have access to a detailed serpentine belt diagram for the 2011 Kia Forte. Please note that depending on the engine type (2.0L or 2.4L), and whether the vehicle has AC, the diagram might vary slightly. It's crucial to specify this information to get the correct diagram.