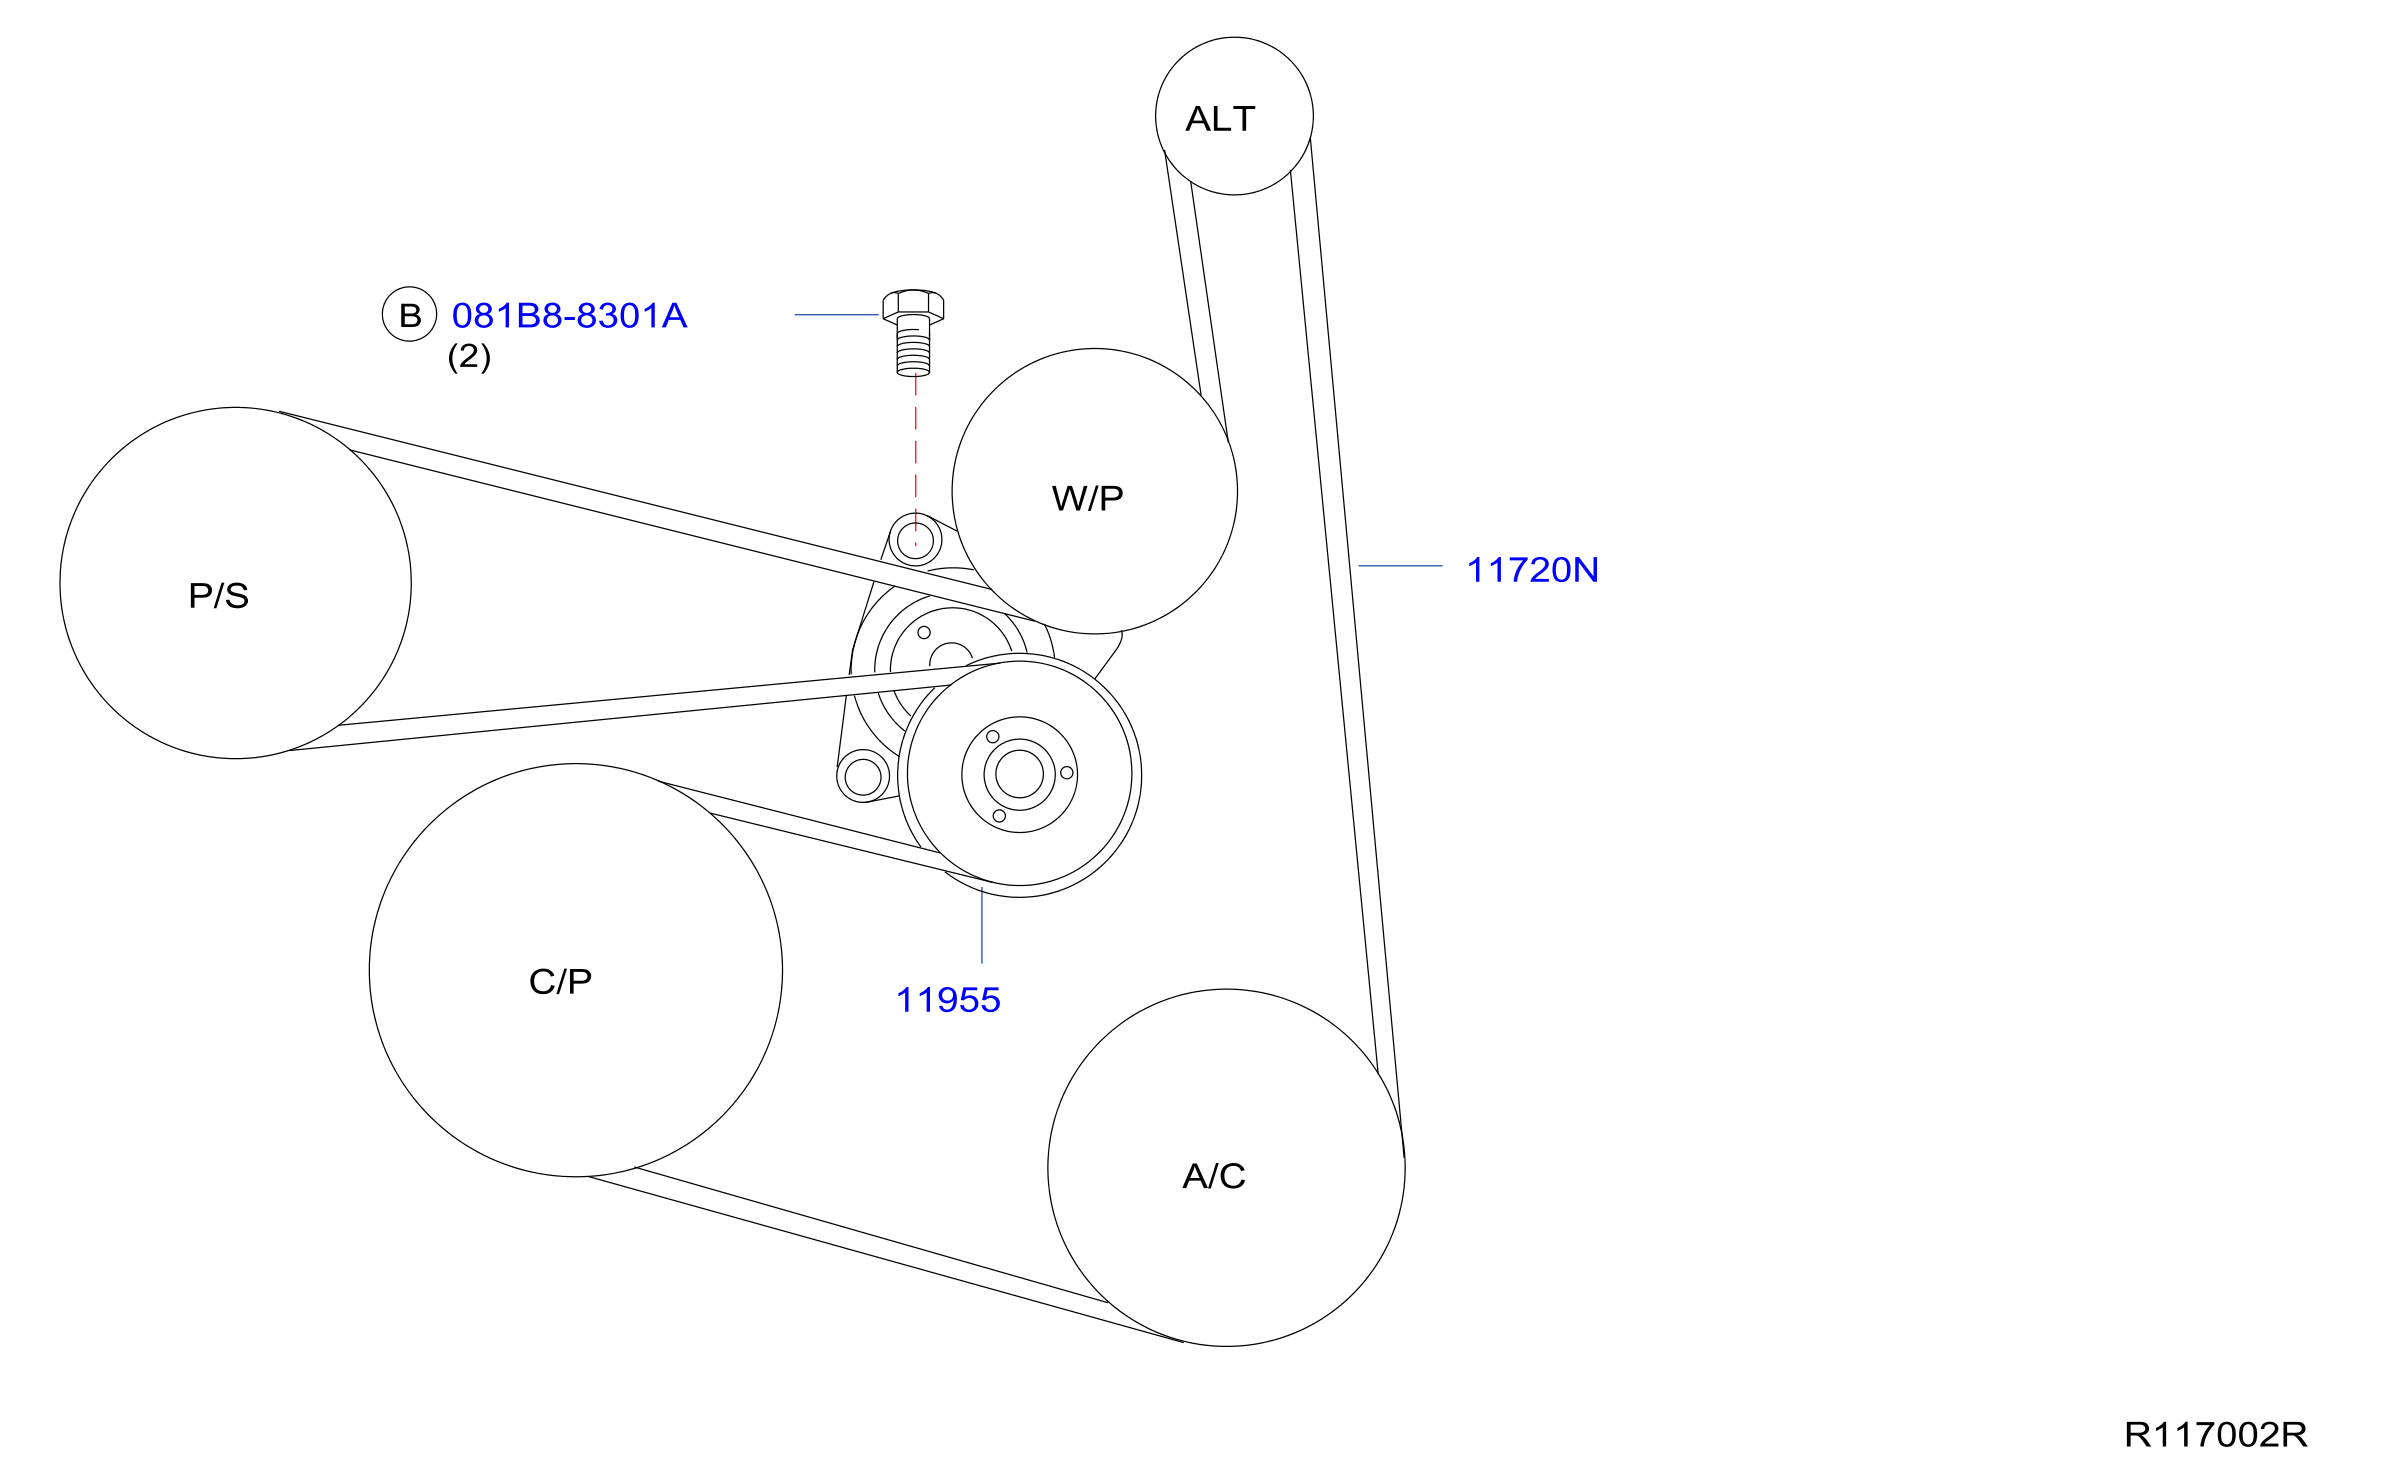
2011 Nissan Altima Serpentine Belt Diagram
The serpentine belt in your 2011 Nissan Altima is a critical component responsible for driving several essential engine accessories. Understanding its routing and operation is crucial for preventative maintenance, troubleshooting, and repairs. This article provides a comprehensive guide to the 2011 Nissan Altima serpentine belt diagram, empowering you to handle related tasks with confidence.
Purpose of Understanding the Serpentine Belt Diagram
Why bother understanding the serpentine belt diagram? Several reasons:
- Replacement: The most common reason. A worn or broken serpentine belt needs immediate replacement to prevent engine overheating and loss of power steering and other essential functions. The diagram ensures correct belt routing.
- Troubleshooting: A squealing or slipping belt often indicates a problem. The diagram helps you identify the belt's path and inspect each pulley for wear, misalignment, or damage.
- Maintenance: Routine inspection of the serpentine belt and its components helps prevent unexpected breakdowns. The diagram allows you to visually confirm the belt is properly seated on all pulleys and that the tensioner is functioning correctly.
- Component Service: When replacing the alternator, power steering pump, or other belt-driven accessories, you'll need to remove and reinstall the serpentine belt. The diagram is your guide.
- Education: Understanding the serpentine belt system is an excellent way to learn about basic engine operation and preventative maintenance.
Key Specs and Main Parts
The 2011 Nissan Altima (both 2.5L and 3.5L engines) use a single serpentine belt to drive the following accessories:
- Crankshaft Pulley: The main driver of the system, connected directly to the engine's crankshaft.
- Alternator: Provides electrical power to the vehicle.
- Power Steering Pump: Assists in steering the vehicle.
- Air Conditioning Compressor: Cools the vehicle's interior.
- Water Pump: Circulates coolant through the engine to prevent overheating.
- Tensioner Pulley: Maintains proper belt tension, preventing slippage and extending belt life. This is a spring-loaded pulley.
- Idler Pulley (May not be present on all configurations): Guides the belt around components, ensuring proper wrap angle.
Important Specs: The exact belt length varies depending on the engine type (2.5L or 3.5L) and whether the vehicle has air conditioning. Always consult your vehicle's service manual or a parts catalog to determine the correct belt part number.
Understanding the Diagram: Symbols and Conventions
Serpentine belt diagrams use a standard set of symbols to represent components and belt routing:
- Solid Lines: Indicate the belt's path around the pulleys. The thickness of the line doesn't usually carry significant meaning.
- Pulleys: Represented as circles. Sometimes they are labeled with abbreviations (e.g., ALT for alternator, P/S for power steering).
- Arrows: Show the direction of belt travel. This is crucial for correct installation.
- Tensioner Pulley: Often depicted with a spring symbol indicating its spring-loaded nature. Some diagrams may show a "T" for tensioner.
- Idler Pulley: Typically shown as a simple circle, often labeled "IDLER".
- Component Labels: Clear labels (e.g., "Crankshaft", "A/C Compressor") identify each pulley.
While color coding is not standard, some diagrams might use different colors to highlight specific sections of the belt path or components. Always refer to the diagram's legend if color is used.
How the Serpentine Belt System Works
The serpentine belt system operates on the principle of transferring rotational force from the engine's crankshaft to various accessories. The crankshaft pulley, driven by the engine, rotates the serpentine belt. The belt, in turn, wraps around and drives the pulleys of the alternator, power steering pump, air conditioning compressor, and water pump.
The tensioner pulley plays a vital role in maintaining proper belt tension. Its spring-loaded design automatically adjusts for belt stretch and wear, ensuring consistent grip and preventing slippage. Without proper tension, the belt might slip, causing reduced performance of the accessories and potentially leading to overheating (due to a poorly driven water pump) or loss of power steering.
The wrap angle of the belt around each pulley is also important. A sufficient wrap angle ensures adequate grip for efficient power transfer. Idler pulleys, when present, are used to optimize the wrap angle on specific components.
Real-World Use: Basic Troubleshooting Tips
Here are some practical troubleshooting tips using the serpentine belt diagram:
- Squealing Belt: A squealing belt usually indicates slippage. Check the belt tensioner for proper operation. Is the tensioner arm moving freely? Is the spring providing adequate force? Also, inspect the belt for cracks, glazing, or contamination (oil, coolant).
- Cracked or Worn Belt: Visual inspection is crucial. Look for cracks, fraying, missing chunks, or excessive wear. If the belt shows signs of damage, replace it immediately. Use the diagram to confirm the correct routing during installation.
- Accessory Failure: If an accessory (e.g., alternator) is not functioning correctly, inspect the serpentine belt and its pulley. Is the pulley turning freely? Is the belt slipping on the pulley? A seized or damaged pulley can cause the belt to break or slip.
- Belt Alignment: Misalignment can cause premature belt wear and noise. Use a straight edge to check that all pulleys are properly aligned. Misalignment can stem from a bent or damaged pulley, a worn bearing, or a misaligned accessory.
Important Note: Before working on the serpentine belt system, always disconnect the negative battery cable to prevent accidental electrical shock.
Safety Considerations
Working with the serpentine belt system involves certain risks:
- Moving Parts: The engine must be off and the key removed before working on the serpentine belt. Accidental engine starting can cause serious injury.
- Hot Surfaces: The engine and exhaust components can be extremely hot, even after the engine has been turned off. Allow sufficient time for the engine to cool before working in the engine compartment.
- Spring-Loaded Tensioner: The tensioner pulley is spring-loaded and can snap back with considerable force when released. Use the appropriate tools to safely release the tensioner. Never place your fingers in the path of the tensioner arm.
- Sharp Edges: Be aware of sharp edges on pulleys, brackets, and other engine components. Wear gloves to protect your hands.
Always consult your vehicle's service manual for specific safety precautions and procedures.
We have the 2011 Nissan Altima Serpentine Belt Diagram readily available for download to assist you further. This diagram offers a visual guide to ensure accurate belt routing and component identification. This can be invaluable during repairs or maintenance.