2012 Dodge Ram 1500 Headlight Wiring Harness
Okay, let's dive into the headlight wiring harness for your 2012 Dodge Ram 1500. Whether you're dealing with a faulty headlight, planning an upgrade, or just want to understand your truck a little better, grasping the ins and outs of this system is crucial. We'll walk through the diagram in detail, explaining the components, their functions, and some common troubleshooting steps. And the best part? We have a complete wiring diagram you can download for reference – more on that later.
Purpose of Understanding the Headlight Wiring Harness
Why bother understanding the headlight wiring harness? Well, several scenarios make this knowledge invaluable:
- Troubleshooting Headlight Issues: If your headlights aren't working correctly (dim, flickering, completely out), understanding the wiring diagram is essential for pinpointing the problem. It helps you trace the circuit and identify faulty components like relays, fuses, or wiring connectors.
- Performing Repairs: Replacing damaged wiring, connectors, or even the entire harness becomes significantly easier when you can confidently identify each wire and its purpose.
- Upgrading Headlights: Swapping out your factory headlights for aftermarket options, especially those requiring additional wiring or relays, demands a thorough understanding of the existing wiring.
- Adding Auxiliary Lighting: If you’re adding fog lights, driving lights, or LED light bars, integrating them into your truck's electrical system safely and correctly requires knowing where to tap into the existing circuits.
- General Electrical System Knowledge: Understanding a specific circuit like the headlight wiring helps build a broader understanding of automotive electrical systems in general.
Key Specs and Main Parts of the 2012 Dodge Ram 1500 Headlight Wiring Harness
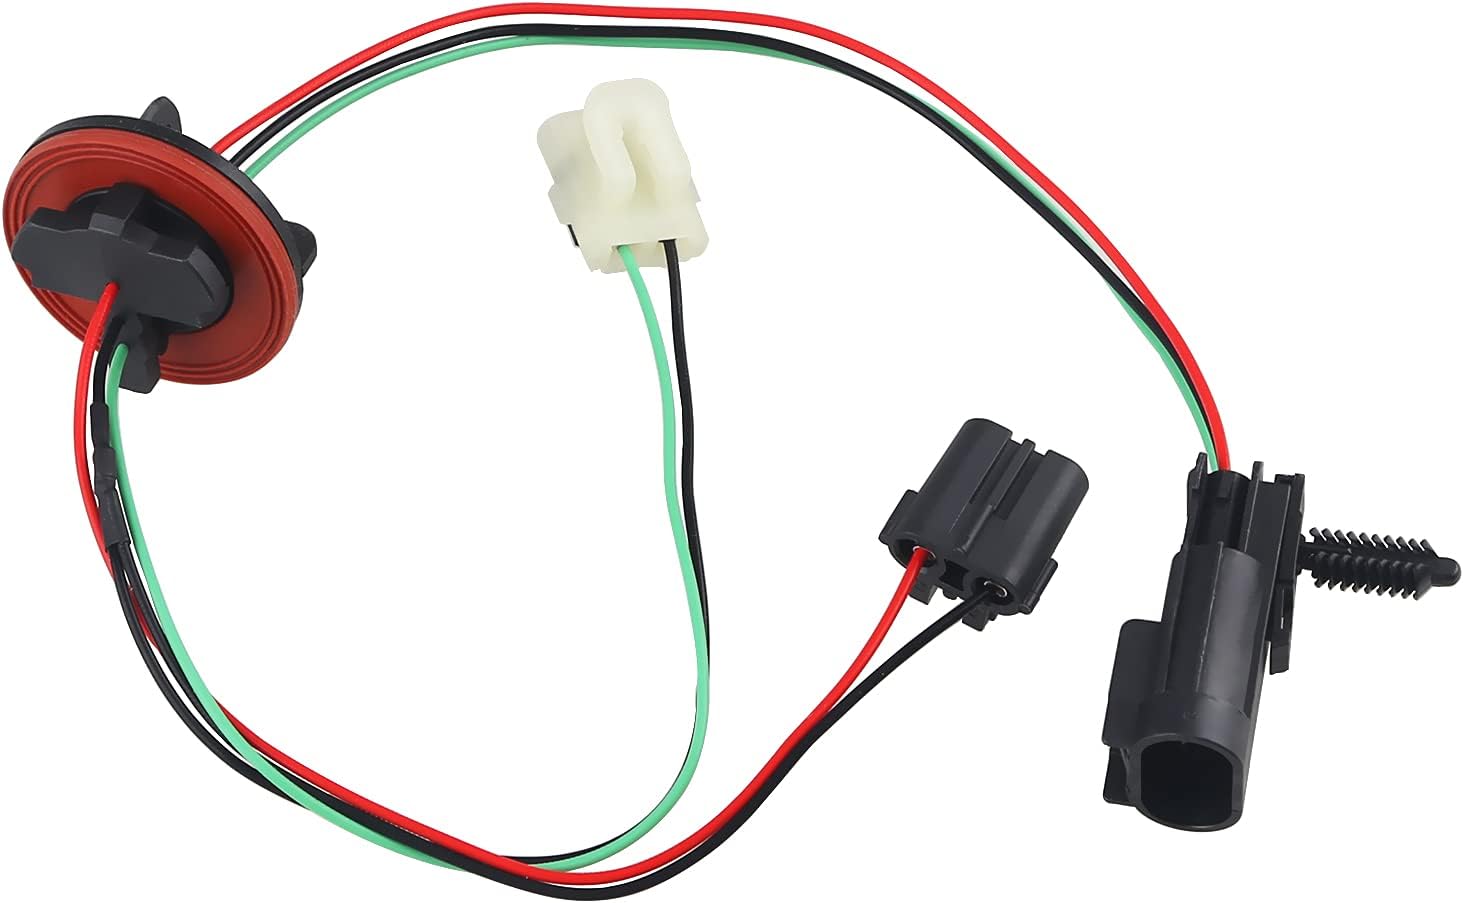
The headlight wiring harness for a 2012 Dodge Ram 1500 is a complex network of wires, connectors, and components that work together to power and control the headlights. Here’s a breakdown of the key components:
- Headlight Bulbs: The obvious one! Usually a dual-filament bulb for high and low beams. The 2012 Ram 1500 typically uses halogen bulbs, though some models may have optional HID (High-Intensity Discharge) systems.
- Headlight Switch: Located on the steering column or dashboard, this switch controls the on/off state of the headlights and the selection between parking lights, low beams, and high beams.
- Headlight Relay(s): These electrically operated switches allow a low-current circuit (from the headlight switch) to control a high-current circuit (powering the headlights). Relays protect the headlight switch from overload. Often there are separate relays for high and low beams.
- Fuses: Protective devices that prevent excessive current flow, safeguarding the wiring and components from damage. There are usually dedicated fuses for the left and right headlights.
- Wiring: Stranded copper wires of varying gauges (thicknesses) carry the electrical current. Different colors are used to identify different circuits.
- Connectors: Plastic housings that allow wires to be easily connected and disconnected. These are found at the headlight bulbs, relays, fuses, and other connection points.
- Ground Points: Metal contact points where the wiring harness connects to the vehicle's chassis, providing a return path for the electrical current. Proper grounding is crucial for the entire system to function correctly.
- Pulse Width Modulation (PWM) Module (if equipped): Some models use a PWM module to control the brightness of the headlights or to dim them for daytime running lights (DRL).
Understanding Wiring Diagram Symbols
A wiring diagram is essentially a roadmap of the electrical system. Here's how to interpret the key elements:
- Lines: Represent wires. Solid lines usually indicate direct connections, while dashed lines may indicate shielded or grounded wires. The thickness of the line doesn't necessarily indicate the wire gauge.
- Colors: Each wire is identified by a color code (e.g., BLU for blue, RED for red, GRN for green, BLK for black). Pay close attention to these codes – they're crucial for identifying the correct wires. You might see abbreviations like VT/WT, indicating a violet wire with a white tracer.
- Symbols for Components: Standard symbols are used to represent components like resistors, capacitors, diodes, relays, switches, fuses, and lamps. You can easily find these standard symbols with a quick online search for "electrical schematic symbols."
- Ground Symbol: Usually represented by a downward-pointing arrow or a series of horizontal lines, indicates a connection to the vehicle's chassis ground.
- Numbers and Letters: Numbers often represent pin numbers on connectors or terminals. Letters might indicate circuit designations or component identifiers.
- Splices: Indicated by a dot where wires connect, showing a point where multiple wires are joined.
How the Headlight Wiring Works
Here's a simplified explanation of how the 2012 Dodge Ram 1500 headlight circuit works:
- When you turn the headlight switch to the "on" position, it sends a low-current signal to the headlight relay(s).
- The relay(s) act as electrically controlled switches. The low-current signal from the headlight switch activates the relay, closing the high-current circuit.
- This allows power from the battery (via a fuse) to flow through the relay to the headlight bulbs.
- The headlights illuminate. Separate circuits control the low beams and high beams, with dedicated relays and fuses for each.
- The ground path completes the circuit, allowing the current to return to the battery, ensuring the headlights remain lit.
For high beam operation, the headlight switch activates the high beam relay, interrupting the low beam circuit (sometimes) and energizing the high beam filaments in the bulbs. The exact implementation depends on the specific trim level and options package.
Real-World Use: Basic Troubleshooting Tips
Here are some basic troubleshooting steps you can take if you're experiencing headlight problems:
- Check the Bulbs: Start with the simplest thing. Visually inspect the bulbs for burnt filaments. If they look okay, use a multimeter to test for continuity.
- Check the Fuses: Use a test light or multimeter to check the headlight fuses. A blown fuse is a common cause of headlight failure. Consult your owner's manual or the fuse box diagram to locate the correct fuses.
- Check the Relays: You can test a relay by swapping it with a known good relay (like the horn relay – they're often the same type). If the headlights work with the swapped relay, the original relay is faulty. You can also use a multimeter to check the relay's coil and contacts.
- Inspect the Connectors: Look for corroded, loose, or damaged connectors at the headlight bulbs, relays, and fuse box. Clean and tighten any suspect connections. Use dielectric grease to prevent future corrosion.
- Check the Grounds: Ensure the ground connections are clean and tight. A poor ground can cause all sorts of electrical problems.
- Test for Voltage: Use a multimeter to check for voltage at the headlight bulb connectors and relay terminals. This will help you determine where the circuit is being interrupted.
Safety Precautions
Working with automotive electrical systems can be dangerous. Keep these safety tips in mind:
- Disconnect the Battery: Always disconnect the negative battery cable before working on the electrical system to prevent accidental shorts and electrical shocks.
- Use Proper Tools: Use insulated tools and wear safety glasses.
- Be Careful with Wiring: Avoid cutting or splicing wires unless you are absolutely sure of what you are doing. Incorrect wiring can damage your vehicle's electrical system.
- High-Intensity Discharge (HID) Systems: HID systems operate at very high voltages and can be extremely dangerous. If you are working on an HID system, take extra precautions and consider consulting a qualified technician. The ballast that creates the high voltage for HID lights are very dangerous even when the car is off because they can hold a charge.
- Don't Overload Circuits: When adding auxiliary lighting, be sure not to overload the existing circuits. Use relays and fuses to protect the wiring.
Understanding your 2012 Dodge Ram 1500's headlight wiring harness is a valuable skill for any DIYer. Remember to take your time, be careful, and always prioritize safety. The wiring diagram is your best friend for navigating this system. We've got that file available for download to help you further. Armed with this knowledge and the diagram, you'll be well-equipped to diagnose and repair most headlight-related issues.