2013 Chevy Traverse 3.6 Serpentine Belt Diagram
Alright, let's dive into the serpentine belt system on your 2013 Chevy Traverse with the 3.6L engine. This guide will walk you through understanding its diagram, functionality, and some common troubleshooting scenarios. Consider this your in-depth reference for everything serpentine belt-related. And remember, we have a downloadable diagram at the end of this article for your convenience.
Purpose of the Serpentine Belt Diagram
Why bother with a diagram? Simple: it's your roadmap to understanding and working on a crucial engine component. The serpentine belt drives essential accessories, and without it, you're going nowhere fast. The diagram helps with:
- Repairs and Replacements: Knowing the correct belt routing is paramount when replacing a worn or broken belt. Incorrect routing can lead to component failure and engine damage.
- Troubleshooting: A diagram helps pinpoint which accessory is likely causing a problem if you're experiencing issues like power steering failure, A/C malfunction, or alternator underperformance.
- General Understanding: Even if you're not currently facing a problem, familiarizing yourself with the system's layout allows for better preventative maintenance and faster diagnostics down the line.
- Part Identification: The diagram helps you to visually identify each part of the serpentine system, so you can find the correct replacements.
Key Specs and Main Parts of the 2013 Traverse 3.6L Serpentine System
Let's break down the key components involved in the serpentine belt system:
- Serpentine Belt: The continuous belt itself, typically made of reinforced rubber. Its length and number of ribs are specific to the 3.6L Traverse configuration. Expect a replacement interval around 60,000-100,000 miles, but always inspect for cracks and wear regularly.
- Crankshaft Pulley (Damper): Located at the bottom of the engine, driven directly by the crankshaft. It's the primary driver of the entire serpentine system. The harmonic balancer within the crankshaft pulley absorbs vibrations and oscillations from the engine, protecting other components.
- Alternator Pulley: The alternator generates electricity to power the vehicle's electrical system and charge the battery. If your battery isn't charging or your lights are dim, the alternator or belt routing could be the culprit.
- Power Steering Pump Pulley: This drives the power steering pump, which provides hydraulic assistance for steering. If your steering is heavy or you hear a whining noise when turning, check this system.
- Air Conditioning (A/C) Compressor Pulley: Engages and disengages to drive the A/C compressor, which circulates refrigerant. If your A/C isn't blowing cold air, investigate this component.
- Idler Pulley(s): Smooth pulleys that guide the belt and maintain proper tension. They don't drive any accessories themselves.
- Tensioner Pulley: A spring-loaded pulley that automatically maintains the correct tension on the serpentine belt. A faulty tensioner can cause belt slippage, noise, and premature wear. The tensioner is crucial; a weak tensioner will lead to belt issues.
Understanding Serpentine Belt Diagram Symbols
Diagrams use standardized symbols. Here's what you're likely to encounter:
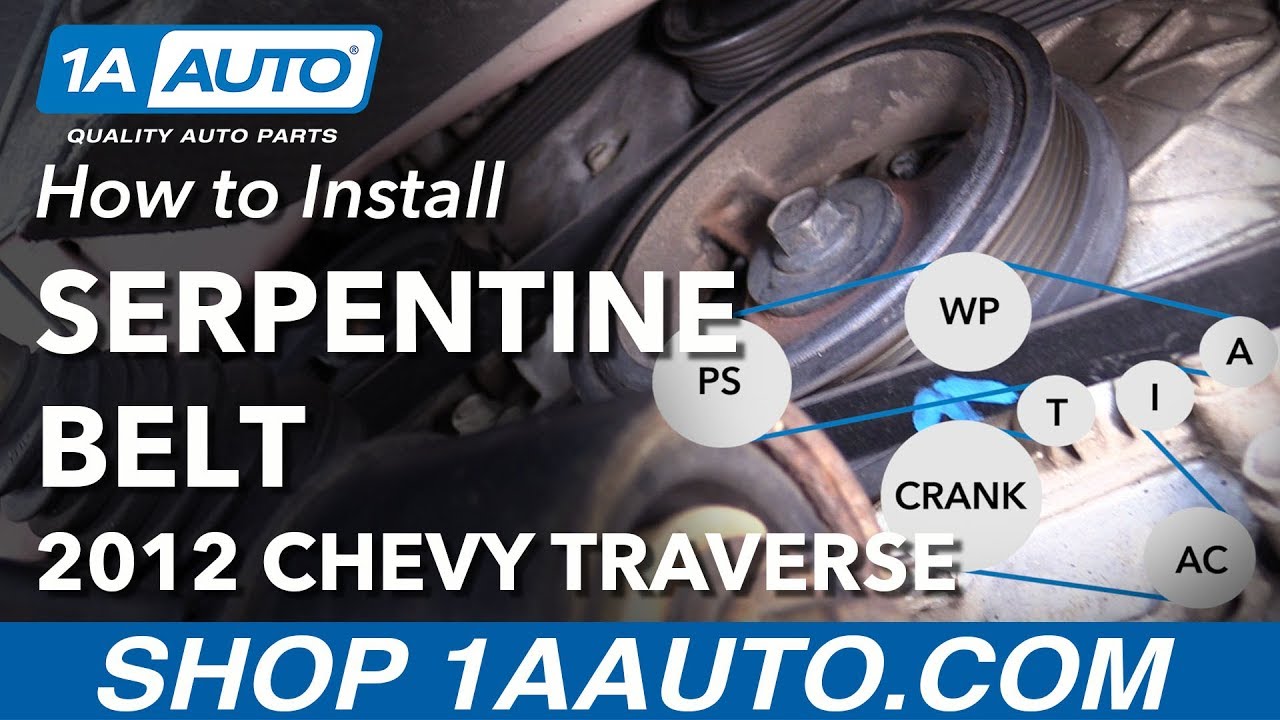
- Solid Lines: Represent the path of the serpentine belt itself. The direction of the line indicates the direction the belt travels.
- Circles: Indicate pulleys. The size might be proportional to the actual pulley size, but this isn't always the case.
- Arrows: Show the direction of rotation for each pulley. This is crucial for understanding how the belt needs to be routed.
- Text Labels: Each pulley will be labeled with its corresponding component (e.g., "ALT" for alternator, "P/S" for power steering).
- Tensioner Symbol: Typically shown as a pulley connected to a spring, indicating its tensioning function.
How the Serpentine System Works
The serpentine belt system is elegantly simple in concept. The crankshaft pulley, driven by the engine's rotation, powers the entire system. As the crankshaft pulley spins, it turns the serpentine belt, which, in turn, drives all the accessory pulleys. The tensioner pulley ensures that the belt remains taut and doesn't slip. This tension is critical for proper operation of the accessories.
Think of it like a series of gears all connected by a chain. If the chain (belt) is too loose or breaks, the gears (accessories) stop working.
Real-World Use and Basic Troubleshooting
Here's how you can use your newfound knowledge to troubleshoot common problems:
- Squealing Noise: Often indicates a loose or worn serpentine belt. Inspect the belt for cracks, glazing (a shiny surface), or missing ribs. Check the tensioner to ensure it's functioning correctly. Sometimes, the squealing could also come from a failing pulley bearing.
- Battery Not Charging: Could be a faulty alternator, but before replacing it, check the serpentine belt and its routing. If the belt is slipping, the alternator won't spin at the correct speed, leading to insufficient charging.
- Power Steering Failure: Similar to the alternator issue, a slipping or broken serpentine belt can prevent the power steering pump from operating.
- A/C Not Working: Same principle applies. The A/C compressor needs to be driven by the serpentine belt to function.
- Visual Inspection: Regularly inspect the belt for wear and tear. Look for cracks, fraying, missing ribs, or signs of oil contamination. A contaminated belt will degrade quickly.
- Check Pulley Alignment: Use a straight edge to verify that all pulleys are aligned correctly. Misalignment can cause premature belt wear and noise.
Safety Precautions
Working on the serpentine belt system can be dangerous if you're not careful:
- Disconnect the Battery: Always disconnect the negative battery cable before working on any electrical components. This prevents accidental shorts and shocks.
- Hot Engine: Never work on the serpentine belt system when the engine is hot. Allow it to cool down completely to avoid burns.
- Moving Parts: Keep your hands, clothing, and tools away from moving parts while the engine is running. The serpentine belt can cause serious injury.
- Eye Protection: Wear safety glasses to protect your eyes from debris.
- Proper Tools: Use the correct tools for the job. For example, use a serpentine belt tool to relieve tension on the tensioner pulley when removing or installing the belt.
- Tensioner Spring: The tensioner pulley is spring-loaded and can snap back with considerable force when released. Use caution and follow the manufacturer's instructions for releasing the tension.
The crankshaft pulley is a risky component because of its direct connection to the engine's rotation. Be extremely cautious when working near it.
The tensioner holds a lot of potential energy. Improper handling can cause injury.
By understanding the diagram and the components involved, you'll be well-equipped to diagnose and resolve issues with your 2013 Chevy Traverse's serpentine belt system. Remember that this guide is intended to be a helpful resource but does not replace the need for professional assistance when necessary.
Now, about that diagram we promised...you can download a detailed PDF diagram of the 2013 Chevy Traverse 3.6L serpentine belt routing [HERE - Placeholder for Diagram Link]. This diagram will provide a clear visual reference to assist you during your repairs and maintenance.