2013 Chrysler 200 2.4 Serpentine Belt Diagram
Let's dive into the serpentine belt system of your 2013 Chrysler 200 with the 2.4L engine. This article will be your guide to understanding the serpentine belt diagram, its purpose, and how to use it for maintenance and troubleshooting. Think of this as the inside scoop from a seasoned mechanic – everything you need to know to confidently tackle this area of your car.
Why Bother with a Serpentine Belt Diagram?
The serpentine belt is a critical component. It drives several essential accessories, and if it fails, you're stranded. Knowing your way around the serpentine belt diagram is invaluable for several reasons:
- Maintenance: Understanding the belt's routing helps you inspect it for wear and tear (cracks, fraying, glazing).
- Repair: If the belt breaks, slips, or needs replacement, the diagram is your roadmap for proper installation. Incorrect routing can damage components or lead to belt failure.
- Troubleshooting: Squealing noises, power steering loss, or A/C malfunction can often be traced back to the serpentine belt system. The diagram helps you pinpoint the source of the problem.
- Understanding System Function: Gaining a general understanding of how the belt system works is useful for any car owner.
Key Specs and Main Parts (2013 Chrysler 200 2.4L)
Before we jump into the diagram itself, let's identify the key components and their roles:
- Crankshaft Pulley: The heart of the system. Driven by the engine, it provides rotational power to the serpentine belt. Its diameter is crucial for calculating accessory drive speeds.
- Alternator Pulley: Driven by the belt, the alternator generates electricity to power the car's electrical system and charge the battery.
- Power Steering Pump Pulley: Provides hydraulic pressure to assist steering.
- Air Conditioning Compressor Pulley: Engages and disengages to drive the A/C compressor, cooling the cabin.
- Idler Pulley(s): Smooth, ungrooved pulleys used to guide the belt and maintain proper tension. They help optimize the belt's wrap angle around other pulleys.
- Tensioner Pulley: Spring-loaded pulley that automatically maintains the correct tension on the serpentine belt. Crucial for preventing slippage and premature wear. It includes a mechanism to relieve tension during belt installation and removal.
The serpentine belt itself is usually a multi-ribbed belt, made of a durable rubber compound with reinforcing cords. The 2.4L engine in the 2013 Chrysler 200 uses a specific belt length and rib count, which is usually printed on the belt itself (or can be found in your vehicle's service manual). A typical belt dimension is 7PK**** where 7 is the number of ribs and **** is the belt length in millimeters.
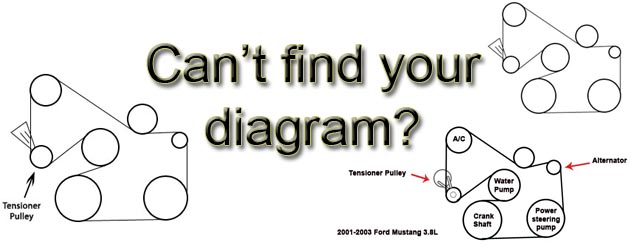
Decoding the Serpentine Belt Diagram: Symbols and Conventions
A serpentine belt diagram might seem like a complex web at first, but it's based on simple conventions:
- Solid Lines: Represent the path of the serpentine belt. The thicker the line, sometimes signifies the front side of the belt (the side that makes contact with the grooved pulleys).
- Pulleys: Circles represent the pulleys. The diagram will show the pulley attached components like the alternator and A/C compressor.
- Arrows: Indicate the direction of rotation for each pulley. This is important for understanding the forces acting on the belt.
- Component Labels: Abbreviations are used to identify each component. For example:
- ALT: Alternator
- P/S: Power Steering Pump
- A/C: Air Conditioning Compressor
- CRANK: Crankshaft Pulley
- TENS: Tensioner
- IDLER: Idler Pulley
- Tensioner Direction: Usually, an arrow will be indicated on the diagram showing the direction in which the tensioner can be moved to relieve tension on the belt.
The diagram typically provides a top-down view of the engine, so you're looking at the pulleys as if you were standing in front of the car, looking down at the engine bay. The diagram shows how the belt threads around each pulley. Note the smooth side of the belt usually runs against the idler pulley, while the ribbed side runs against the crankshaft pulley and the pulleys of the other accessories.
How It Works: The Serpentine Belt System in Action
The engine's rotation turns the crankshaft pulley. This pulley then drives the serpentine belt, which in turn spins the pulleys of the accessories (alternator, power steering pump, A/C compressor). The tensioner pulley maintains the correct amount of tension on the belt to prevent slippage. Without sufficient tension, the belt will slip, leading to reduced performance or failure of the accessories. Too much tension can cause premature wear on the belt and bearings within the accessories.
The routing of the serpentine belt is designed to optimize the wrap angle of the belt around each pulley. The wrap angle is the amount of contact the belt has with the pulley's surface. A larger wrap angle provides better grip and reduces the likelihood of slippage, especially under load.
Real-World Use: Basic Troubleshooting Tips
Here's how you can use the diagram to diagnose common serpentine belt problems:
- Squealing Noise: A squealing noise, especially when the engine is cold or under load (e.g., turning the steering wheel or turning on the A/C), often indicates a slipping belt. Use the diagram to check the tensioner. Is it moving freely? Is it within its operating range? Also, inspect the belt for glazing (a shiny, hardened surface) or contamination (oil or coolant).
- Accessory Failure: If your power steering fails, your battery isn't charging, or your A/C isn't working, check the serpentine belt first. Is it broken? Is it properly routed? Use the diagram to confirm the belt is still properly driving the affected component.
- Belt Wear: Regularly inspect the belt for cracks, fraying, or missing ribs. The diagram reminds you where to look and how to properly install a new belt.
- Misalignment: Misalignment between pulleys can cause premature belt wear and noise. While the diagram itself won't directly show misalignment, it gives you a reference for how the belt should be tracking. Visually inspect each pulley to ensure it's properly aligned with the others. A straightedge placed along the pulleys can help identify misalignment.
Safety First: Working with the Serpentine Belt System
Working on the serpentine belt system can be dangerous if you're not careful:
- Engine Off: Always work on the serpentine belt system with the engine off and the key removed from the ignition.
- Hot Components: Be aware that some components, like the exhaust manifold, can remain hot for a long time after the engine is shut off.
- Moving Parts: Never put your hands near the serpentine belt or pulleys while the engine is running. The belt can grab clothing or body parts, causing serious injury.
- Tensioner Spring: The tensioner has a strong spring. Always use the correct tool to relieve the tension before removing the belt. Incorrectly releasing the tensioner can cause the tool to slip and injure you.
- Battery: Disconnecting the negative battery cable is recommended to prevent accidental electrical shorts while working.
The components in the belt path and the belt itself should be checked for wear and tear. Replacing a faulty component or belt can save you a lot of trouble, time and money in the long run.
Important Note: While we've covered the basics, always consult your vehicle's service manual for specific instructions and torque specifications. Every vehicle is different, and using the wrong procedure can damage your car.
We have a detailed serpentine belt diagram specific to the 2013 Chrysler 200 with the 2.4L engine available for download. This will be a valuable resource to keep on hand for maintenance and repairs.