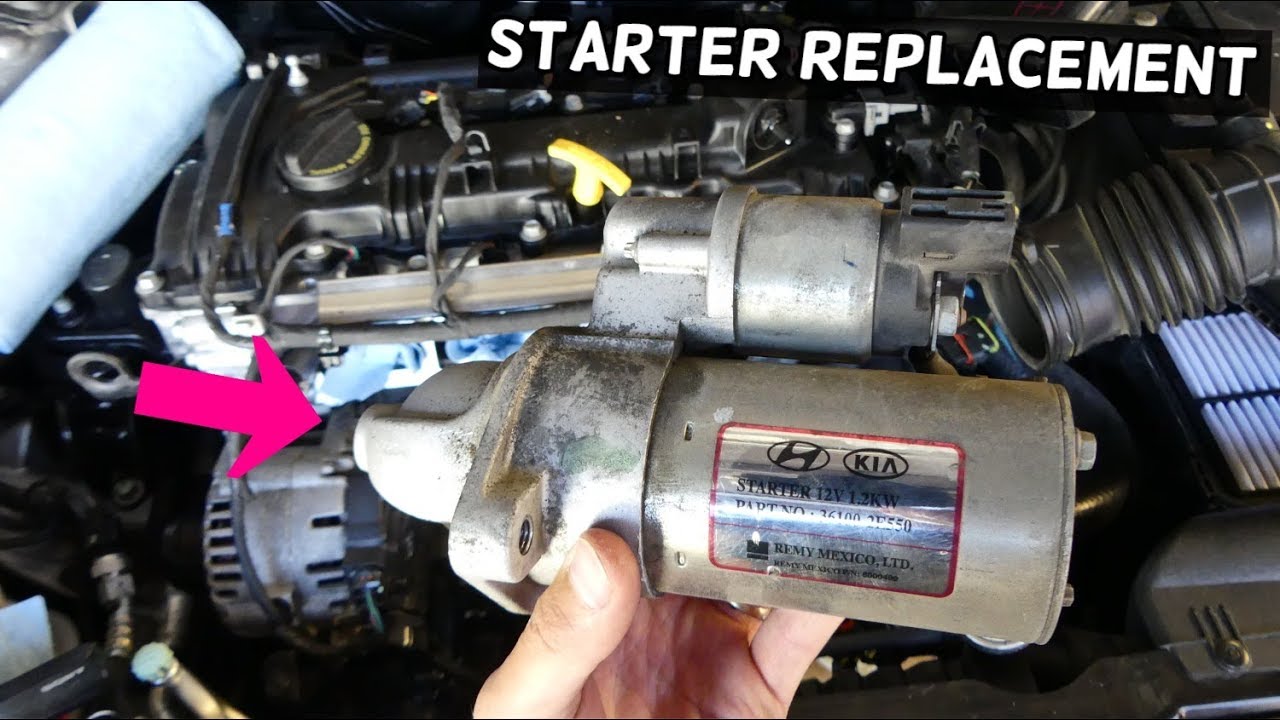
2013 Kia Sportage 2.0 Starter Location Diagram
2013 Kia Sportage 2.0 Starter Location and System Diagram: A DIY Guide
This article provides a detailed overview of the 2013 Kia Sportage 2.0L engine starter system, focusing on the starter motor location and associated electrical components. Understanding this system is crucial for various tasks, from routine maintenance and troubleshooting starting problems to more advanced modifications or engine swaps. We'll cover the key components, their functions, how the system operates, and basic troubleshooting steps. Crucially, we'll also emphasize safety precautions when working with electrical systems.
Why You Need This Diagram
Having a clear understanding of the starter system, aided by a visual diagram, is invaluable for several reasons:
- Troubleshooting Starting Issues: A common car problem is difficulty starting. The diagram helps pinpoint whether the issue lies with the starter itself, the solenoid, the battery, or the wiring in between.
- Performing Starter Replacement: Replacing a starter is a relatively straightforward DIY project, but knowing the exact location and how to disconnect the electrical connections safely is paramount.
- Understanding Vehicle Electrical System: The starter circuit is a fundamental part of the vehicle's electrical system. Understanding it provides a foundation for comprehending other electrical systems.
- Modifications and Upgrades: If you're planning any modifications involving the electrical system or engine, understanding the starter circuit is essential to avoid damaging other components.
Key Specs and Main Parts
The 2013 Kia Sportage 2.0L uses a conventional starter motor system. Here are the key components:
- Starter Motor: This is the primary component responsible for cranking the engine. It's a high-torque electric motor designed to rotate the engine's flywheel.
- Solenoid: The solenoid is an electromagnetic switch mounted directly on the starter motor. It serves two primary functions: engaging the starter pinion gear with the flywheel ring gear and providing a high-current electrical connection to the starter motor.
- Battery: The battery provides the necessary electrical power to operate the starter motor. The 2013 Sportage typically uses a 12-volt battery, and its *Cold Cranking Amps (CCA)* rating is a critical specification.
- Ignition Switch: The ignition switch, when turned to the "start" position, sends a signal to the starter relay.
- Starter Relay: A low current signal from the ignition switch can be used to trigger the starter relay. The starter relay completes a circuit to send high amperage current from the battery to the starter solenoid.
- Wiring Harness: The wiring harness provides the electrical connections between all the components. This includes thick gauge wires for the main power supply to the starter and smaller gauge wires for control signals.
- Flywheel (or Flexplate): The flywheel (for manual transmissions) or flexplate (for automatic transmissions) has a ring gear around its perimeter. The starter pinion gear engages with this ring gear to crank the engine.
Symbols and Diagram Conventions
Understanding the symbols used in the starter system diagram is crucial for interpreting it correctly. Here's a breakdown of common symbols:
- Solid Lines: Represent electrical wires. Thicker lines generally indicate wires carrying higher current.
- Dashed Lines: May represent ground connections or signal wires carrying lower current.
- Component Boxes: Rectangular boxes typically represent electrical components like the starter motor, solenoid, relay, and ignition switch. These boxes may contain internal diagrams to illustrate their internal workings.
- Circles: Can represent terminals or connection points where wires are joined together.
- Ground Symbol: A series of horizontal lines decreasing in length, indicating a connection to the vehicle's chassis, which serves as the ground.
- Battery Symbol: A series of alternating long and short lines, representing the battery's positive and negative terminals.
- Colors: Wire colors are often indicated on the diagram (e.g., Red for positive, Black for ground). These colors are crucial for identifying specific wires in the vehicle.
How It Works: The Starter System in Action
The starter system works in a sequence of steps:
- Key in Ignition: When you insert the key and turn it to the "start" position, you're initiating the starting sequence.
- Signal to Relay: The ignition switch sends a low-current signal to the starter relay.
- Relay Activation: The starter relay closes, completing the high-current circuit from the battery to the starter solenoid.
- Solenoid Engagement: The energized solenoid performs two actions simultaneously:
- It pushes the starter pinion gear forward to engage with the flywheel/flexplate ring gear.
- It closes a high-current electrical contact, allowing the battery's full power to flow to the starter motor.
- Engine Cranking: The starter motor, now receiving full power, spins the flywheel/flexplate, thus cranking the engine.
- Engine Start: Once the engine starts and reaches a certain RPM, you release the key from the "start" position. The ignition switch cuts power to the starter relay, de-energizing the solenoid.
- Disengagement: The starter pinion gear retracts from the flywheel/flexplate, and the starter motor stops spinning.
Real-World Use: Basic Troubleshooting Tips
Here are some common starter system problems and basic troubleshooting steps:
- No Cranking at All:
- Check the Battery: Ensure the battery is fully charged and the terminals are clean and securely connected. Use a multimeter to check the battery voltage (should be around 12.6 volts).
- Check the Fuses and Relays: Inspect the starter fuse and starter relay in the fuse box. Replace any blown fuses or faulty relays.
- Check the Wiring: Look for any loose or corroded connections in the starter circuit, especially at the battery, starter solenoid, and ground connections.
- Starter Solenoid: Try tapping the starter solenoid with a wrench while someone turns the key to the "start" position. If the starter engages briefly, the solenoid is likely faulty.
- Slow Cranking:
- Weak Battery: A weak battery may not provide enough current to crank the engine at the normal speed.
- Poor Connections: Corroded or loose connections can restrict current flow.
- Worn Starter Motor: A worn starter motor may draw excessive current, causing slow cranking.
- Clicking Sound with No Cranking:
- Low Battery Voltage: Not enough voltage to engage the starter.
- Faulty Solenoid: The solenoid may be engaging, but not making proper electrical contact.
Safety First: Handling Risky Components
Working with the starter system involves high-current electrical components. Always observe the following safety precautions:
- Disconnect the Battery: Before working on any part of the starter system, disconnect the negative battery cable. This prevents accidental short circuits and electrical shocks.
- Use Insulated Tools: Use tools with insulated handles to avoid electrical shocks.
- Avoid Touching Live Wires: Never touch any exposed wires while the battery is connected.
- Be Careful with Fuel Lines: The starter is located near fuel lines. Avoid sparks or open flames in this area to prevent a fire.
- Wear Safety Glasses: Protect your eyes from debris or sparks.
- Never work alone: It is advisable to always work with someone else in case of an emergency.
Important Note: The starter motor is a powerful electrical component, and a malfunctioning starter can draw a large amount of current, potentially causing damage to the vehicle's electrical system or even a fire. If you are not comfortable working with electrical systems, it's best to consult a qualified mechanic.
Disclaimer: This guide is for informational purposes only and should not be considered a substitute for professional advice. Always consult a qualified mechanic for any repairs or modifications to your vehicle.
We have the 2013 Kia Sportage 2.0L Starter Location Diagram available for download. This diagram provides a detailed visual representation of the system and will be a valuable resource for your DIY projects. Contact us, and we'll gladly provide you with the diagram file.