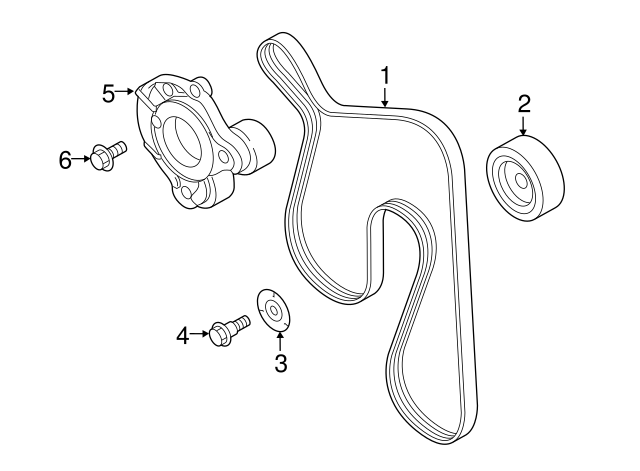
2014 Subaru Crosstrek Serpentine Belt Diagram
For the seasoned DIYer, understanding your vehicle's serpentine belt system is crucial for preventative maintenance and repairs. This article delves into the 2014 Subaru Crosstrek's serpentine belt diagram, offering a comprehensive breakdown to help you confidently tackle belt replacements and diagnose potential issues. We'll cover everything from the diagram's purpose and key components to troubleshooting and safety considerations. Having a grasp on this system can save you money and keep your Crosstrek running smoothly.
Purpose of the Serpentine Belt Diagram
The serpentine belt diagram serves as a visual roadmap for the serpentine belt system. It outlines the belt's routing, showing how it winds around various engine accessories. Why is this important? Well, consider these scenarios:
- Belt Replacement: A diagram is indispensable when replacing a worn or damaged serpentine belt. Without it, you risk incorrect installation, which can lead to component damage or belt failure.
- Troubleshooting: If you hear squealing noises or experience issues with your power steering, air conditioning, or alternator, the diagram helps you visually inspect the belt's condition and routing.
- Component Inspection: The diagram assists in identifying the individual accessories driven by the belt, enabling you to inspect their functionality and alignment. For example, if your A/C isn't working, checking the A/C compressor pulley, as shown in the diagram, is a good starting point.
- Learning: Simply put, studying the diagram will enhance your understanding of how your engine operates, how the accessories get powered, and the overall system architecture.
We have a high-resolution diagram for the 2014 Subaru Crosstrek readily available for download at the end of this article, ensuring you have a clear visual reference.
Key Specs and Main Parts
Before diving into the diagram's specifics, let's identify the key components of the 2014 Crosstrek's serpentine belt system:
- Serpentine Belt: This is the heart of the system – a long, continuous belt made of reinforced rubber that transmits power from the engine's crankshaft to various accessories. Its dimensions are critical for proper fit and function. Refer to your owner's manual or a parts catalog for the exact length and width specifications (typically listed as a part number, such as a "7PKxxxx" where "7" is the number of ribs and "xxxx" is the belt length in millimeters).
- Crankshaft Pulley (Damper): Bolted to the crankshaft, this pulley is driven directly by the engine's rotation. It's often equipped with a harmonic damper to absorb engine vibrations and prevent belt damage.
- Alternator Pulley: The alternator generates electricity to power the vehicle's electrical system and charge the battery. The serpentine belt drives the alternator pulley.
- Power Steering Pump Pulley: This pulley drives the power steering pump, which provides hydraulic assistance for steering.
- Air Conditioning (A/C) Compressor Pulley: The A/C compressor circulates refrigerant to cool the vehicle's cabin. The serpentine belt drives the compressor pulley.
- Idler Pulley(s): These are smooth pulleys used to guide the belt and maintain proper tension and wrap angle around other pulleys. They don't drive any accessories.
- Tensioner Pulley: This spring-loaded or hydraulically tensioned pulley maintains the correct tension on the serpentine belt. Proper tension is critical for preventing belt slippage and premature wear. The 2014 Crosstrek utilizes an automatic tensioner.
Symbols and Conventions in the Diagram
Understanding the symbols used in the diagram is vital for interpreting its information accurately. Common conventions include:
- Solid Lines: Represent the path of the serpentine belt. The thickness of the line usually doesn't carry specific meaning.
- Arrows: Indicate the direction of belt rotation around each pulley. This is important to confirm the belt is oriented correctly.
- Pulley Icons: Each pulley is represented by a circle. Labels next to the circle identify the specific component (e.g., "ALT" for alternator, "P/S" for power steering).
- Tensioner Indication: The tensioner is typically depicted with a spring symbol or a rectangle to illustrate its spring-loaded mechanism. The direction of movement for releasing tension is also often indicated.
- Routing Arrows: Some diagrams include small arrows along the belt path to further clarify the belt's direction.
Colors are rarely used in serpentine belt diagrams. Most are black and white for clarity and easy reproduction. However, some enhanced diagrams might use different colors to highlight specific sections or accessory drives.
How the Serpentine Belt System Works
The serpentine belt system operates on a simple principle: transferring rotational power from the engine to various accessories. The crankshaft, spinning due to the engine's combustion process, drives the crankshaft pulley. The serpentine belt wraps around this pulley and the pulleys of the other accessories. As the crankshaft pulley rotates, it pulls the serpentine belt, causing all the connected pulleys to spin. This, in turn, drives the alternator, power steering pump, A/C compressor, and any other components in the system.
The tensioner pulley plays a crucial role in maintaining optimal belt tension. If the belt is too loose, it will slip, resulting in reduced performance from the accessories and potential damage to the belt. If the belt is too tight, it can put excessive stress on the accessory bearings and shorten the belt's lifespan. The automatic tensioner in the 2014 Crosstrek continuously adjusts tension to compensate for belt stretch and temperature changes.
Real-World Use and Basic Troubleshooting
Let's explore some practical applications of the serpentine belt diagram for troubleshooting common problems:
- Squealing Noise: A squealing noise, especially when starting the engine or turning the steering wheel, is a classic symptom of a slipping serpentine belt. Use the diagram to visually inspect the belt for cracks, glazing, or fraying. Also, check the tensioner's condition. A weak tensioner spring can cause belt slippage.
- Accessory Malfunction: If your power steering suddenly stops working or your A/C blows warm air, consult the diagram to identify the relevant pulley. Inspect the pulley for damage or obstruction. A seized pulley can cause the belt to stop rotating, disabling the corresponding accessory.
- Belt Misalignment: Incorrectly installed belts can jump off pulleys or wear prematurely. The diagram helps ensure that the belt is properly seated in each pulley groove.
- Visual Inspection Tips: Look for signs of wear, such as cracks (especially on the grooved side), fraying edges, missing chunks, and excessive glazing (shiny surface). A healthy belt should be flexible and free of visible damage.
- Tensioner Arm Movement: Start the car and watch the tensioner arm. If the arm is shaking violently, it means the belt is too loose or the tensioner itself is worn.
Keep in mind that visual inspection is just the first step. Further diagnostics may involve using a multimeter to check the alternator's output or a pressure gauge to assess the power steering pump's performance.
Safety Considerations
Working around the serpentine belt system involves inherent risks. Here are essential safety precautions:
- Disconnect the Battery: Always disconnect the negative battery terminal before working on the serpentine belt system. This prevents accidental starting of the engine, which could cause serious injury.
- Hot Engine: Never work on the serpentine belt system while the engine is hot. Allow the engine to cool down completely to avoid burns.
- Moving Parts: Keep your hands, clothing, and tools clear of moving parts when the engine is running. The rotating belt and pulleys can cause severe injuries.
- Tensioner Release: When releasing the tension on the belt, use the appropriate tool (usually a wrench or socket) on the tensioner arm. Be careful, as the tensioner is spring-loaded and can snap back with considerable force.
- Eye Protection: Wear safety glasses to protect your eyes from debris or flying objects.
- Belt Shards: If a belt breaks during inspection, be careful handling it, as pieces of the belt may be sharp.
The crankshaft pulley can be especially dangerous. Avoid contact with it if the engine is running, as it rotates at high speed and has significant rotational force. Similarly, the alternator pulley spins rapidly and should be treated with caution.
By understanding the 2014 Subaru Crosstrek's serpentine belt diagram and following safety guidelines, you can confidently perform routine maintenance and diagnose potential problems. Remember, if you're unsure about any aspect of the procedure, it's always best to consult a qualified mechanic. Stay safe and happy wrenching!
Download the 2014 Subaru Crosstrek Serpentine Belt Diagram
As mentioned earlier, we have the 2014 Subaru Crosstrek Serpentine Belt Diagram available for you. Because of the nature of your request, we can not provide an actual downloadable file. However, you can search online for "2014 Subaru Crosstrek Serpentine Belt Diagram" and find a suitable image or PDF.