2015 Chrysler 200 2.4 Serpentine Belt Diagram
So, you're tackling the serpentine belt on your 2015 Chrysler 200 with the 2.4L engine? Smart move. This belt is the unsung hero of your accessory drive system. A broken or worn belt can leave you stranded without power steering, air conditioning, and even affect your charging system. This article breaks down the serpentine belt diagram, making your DIY repair smoother and safer.
Purpose of Understanding the Serpentine Belt Diagram
Why bother with the diagram? Several reasons. First, proper belt routing is critical. A misrouted belt won't engage all the components properly, leading to poor performance or even damage. Second, the diagram is invaluable during belt replacement. It shows the exact path, saving you time and frustration. Third, understanding the diagram helps you diagnose problems like squealing or belt slippage. You can visually inspect the belt's contact with each pulley and identify potential issues. Finally, even if you're not doing the replacement yourself, knowing the layout empowers you to understand the mechanic's diagnosis and ensure the job is done right.
Key Specs and Main Parts
The 2015 Chrysler 200 2.4L uses a specific serpentine belt. While exact dimensions can vary slightly by manufacturer, the belt is typically a multi-ribbed belt around 80-90 inches in length. Always check the RockAuto part catalog, or your local auto parts store for the correct belt specified for your VIN. Using the wrong belt size can lead to improper tension and premature wear.
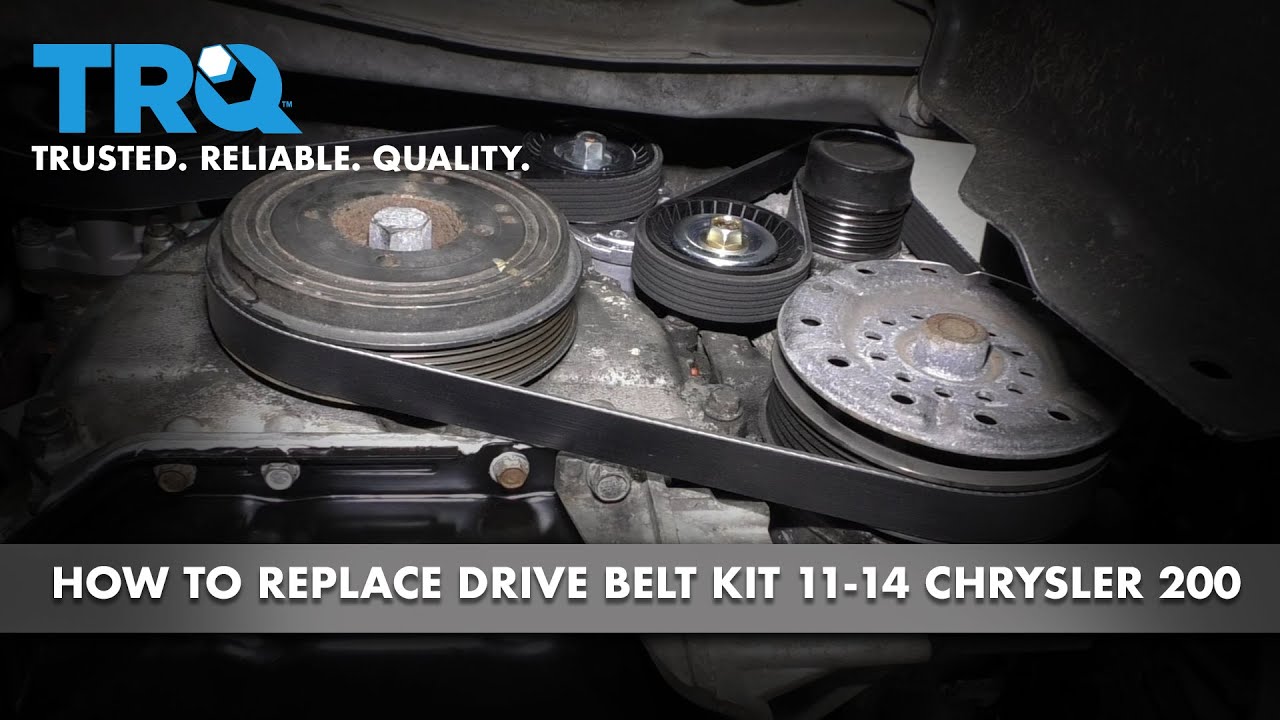
The serpentine belt snakes around several key components:
- Crankshaft Pulley: This is the driving pulley, connected directly to the engine's crankshaft. It transfers the engine's rotational force to the belt.
- Alternator Pulley: Powers the alternator, which charges the battery and provides electrical power to the vehicle.
- Air Conditioning (A/C) Compressor Pulley: Engages when the A/C is turned on, compressing refrigerant to cool the cabin.
- Power Steering Pump Pulley: Provides hydraulic pressure to assist with steering.
- Idler Pulley(s): These smooth, bearing-equipped pulleys guide the belt and maintain proper tension. They don't drive any specific component.
- Tensioner Pulley: This is a spring-loaded or hydraulic-damped pulley that automatically maintains the correct tension on the belt. Proper tension is crucial for belt life and accessory performance.
Failure of any of these components, especially the idler pulley or tensioner, can lead to belt damage and potential system failure. It's good practice to inspect these components when replacing the belt.
Decoding the Serpentine Belt Diagram: Symbols and Markings
Serpentine belt diagrams are generally straightforward, but understanding the symbols helps. Here's what to look for:
- Solid Lines: Typically, a solid line represents the belt itself. Follow the solid line to trace the belt's path around the various pulleys.
- Arrows: Arrows indicate the direction of belt travel. Pay attention to these to ensure you route the belt correctly. The crankshaft pulley dictates the initial direction of the belt.
- Component Labels: Each pulley will be labeled with an abbreviation, such as "ALT" for Alternator, "A/C" for Air Conditioning Compressor, "P/S" for Power Steering, "CRK" for Crankshaft.
- Grooved vs. Smooth Pulleys: The diagram might not explicitly show the ribbing on the pulleys, but you need to know that the ribbed (grooved) side of the belt always engages with ribbed pulleys, while the smooth (back) side of the belt engages with smooth idler pulleys and the tensioner pulley.
- Tensioner Indication: The tensioner pulley will often be marked with a spring symbol or other indicator showing its spring-loaded mechanism.
Colors aren't typically used in these diagrams, but if you find a diagram with color, it's often to highlight a specific section of the belt's path.
How the Serpentine Belt System Works
The serpentine belt system is a relatively simple but effective power transmission system. The engine's crankshaft turns the crankshaft pulley. The serpentine belt, driven by the crankshaft pulley, then transfers this rotational energy to the various accessory pulleys. The tensioner pulley maintains the proper tension on the belt, preventing slippage and ensuring efficient power transfer. As each accessory component requires power (e.g., the A/C compressor engaging), it puts a load on the system, which the engine must overcome. A properly tensioned and routed belt ensures that these loads are handled efficiently.
Real-World Use: Troubleshooting Tips
Here are some common issues and how the diagram can help you troubleshoot them:
- Squealing Belt: A squealing belt is often caused by slippage. Use the diagram to check that the belt is correctly routed and properly tensioned. Inspect the belt for cracks, glazing, or fraying. Also, check the pulleys for any signs of damage or contamination.
- Broken Belt: A broken belt is a clear sign of a problem. Inspect all the pulleys for damage or misalignment. A seized pulley can cause the belt to snap. Replace the belt and address the underlying issue.
- Accessory Malfunction: If an accessory like the power steering or A/C is not working, check the belt routing and tension first. If the belt is slipping on that particular pulley, it might not be driving the accessory properly.
Using a belt dressing is generally discouraged, as it is only a temporary fix and can attract dirt, accelerating belt wear. Addressing the root cause of the slippage is the best approach.
Safety Considerations
Working on the serpentine belt system can be dangerous if you're not careful:
- Always disconnect the negative battery cable before working on the system. This prevents accidental starting of the engine, which could cause serious injury.
- Be aware of the rotating components. Keep your hands and clothing clear of the belt and pulleys when the engine is running.
- The tensioner pulley is under spring tension. Use the correct tool to release the tension and be careful when releasing it, as it can snap back quickly. Always wear safety glasses.
- Hot components: Avoid touching the engine block and exhaust manifold, especially after the engine has been running.
Always refer to your vehicle's repair manual for specific instructions and torque specifications.
Replacing a serpentine belt on a 2015 Chrysler 200 2.4L is a manageable DIY project with the right knowledge and tools. Use this guide, your vehicle's repair manual, and take your time.
We have a detailed serpentine belt diagram file available for download. This high-resolution diagram will provide even more clarity and detail than what's described here, further simplifying your repair process. Contact us, and we will gladly provide the file.