
2015 Chrysler 200 Heater Hose Diagram
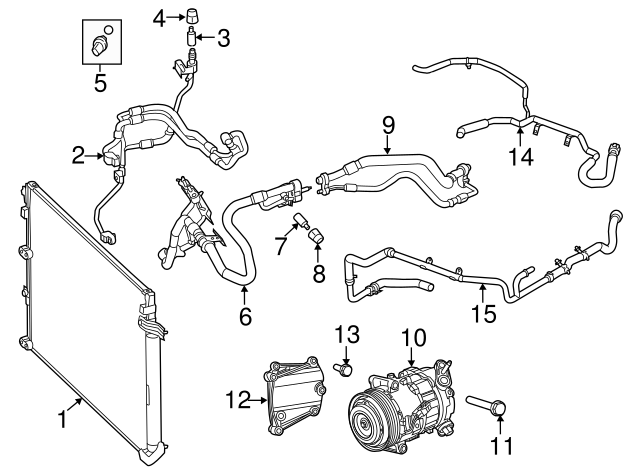
Let's dive into the heater hose diagram for the 2015 Chrysler 200. This seemingly simple system is crucial for keeping you comfortable in colder months, and understanding its layout is essential for everything from basic maintenance to troubleshooting and even more involved repairs. Whether you're a seasoned DIYer or just looking to expand your automotive knowledge, this breakdown will give you the confidence to tackle any heater hose-related issues.
Purpose of the Heater Hose Diagram
Why bother with a heater hose diagram? Well, a clear diagram is your roadmap to the coolant system responsible for cabin heating. It serves multiple purposes:
- Diagnosis: When your heater blows cold air, or you notice coolant leaks, the diagram helps you pinpoint the source of the problem.
- Repair: Replacing a cracked or damaged hose becomes significantly easier when you know exactly where it connects.
- Maintenance: Regularly inspecting hoses for wear and tear is preventative maintenance, and the diagram helps you locate all relevant components quickly.
- Understanding: Gaining a fundamental understanding of your vehicle's cooling system will help you feel empowered to tackle future repairs.
Key Specs and Main Parts
The 2015 Chrysler 200 typically uses two main heater hoses:
- Inlet Hose: This hose carries hot coolant from the engine to the heater core. The location of the inlet hose on the engine block or cylinder head may vary slightly depending on the specific engine (2.4L Tigershark I4 or the 3.6L Pentastar V6), but it's usually near the thermostat housing.
- Outlet Hose: This hose carries cooled coolant from the heater core back to the engine, typically connecting to the water pump or a return line near the engine block.
Other related components crucial to the heater system include:
- Heater Core: A small radiator located inside the dashboard. Coolant flows through it, and the blower motor forces air across it to provide heat.
- Coolant Reservoir (Expansion Tank): This tank allows for expansion and contraction of the coolant as the engine heats up and cools down.
- Thermostat: Regulates engine temperature by controlling the flow of coolant to the radiator. Though not directly part of the heater hose circuit, its proper functioning is essential for the heater to work.
- Water Pump: Circulates coolant throughout the engine and heater core.
- Hose Clamps: Securely attach the hoses to the various components. These are commonly spring clamps or screw clamps.
Symbols Explained: Decoding the Diagram
Heater hose diagrams use standardized symbols to represent different components and connections. Here's a breakdown of the common symbols you might encounter:
- Solid Lines: Represent hoses or pipes carrying coolant. The thickness of the line might indicate the diameter of the hose, but this isn't always consistent.
- Dashed Lines: Often indicate vacuum lines or control cables, which are related to the heater system's controls but not the coolant flow itself.
- Arrows: Show the direction of coolant flow through the hoses. This is *critical* for proper connection.
- Rectangles/Squares: Usually represent components like the heater core, thermostat housing, or water pump. Sometimes they contain labels indicating the specific component.
- Circles: Might represent sensors (temperature sensors, for example) or fittings.
- Color Coding: Some diagrams use color coding to differentiate between hot (red) and cold (blue) coolant lines. However, not all diagrams use color, so don't rely on it exclusively.
- Component Labels: Look for abbreviations or full names that clearly identify each part (e.g., "Htr Core" for heater core, "W/P" for water pump).
Pay close attention to the arrow directions, as reversing the hoses can lead to poor heating performance or even damage to the system.
How It Works: The Flow of Heat
The heater system is a relatively simple loop. Here's how it works:
- The engine generates heat as it runs.
- The water pump circulates coolant through the engine block and cylinder head, absorbing this heat.
- Hot coolant is forced through the inlet heater hose to the heater core inside the dashboard.
- The blower motor forces air across the fins of the heater core, warming the air.
- The warmed air is directed into the cabin through the vents.
- Cooled coolant exits the heater core through the outlet heater hose and returns to the engine to be reheated.
- The thermostat regulates the engine temperature, ensuring that the coolant is hot enough for effective heating.
The coolant reservoir maintains proper coolant level and provides space for expansion as the coolant heats up.
Real-World Use: Troubleshooting Tips
Here are some common issues and how the heater hose diagram can help you diagnose them:
- No Heat:
- Check Coolant Level: Low coolant is the most common cause. The diagram helps you locate the coolant reservoir quickly.
- Check Hoses: Feel both heater hoses near the firewall after the engine has warmed up. If one is hot and the other is cold, the heater core may be clogged. The diagram shows you where these hoses are located.
- Check Thermostat: A faulty thermostat can prevent the engine from reaching operating temperature. While not on the diagram, the inlet hose connects near it.
- Coolant Leaks:
- Visual Inspection: Look for signs of coolant leaking from the hoses, connections, or the heater core itself (you might smell a sweet odor inside the cabin). The diagram shows you exactly where to look.
- Pressure Test: A cooling system pressure tester can help you locate leaks that are difficult to find.
- Overheating: While not directly related to the heater hoses themselves, overheating can damage them. Make sure the entire cooling system is functioning correctly.
Safety First: Handling Hot Coolant
Working on the cooling system involves dealing with hot coolant, which can cause severe burns. Always remember these safety precautions:
- Never open the cooling system (radiator cap or coolant reservoir) when the engine is hot. Allow the engine to cool down completely before working on it.
- Wear safety glasses and gloves to protect yourself from splashing coolant.
- If you spill coolant, clean it up immediately. It's toxic to animals.
- Be especially cautious when working near the exhaust manifold or other hot engine components.
- If you are unsure about anything, consult a qualified mechanic.
The thermostat housing and radiator are also areas where you must be extremely careful due to high temperatures and pressure.
Diagram Download
We have a detailed heater hose diagram specifically for the 2015 Chrysler 200 available for you to download. Having this resource at your fingertips will be invaluable for troubleshooting and repair. Good luck!