2015 Nissan Altima Rear Suspension Diagram
Understanding the 2015 Nissan Altima Rear Suspension: A Technical Deep Dive
The rear suspension of your 2015 Nissan Altima plays a critical role in ride comfort, handling, and overall vehicle safety. A solid understanding of its components and how they work together is invaluable, whether you're performing routine maintenance, diagnosing a problem, or even considering performance upgrades. This article provides a detailed look at the rear suspension diagram, explaining its key features, functionality, and practical applications. We have the diagram file available for download at the end of this article.
Why Understand the Diagram?
Access to and understanding of a rear suspension diagram offers several benefits. It enables you to:
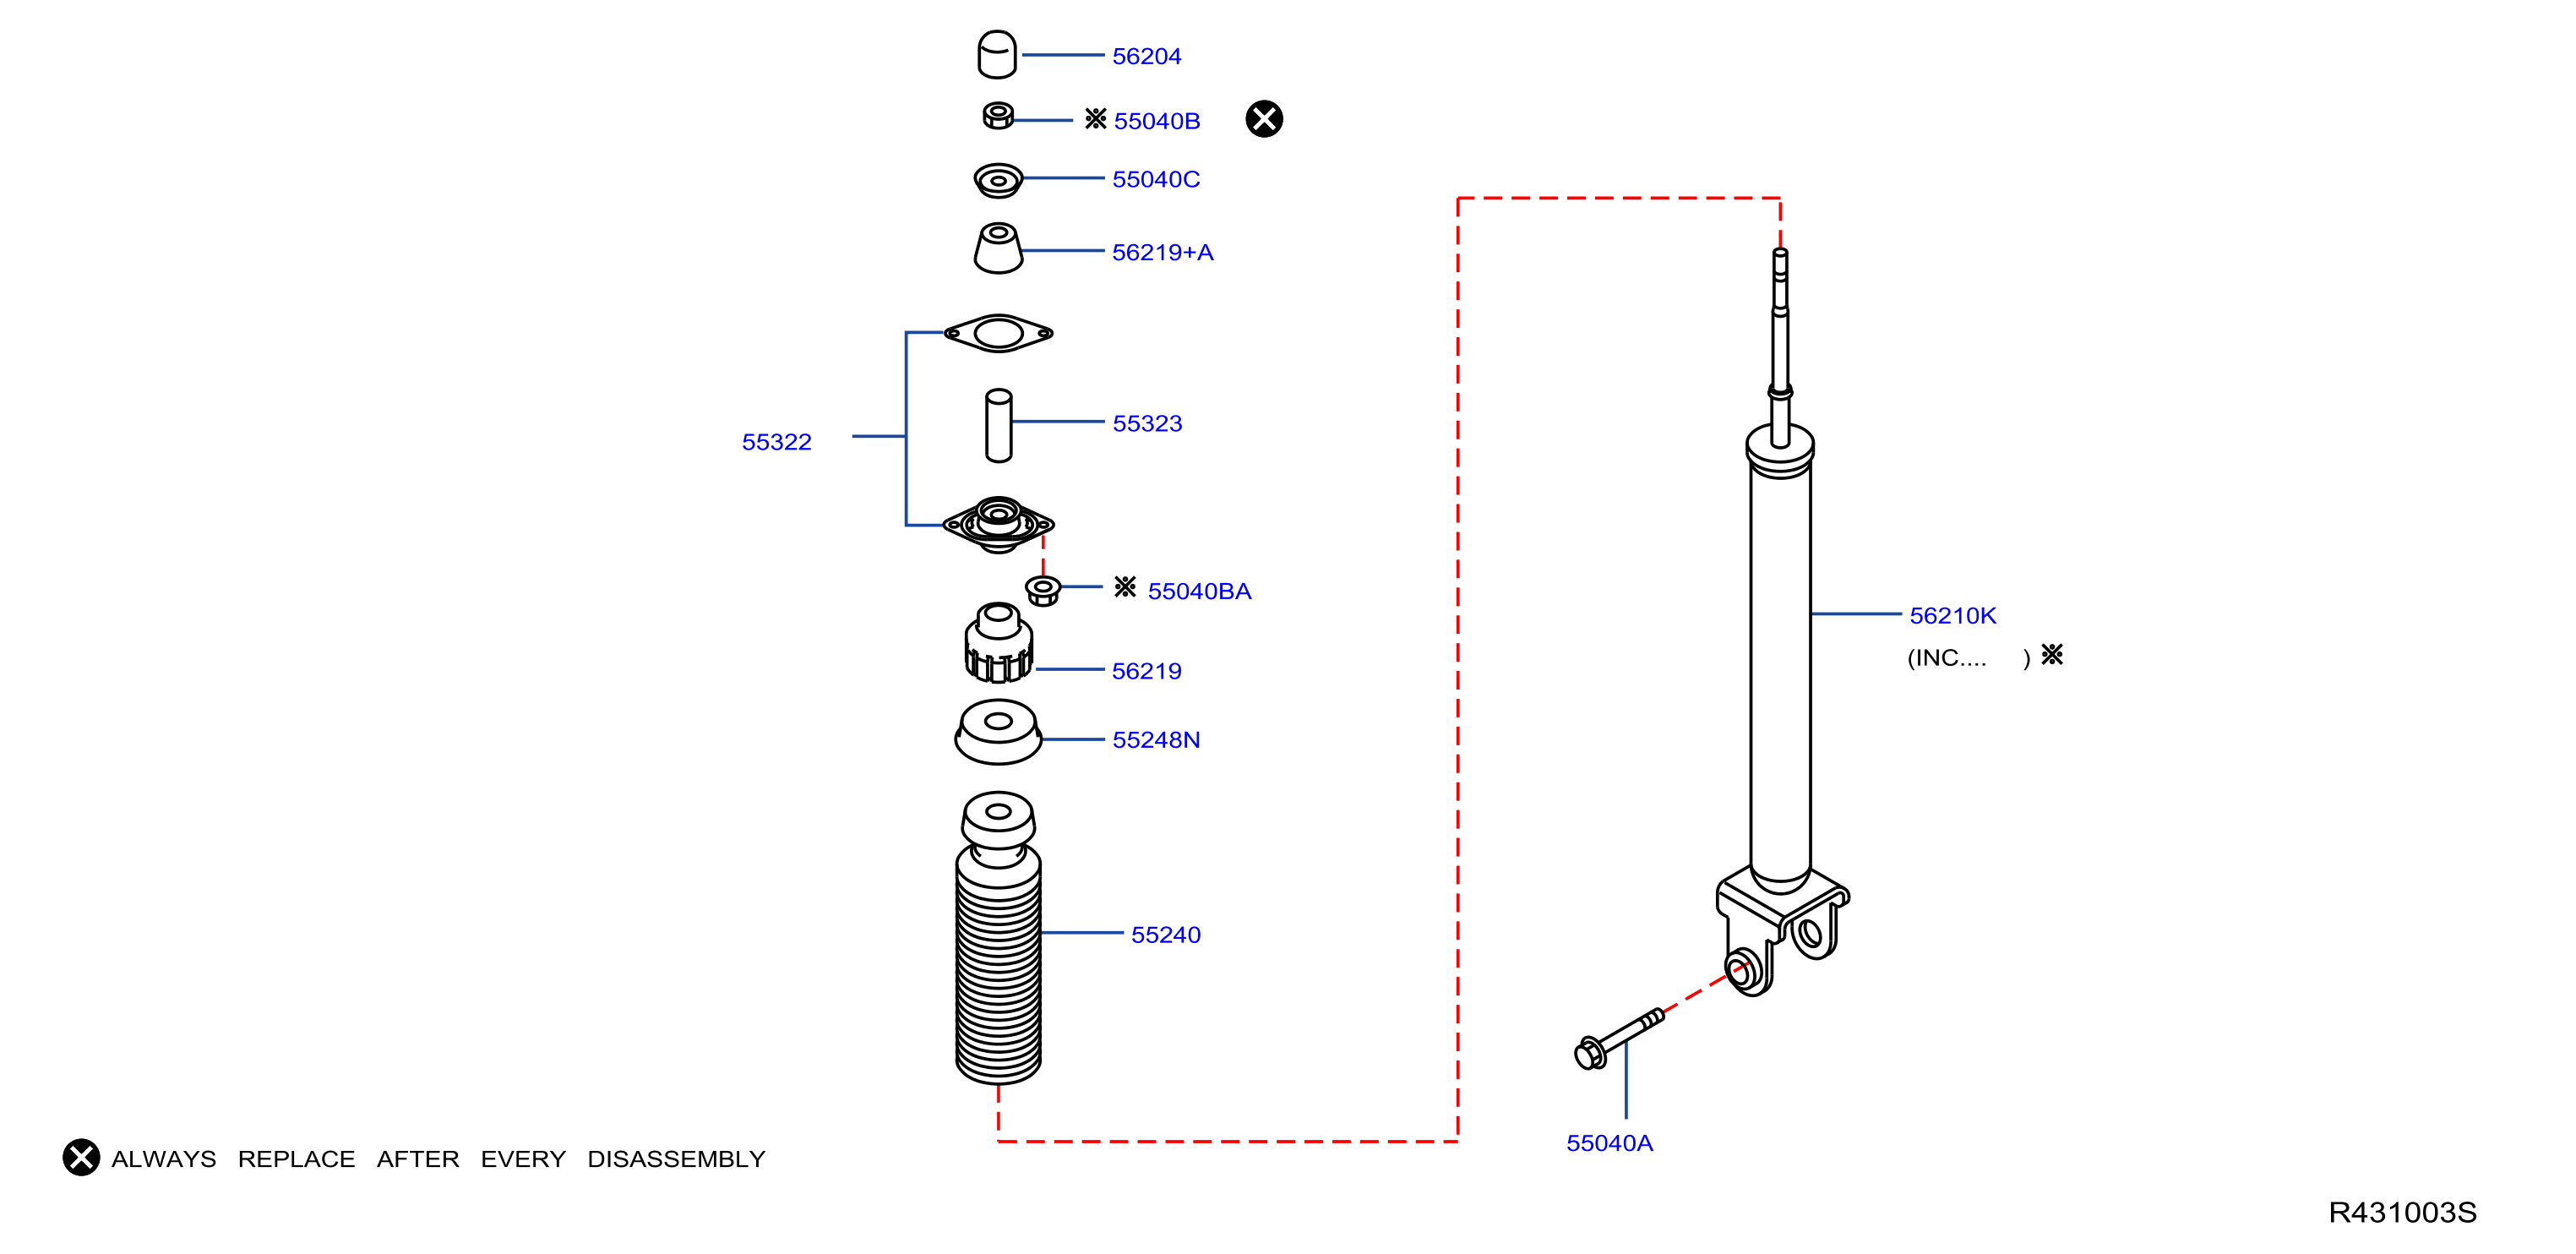
- Accurately identify components: No more guessing! The diagram provides a clear visual representation of each part, allowing for correct identification when ordering replacements or discussing repairs with a professional.
- Understand assembly: Seeing how components fit together helps you grasp the overall system functionality, making troubleshooting easier.
- Diagnose problems effectively: By comparing the diagram with the physical system, you can pinpoint potential issues such as worn bushings, damaged springs, or leaking shocks.
- Perform repairs confidently: Having a visual guide reduces the risk of errors during disassembly and reassembly.
- Plan modifications: If you're considering aftermarket upgrades, the diagram helps you assess compatibility and potential impact on other components.
Key Specs and Main Parts
The 2015 Nissan Altima utilizes a multi-link independent rear suspension. This design offers improved ride quality and handling compared to a simpler beam axle setup. It allows each wheel to react independently to road imperfections, minimizing the transfer of bumps and vibrations to the cabin.
Here's a breakdown of the major components:
- Control Arms: These are the horizontal links (usually three or more) that connect the wheel hub/knuckle to the vehicle's chassis. They control the wheel's movement in multiple directions. You'll typically find upper and lower control arms, often with varying lengths and mounting points.
- Wheel Hub/Knuckle: This is the central part that houses the wheel bearing and provides a mounting point for the brake caliper and wheel. It pivots, allowing the wheel to steer (though not in the rear of most passenger vehicles).
- Shock Absorbers (Dampers): These dampen oscillations from the springs, preventing the car from bouncing excessively after hitting a bump. They convert kinetic energy into heat, which is then dissipated. They are crucial for maintaining tire contact with the road.
- Coil Springs: These support the vehicle's weight and absorb vertical impacts from the road. They store energy when compressed and release it, creating a bouncing motion if not controlled by the shock absorbers.
- Stabilizer Bar (Sway Bar): This connects the left and right sides of the suspension. It resists body roll during cornering by transferring force from one side of the suspension to the other. Its primary function is to improve handling and stability.
- Bushings: These are rubber or polyurethane insulators that are fitted in the joints of the suspension system, and they are designed to absorb the energy and noise when the wheel bounces up and down, allowing for a quieter and smoother ride.
- Mounts: Rubber or urethane components that attach suspension parts to the vehicle's chassis. They isolate noise and vibration.
Deciphering the Diagram: Symbols and Conventions
Understanding the symbols and conventions used in the diagram is crucial for accurate interpretation. While specific diagrams may vary slightly, here are some common elements:
- Lines: Solid lines generally represent physical components, such as control arms or the sway bar. Dashed lines might indicate hidden components or assembly paths.
- Hatching/Shading: Different shading patterns may be used to differentiate between materials or highlight specific areas of interest, such as cross-sections.
- Arrows: Arrows indicate direction of movement, force, or fluid flow (if hydraulic components are involved).
- Numbers/Labels: Each component is typically labeled with a number or code that corresponds to a parts list or legend. Refer to the legend for detailed information about each part.
- Fasteners: Bolts, nuts, and screws are often represented by simplified symbols. The diagram may also indicate torque specifications for each fastener.
Pay close attention to the legend or key provided with the diagram. This will clarify the meaning of any unusual symbols or abbreviations.
How It Works: The Mechanics of the Multi-Link System
The multi-link rear suspension works by allowing each wheel to move vertically with minimal influence on the opposite wheel. When a wheel encounters a bump, the control arms pivot, allowing the wheel to move up and down. The coil spring absorbs the impact, while the shock absorber dampens the resulting oscillations. The numerous links provide greater control over wheel alignment and suspension geometry throughout the range of motion, leading to better handling and ride quality.
The stabilizer bar resists body roll during cornering by transferring force from the compressed (outer) side of the suspension to the extended (inner) side. This helps keep the vehicle level and improves stability. The multi-link design allows engineers to fine-tune the suspension's characteristics, such as roll steer (the tendency of the rear wheels to steer slightly during body roll), to optimize handling performance.
Real-World Use: Basic Troubleshooting
Here are some common rear suspension problems and how the diagram can help you troubleshoot them:
- Clunking Noises: Often caused by worn bushings in the control arms or stabilizer bar links. Visually inspect the bushings for cracks, tears, or excessive play. Use the diagram to locate the specific bushing you suspect is failing.
- Bouncing Ride: Indicates worn shock absorbers. Check for leaks or signs of damage. If the shocks are not effectively damping the spring oscillations, they need to be replaced.
- Uneven Tire Wear: Could be a sign of misaligned suspension components. The diagram can help you identify the adjustable points (if any) for alignment. However, a professional alignment is usually required to correct suspension geometry.
- Vehicle Leans Excessively in Turns: Suggests a problem with the stabilizer bar or its links. Inspect the links for damage or looseness. The bar itself could be broken (though less common).
Important: Always consult a repair manual specific to your vehicle for detailed troubleshooting procedures and torque specifications.
Safety Considerations
Working on the suspension can be dangerous if proper safety precautions are not taken. Always:
- Use jack stands: Never rely solely on a jack to support the vehicle. Place jack stands under the vehicle's frame or designated support points.
- Wear safety glasses: Protect your eyes from debris.
- Disconnect the battery: Reduces the risk of electrical shock, especially if working near ABS sensors.
- Be aware of spring compression: Coil springs store a significant amount of energy. Compressing or releasing them without the proper tools can be extremely dangerous. If you need to remove a coil spring, use a spring compressor designed for that purpose.
This is a particularly risky area. If you are not comfortable with this process, seek professional assistance.
- Torque fasteners correctly: Use a torque wrench to tighten fasteners to the manufacturer's specifications. Over-tightening or under-tightening can lead to component failure.
Suspension components are under significant stress. Inspect them regularly for signs of wear or damage, and replace them as needed to maintain safe handling and braking performance.
By understanding the 2015 Nissan Altima rear suspension diagram and the principles behind its operation, you'll be better equipped to maintain, diagnose, and repair your vehicle, saving you time and money in the long run.
Click on the link below to download the full rear suspension diagram for the 2015 Nissan Altima:
Download the 2015 Nissan Altima Rear Suspension Diagram