2017 Dodge Journey 3.6 Serpentine Belt Diagram
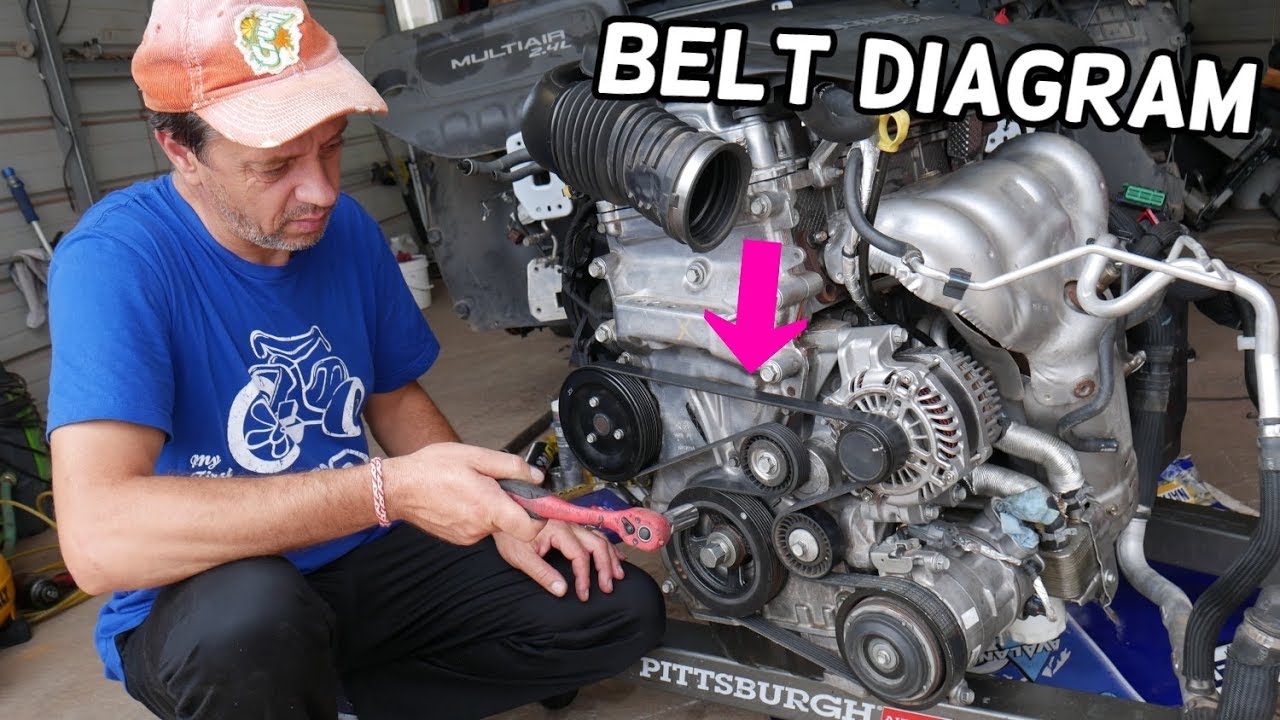
Alright, let's dive into the serpentine belt diagram for a 2017 Dodge Journey equipped with the 3.6L Pentastar V6 engine. This guide isn't just a pretty picture; it's your roadmap for understanding, maintaining, and troubleshooting a crucial component of your Journey's engine. Whether you're tackling a squealing belt, replacing a worn idler pulley, or simply deepening your automotive knowledge, having a clear understanding of the serpentine belt routing is essential.
Purpose of the Serpentine Belt Diagram
The serpentine belt diagram serves several critical purposes. Primarily, it provides a visual representation of how the belt should be routed around the various engine accessories. This is invaluable when:
- Replacing a broken or worn belt: If your belt snaps (and trust me, it happens), you'll need to know the correct path to route the new one. Without the diagram, you're essentially guessing, which can lead to improper installation and potential damage.
- Troubleshooting squealing or slipping belts: The diagram helps you visually inspect the belt's alignment and identify potential issues with pulleys or tensioners.
- Replacing pulleys or tensioners: Knowing the belt's path makes removing and reinstalling components much easier and ensures proper belt tension after the repair.
- General maintenance and learning: Understanding the system allows for informed preventative maintenance, potentially saving you from costly repairs down the road.
Key Specs and Main Parts
Before we dissect the diagram, let's review the major components and relevant specs:
Engine:
- 3.6L Pentastar V6 (commonly known as the "Pentastar").
Serpentine Belt:
- Material: Typically EPDM (Ethylene Propylene Diene Monomer) rubber for heat and wear resistance.
- Length: Specific to the 2017 Dodge Journey 3.6L, varying slightly based on equipment (A/C, etc.). While I can't give the exact length without access to real-time part lookup, a quick search using your VIN should provide the correct Gates, Dayco, or Goodyear part number and belt length.
Important Note: Using the wrong belt length can lead to either insufficient tension (slippage) or excessive tension (premature bearing wear).
Components Driven by the Serpentine Belt:
- Crankshaft Pulley (or Damper): The driving force of the system, connected directly to the engine's crankshaft.
- Alternator: Charges the battery and powers the vehicle's electrical system.
- Power Steering Pump: Provides hydraulic assistance for steering.
- Air Conditioning Compressor (A/C Compressor): Compresses refrigerant for the A/C system.
- Water Pump: Circulates coolant through the engine to prevent overheating.
- Idler Pulley(s): Smooth, non-driven pulleys used to guide the belt and maintain proper wrap around other pulleys.
- Belt Tensioner: A spring-loaded pulley that maintains consistent tension on the belt. A critical component for proper function and longevity.
Symbols on the Serpentine Belt Diagram
Serpentine belt diagrams are generally straightforward, but understanding the symbols is crucial:
- Solid Lines: Represent the path of the belt itself. The thicker the line, the easier it will be to trace.
- Arrows: Indicate the direction of belt travel. Pay close attention to these to ensure you're routing the belt correctly.
- Circles: Represent pulleys. Different sizes indicate different pulley diameters.
- Text Labels: Clearly label each pulley (e.g., "ALT" for Alternator, "P/S" for Power Steering, "CMPR" for Compressor, "IDLR" for Idler, "TENSNR" for Tensioner, "CRANK" for Crankshaft).
- Rough Surface Indication: Some diagrams use hatching or shading on the pulley circumference to indicate the grooved side of the pulley that contacts the ribbed side of the serpentine belt. The smooth side of the belt usually makes contact with smooth pulleys like the idler or tensioner pulley.
- Tensioner Location: The tensioner is typically denoted by a spring symbol or an arrow indicating the direction in which it applies tension.
How It Works
The serpentine belt system is ingeniously simple yet vital. The crankshaft pulley, driven by the engine, transfers rotational force to the belt. The belt, in turn, wraps around and drives the various engine accessories. The tensioner maintains consistent belt tension, preventing slippage and ensuring efficient operation. The idler pulleys provide optimal belt wrap and routing, maximizing contact with the driven components.
Think of it as a single continuous loop. When the engine is running, the crankshaft pulley spins, causing the serpentine belt to spin, which then spins all the other pulleys attached to the accessories. If any of these components seize or have excessive resistance, the belt can slip, squeal, or even break.
Real-World Use: Basic Troubleshooting
Here are some common scenarios where the serpentine belt diagram comes in handy:
- Squealing Belt: A common symptom indicating belt slippage. Use the diagram to inspect the belt for wear, cracks, or glazing. Also, check the tensioner for proper operation. Is it moving freely? Is the belt properly aligned on all pulleys? Misalignment can also cause squealing.
- Broken Belt: Obviously, you'll need a new belt. Use the diagram to correctly route the new belt. Make sure to inspect the pulleys for any damage that may have caused the belt to break.
- Accessory Failure: If an accessory (like the alternator) fails, it can put excessive strain on the belt, causing it to wear prematurely. Use the diagram to identify the affected component and plan the repair.
- Checking Belt Condition: Regularly inspect the belt for cracks, fraying, or missing ribs. The diagram helps you quickly locate and examine the entire belt's surface.
Safety Considerations
Working around a running engine is inherently dangerous. Here are some critical safety precautions:
- Never work on the serpentine belt system with the engine running unless absolutely necessary for diagnostic purposes. Even then, extreme caution is required.
- Disconnect the negative battery cable to prevent accidental starting of the engine.
- Keep hands, hair, and clothing clear of moving parts. The serpentine belt and pulleys spin at high speeds and can cause serious injury.
- Be aware of the radiator fan. It can cycle on even with the engine off, posing a significant risk. Many modern vehicles use electric fans that can activate unexpectedly.
- Wear safety glasses to protect your eyes from debris.
- Ensure adequate ventilation when working in an enclosed space.
The serpentine belt system, while seemingly simple, is crucial for your 2017 Dodge Journey's reliable operation. Understanding the diagram and the function of each component empowers you to perform essential maintenance and troubleshooting, saving you time and money.
For a downloadable copy of the diagram specifically tailored for your 2017 Dodge Journey 3.6L, please refer to the manufacturer's service manual. Because of copyright and licensing restrictions, we cannot directly provide a diagram download here. However, the information provided above coupled with your owner's manual should provide enough information to tackle most common repairs.