2017 Nissan Armada Fuse Box Diagram
The 2017 Nissan Armada, a robust and capable SUV, relies on a network of electrical circuits protected by fuses. Understanding the fuse box diagram for this vehicle is crucial for a range of tasks, from simple troubleshooting to more complex electrical modifications. This article serves as a comprehensive guide to the 2017 Armada's fuse box layout, symbols, and functionalities, empowering you to confidently tackle electrical issues and modifications.
Purpose of Understanding the Fuse Box Diagram
Why bother with the fuse box diagram? The answer lies in its utility. The diagram is essential for:
- Troubleshooting Electrical Problems: When an electrical component fails – a headlight, the radio, or even the power windows – the first suspect is often a blown fuse. The diagram helps you quickly locate the correct fuse and determine if it's the culprit.
- Performing Electrical Repairs: If you're replacing a faulty component or wiring, the diagram helps you understand the circuit's structure and identify the correct wires and connections.
- Adding Aftermarket Accessories: Installing accessories like aftermarket lighting, sound systems, or dash cams requires tapping into the vehicle's electrical system. The diagram aids in identifying suitable power sources and ensures that you're connecting to the correct circuits to avoid overloading the system.
- General Vehicle Maintenance: Familiarizing yourself with the fuse box and its components allows you to understand the vehicle's electrical architecture and perform basic maintenance tasks, such as replacing fuses preventatively.
Key Specs and Main Parts
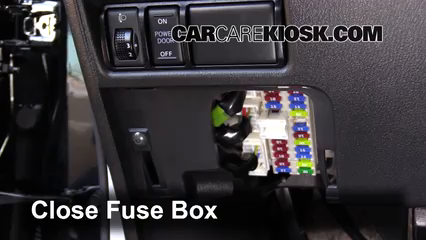
The 2017 Nissan Armada typically has multiple fuse boxes. The most important ones are usually located:
- Inside the Cabin: Often found on the driver's side, behind a panel near the dashboard, or underneath the steering wheel. This box generally houses fuses for interior components like the radio, power windows, dome lights, and instrument panel.
- Under the Hood (Engine Compartment): Located near the battery, this box contains fuses and relays for critical engine and drivetrain components like the fuel pump, ignition system, headlights, and cooling fan.
Key parts within these fuse boxes include:
- Fuses: These are sacrificial devices designed to protect circuits from overcurrent. They contain a thin metal strip that melts and breaks the circuit if the current exceeds a predetermined level. Fuses are rated in amperes (amps), indicating the amount of current they can handle before blowing.
- Relays: These are electromechanical switches that control high-current circuits using a low-current signal. Relays are commonly used to control components like headlights, starter motor, and air conditioning compressor.
- Fuse Puller: A small plastic tool used to safely remove and install fuses without damaging them. It's usually included in the fuse box.
- Spare Fuses: A selection of fuses with different amperage ratings, kept in the fuse box for replacements.
Understanding the Symbols and Layout
The fuse box diagram is essentially a map that identifies each fuse and relay and indicates the circuit it protects. Here's a breakdown of common elements:
- Fuse Number/Identifier: Each fuse is assigned a unique number or alphanumeric code. This code is referenced in the diagram.
- Amperage Rating: The amperage rating of each fuse is usually indicated next to the fuse number. It's crucial to replace a blown fuse with one of the same amperage rating to prevent damage to the circuit.
- Circuit Description: A brief description of the component or system the fuse protects (e.g., "Headlight (Right)," "Power Window (Driver)").
- Lines: Lines in the diagram represent electrical circuits. They connect fuses, relays, and components.
- Colors: Color coding on the wiring might be referenced in some diagrams. Knowing the wire colors helps identify specific wires within a harness.
- Icons: Specific icons may represent certain components or functions. For example, a light bulb icon might indicate a headlight circuit, while a speaker icon might represent the audio system.
Important Note: Always consult the owner's manual for the specific diagram for your 2017 Nissan Armada. There can be slight variations depending on the trim level and optional equipment.
How It Works: The Circuit Protection Mechanism
The fuse box serves as a central distribution point for electrical power and, more importantly, as a safety mechanism. Here's how it works:
- Power Distribution: The battery provides the primary source of electrical power. The fuse box distributes this power to various circuits throughout the vehicle.
- Overcurrent Protection: Each circuit is protected by a fuse. If a fault occurs (e.g., a short circuit, excessive current draw), the current in that circuit increases dramatically.
- Fuse Blows: The excessive current causes the thin metal strip inside the fuse to heat up and melt, breaking the circuit. This prevents the excessive current from damaging the components connected to that circuit.
- Circuit Isolation: By blowing the fuse, the faulty circuit is isolated from the rest of the electrical system, preventing further damage.
Relays, on the other hand, allow a low-current circuit (controlled by a switch in the cabin) to control a high-current circuit (powering the headlights, for example). This protects the switch from handling the full current load, extending its lifespan.
Real-World Use: Basic Troubleshooting Tips
Here are some basic troubleshooting tips using the fuse box diagram:
- Symptom Identification: Identify the component or system that's malfunctioning (e.g., the radio doesn't work).
- Diagram Consultation: Locate the fuse box diagram and find the fuse associated with the malfunctioning component.
- Fuse Inspection: Visually inspect the fuse. A blown fuse will typically have a broken or melted metal strip inside. If you can't easily see it, use a multimeter to check for continuity. A good fuse will show continuity; a blown fuse will not.
- Fuse Replacement: If the fuse is blown, replace it with a new fuse of the same amperage rating. Never use a fuse with a higher amperage rating, as this could overload the circuit and cause damage or even a fire.
- Testing: After replacing the fuse, test the component to see if it's working. If the fuse blows again immediately, there's likely a more serious problem in the circuit, such as a short circuit. Seek professional help in this case.
Safety Considerations
Working with automotive electrical systems can be hazardous. Here are some essential safety precautions:
- Disconnect the Battery: Before working on any electrical components, disconnect the negative (-) terminal of the battery to prevent accidental short circuits and electrical shocks.
- Work in a Well-Lit Area: Ensure you have adequate lighting to see clearly and avoid mistakes.
- Use Proper Tools: Use insulated tools to prevent electrical shocks.
- Identify High-Risk Components: Components like the airbag system, ABS (Anti-lock Braking System), and fuel injection system are sensitive and can be dangerous if handled improperly. If you're not comfortable working on these systems, seek professional assistance.
- Never Bypass a Fuse: Bypassing a fuse with a wire or other conductive material is extremely dangerous and can lead to a fire.
- Be Careful with Relays: Relays can get hot during operation. Allow them to cool down before handling them.
Working on your car's electrical system can be satisfying and save you money. Always put safety first and when in doubt, consult a qualified mechanic.
We have the 2017 Nissan Armada Fuse Box Diagram file ready for you to download. Having this diagram handy will prove invaluable during troubleshooting and modifications.