2019 Chevy Silverado Serpentine Belt Diagram
Welcome, fellow gearheads! Today, we're diving deep into the serpentine belt system of the 2019 Chevy Silverado. This isn't just about understanding a diagram; it's about empowering you to tackle repairs, diagnose issues, and truly understand how a vital part of your truck operates. Think of this as your trusted mechanic explaining the system, skipping the jargon where possible but giving you the technical details when they matter.
Purpose of Understanding the Serpentine Belt Diagram
Why bother with a serpentine belt diagram? Several reasons. First, if your Silverado's belt breaks (and it will eventually), you'll need to know the correct routing when replacing it. Incorrect routing can lead to component failure, poor performance, or even damage. Second, a diagram helps you diagnose problems. A squealing belt might be a tensioner issue, a worn pulley, or a misaligned component. With a diagram, you can systematically check each part. Third, for those modifying their Silverado, understanding the belt system is crucial when adding accessories like superchargers or upgraded alternators that require belt adjustments. Finally, it’s simply good automotive knowledge to possess. It can save you money, time, and the headache of a shop visit.
Key Specs and Main Parts of the 2019 Silverado Serpentine Belt System
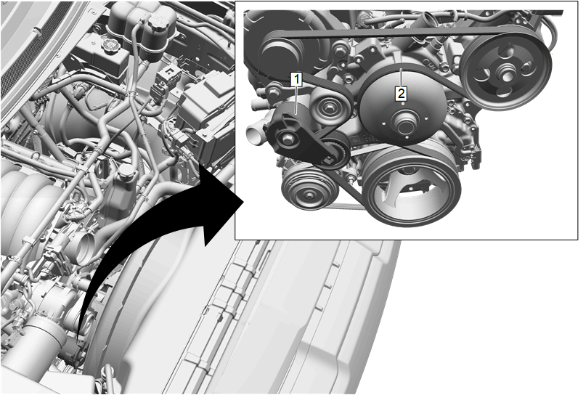
The 2019 Silverado came with a few engine options, and while the core principle remains the same, the belt routing can differ. We'll focus on the most common configurations, but always double-check against your specific engine. The main components include:
- Crankshaft Pulley (Damper): This is driven directly by the engine's crankshaft and provides the power to drive all other components.
- Alternator Pulley: The alternator generates electricity to power the truck's electrical system and charge the battery.
- Power Steering Pump Pulley: This powers the hydraulic system for the power steering.
- Water Pump Pulley: Circulates coolant throughout the engine to maintain proper temperature.
- Air Conditioning Compressor Pulley: Runs the A/C system.
- Idler Pulley(s): These are smooth pulleys used to guide the belt and provide the necessary wrap around other pulleys.
- Tensioner Pulley: This is a spring-loaded pulley that maintains the correct tension on the serpentine belt. This is a critical component; failure here is a common cause of belt issues.
- Serpentine Belt: The heart of the system, a single, continuous belt that drives all the accessories.
The belt itself is typically a multi-ribbed belt made of a reinforced rubber compound. Proper belt tension is crucial. Too loose, and it will slip and squeal. Too tight, and it can damage the bearings in the driven components.
Understanding the Serpentine Belt Diagram Symbols
A serpentine belt diagram isn't just a random drawing; it uses specific symbols to convey information. Here's a breakdown:
- Solid Lines: These represent the path of the outside (ribbed) surface of the serpentine belt.
- Dashed Lines: These represent the path of the inside (smooth) surface of the serpentine belt. This indicates the belt is wrapping around the back of a pulley.
- Arrows: Indicate the direction of rotation for each pulley. This is essential for understanding how the belt should be routed.
- Component Icons: Simplified drawings of each component (alternator, A/C compressor, etc.) are used to identify them on the diagram.
- Tensioner Symbol: The tensioner pulley is often indicated with a symbol representing a spring or a pivoting arm.
- Color Coding (if present): Some diagrams use colors to further differentiate the belt path or highlight specific components. Refer to the diagram's key if colors are used.
Understanding these symbols allows you to quickly interpret the diagram and visualize the belt's path.
How the Serpentine Belt System Works
The serpentine belt system is relatively straightforward. The crankshaft pulley, connected directly to the engine, spins as the engine runs. This rotational force is transferred to the serpentine belt, which wraps around all the other pulleys. The belt's friction against each pulley causes them to rotate, driving the accessories (alternator, power steering pump, water pump, A/C compressor). The tensioner pulley constantly applies pressure to the belt, preventing slippage and ensuring all accessories are driven efficiently. Think of it as a complex chain drive, but using a flexible belt instead of a chain.
The tensioner is especially important. It uses a spring-loaded arm to maintain constant tension on the belt. As the belt stretches over time, the tensioner automatically adjusts to compensate. A failing tensioner will lead to belt slippage, noise, and eventually, component failure. Listen for rattling or chirping sounds coming from the tensioner – that's often a sign it needs replacing.
Real-World Use: Basic Troubleshooting Tips
Here are some common issues and how the diagram can help:
- Squealing Belt: This often indicates a loose belt. Check the tensioner to see if it's functioning correctly. A worn or glazed belt can also cause squealing. The diagram shows the correct belt path; ensure it's routed properly.
- Belt Slippage: This can be caused by a worn belt, a faulty tensioner, or a contaminated pulley. Inspect the pulleys for oil or coolant leaks. The diagram helps you identify all the components that need inspection.
- Belt Breaking: This can be caused by a seized component, a misaligned pulley, or a worn belt. If a belt breaks repeatedly, inspect all pulleys for damage or misalignment. The diagram is essential for verifying proper alignment.
- Noisy Tensioner: A rattling or chirping noise coming from the tensioner indicates a failing bearing. Replace the tensioner assembly. The diagram shows the tensioner's location.
Before replacing any component, always visually inspect the entire system. Look for cracks, wear, and misalignment. A good flashlight and a mechanic's stethoscope can be invaluable tools for diagnosis.
Safety Considerations
Working on the serpentine belt system can be dangerous. Here are some key safety points:
- Disconnect the Battery: Always disconnect the negative battery cable before working on any electrical or mechanical components.
- Hot Engine: Never work on the serpentine belt system while the engine is hot. Allow the engine to cool completely before starting any repairs.
- Moving Parts: Never put your hands or tools near the serpentine belt while the engine is running. The belt and pulleys rotate at high speeds and can cause serious injury.
- Protective Gear: Wear safety glasses to protect your eyes from debris.
The crankshaft pulley is a high-torque component. When removing or installing it, use the correct tools and torque specifications. Improper tightening can damage the engine.
Also be aware that the tensioner is spring-loaded. When releasing the tension, be sure to use the correct tool and follow the manufacturer's instructions to avoid injury.
Accessing the 2019 Chevy Silverado Serpentine Belt Diagram
We have a detailed, downloadable PDF file of the 2019 Chevy Silverado Serpentine Belt Diagram available. This diagram includes multiple engine options and clear visual representations of the belt routing. Having this diagram on hand is a valuable asset for any Silverado owner. Look for the link below to download it.
Please remember that this article provides general guidance. Always consult your vehicle's service manual for specific instructions and torque specifications. Working on your vehicle can be dangerous if not done properly. If you're not comfortable performing the repairs yourself, it's best to consult a qualified mechanic.