97 Ford Ranger Stereo Wiring Diagram
So, you’re staring at a tangled mess of wires behind the dash of your trusty ’97 Ford Ranger and thinking, "There's gotta be a better way!" You're right. Understanding the 1997 Ford Ranger stereo wiring diagram is essential whether you're replacing a blown speaker, upgrading to a modern head unit, diagnosing a mysterious audio issue, or simply trying to understand the electrical anatomy of your truck. This guide will break down the diagram, making it easier to navigate and use for your projects.
Purpose: Why Bother with the Diagram?
Why should you care about this seemingly complex web of wires? The 1997 Ford Ranger stereo wiring diagram serves as your roadmap to the audio system. It's crucial for several reasons:
- Repairs and Troubleshooting: Identifying a short circuit, a broken wire, or a malfunctioning speaker becomes significantly easier with the diagram. You can trace circuits and pinpoint the exact location of the problem.
- Upgrading the Head Unit: Swapping out the factory radio for a modern unit with features like Bluetooth, navigation, or Apple CarPlay requires connecting the new unit's wires to the correct wires in your Ranger. The diagram shows you exactly which wire is power, ground, speaker outputs, and more, preventing potentially damaging mistakes.
- Adding Amplifiers and Speakers: Expanding your audio system with aftermarket amplifiers and speakers means tapping into the existing wiring. The diagram helps you identify the speaker wires and the remote turn-on lead for the amplifier.
- Learning Automotive Electrical Systems: Even if you're not actively working on your stereo, understanding the wiring diagram provides valuable insight into how automotive electrical systems function.
Key Specs and Main Parts of the System
Before diving into the diagram itself, let's identify the key components and specifications:
- Head Unit (Radio): The heart of the system, providing the user interface, amplification, and signal processing. The '97 Ranger likely had a basic AM/FM radio with an optional cassette player or CD player.
- Speakers: Typically, the Ranger came with two speakers in the front doors. Some models might have included rear speakers as well. The speaker impedance (resistance to AC current, measured in ohms) is crucial when replacing them. Typically, factory speakers are 4 ohms.
- Wiring Harness: The collection of wires that connect the head unit to the speakers, power source, ground, and other components. The factory harness uses specific colors for each function (more on this later).
- Antenna: Receives radio signals.
- Fuse: A crucial safety component that protects the stereo system from overcurrent. It's located in the fuse box.
Important Specification: Voltage. The Ford Ranger operates on a 12V DC electrical system. All aftermarket components must be compatible with this voltage. Incorrect voltage can damage the stereo or the vehicle's electrical system.
Symbols: Deciphering the Wiring Diagram
Wiring diagrams use standardized symbols to represent electrical components and connections. Understanding these symbols is key to interpreting the diagram:
- Solid Lines: Represent wires. Thicker lines generally indicate wires carrying higher current.
- Dashed Lines: May represent shielding or connections to ground.
- Circles: Often represent connection points or terminals.
- Squares: Can represent components or connectors.
- Resistor Symbol (Zigzag Line): Represents a resistor, which limits current flow.
- Capacitor Symbol (Two Parallel Lines): Represents a capacitor, which stores electrical energy.
- Ground Symbol (Series of Horizontal Lines): Represents a connection to the vehicle's chassis, providing a path for current to return to the battery.
- Fuse Symbol: Represents a fuse, often a small rectangle with a line through it.
Color Codes
The color codes used in the wiring diagram are equally important. Ford used a consistent color scheme for its wiring, although slight variations may exist depending on the specific trim level and options of your Ranger. Here are some common color codes you'll likely encounter:
- Red: Typically indicates a constant +12V power source (battery).
- Yellow: Often indicates a switched +12V power source (ignition).
- Black: Always indicates ground.
- White/Light Green: Often Used for illumination.
- Speaker Wires: A pair of wires will connect to each speaker. Common colors include:
- White: Left Front (+)
- White/Black: Left Front (-)
- Gray: Right Front (+)
- Gray/Black: Right Front (-)
- Green: Left Rear (+) (if equipped)
- Green/Black: Left Rear (-) (if equipped)
- Violet: Right Rear (+) (if equipped)
- Violet/Black: Right Rear (-) (if equipped)
Important Note: Always verify wire colors with a multimeter before making any connections. Wire colors can fade or be inconsistent, especially in older vehicles.
How It Works: Tracing the Circuit
The stereo system works by receiving power from the vehicle's battery, processing audio signals, and amplifying those signals to drive the speakers. The wiring diagram shows how these components are interconnected.
Power Circuit: The red wire provides constant power to the head unit, allowing it to retain memory (station presets, clock settings). The yellow wire provides switched power, turning the head unit on and off with the ignition. A fuse protects this circuit from overcurrent.
Ground Circuit: The black wire provides a return path for the current to the battery. A good ground connection is essential for proper operation. A loose or corroded ground can cause all sorts of audio problems, from buzzing and distortion to complete failure.
Speaker Circuits: The speaker wires carry the amplified audio signal from the head unit to the speakers. Each speaker has a positive (+) and a negative (-) terminal. Connecting the wires with the correct polarity (positive to positive, negative to negative) is crucial for proper sound quality. Reverse polarity can cause phase cancellation, resulting in weak bass and a muddy sound.
Real-World Use: Basic Troubleshooting Tips
Here are some common issues and how the wiring diagram can help you diagnose them:
- No Power to the Head Unit: Check the fuse first. If the fuse is blown, replace it with one of the same amperage. If the fuse blows repeatedly, there's likely a short circuit in the wiring. Use the diagram to trace the power and ground wires and look for damaged insulation or pinched wires.
- One Speaker Not Working: Check the speaker connections first. If the connections are good, use a multimeter to check the speaker wire for continuity (a complete circuit). If there's no continuity, the wire is broken. You can also test the speaker itself with a multimeter to see if it's blown.
- Distorted Sound: Distorted sound can be caused by a blown speaker, a loose connection, or a problem with the head unit or amplifier. Use the diagram to trace the speaker wires and check for loose connections or damaged wires.
- Excessive Noise (Buzzing or Hissing): Noise can be caused by a poor ground connection, a ground loop, or interference from other electrical components. Ensure the head unit and amplifier (if applicable) have good ground connections. You can also try rerouting the speaker wires to avoid running them near power wires.
Safety: Highlighting Risky Components
Working with automotive electrical systems can be dangerous if you're not careful. Here are some safety precautions to keep in mind:
- Disconnect the Battery: Always disconnect the negative (-) terminal of the battery before working on any electrical component. This will prevent accidental short circuits and potential electrocution.
- Use a Multimeter: A multimeter is an essential tool for troubleshooting electrical problems. Use it to check for voltage, continuity, and resistance.
- Don't Cut Corners: Use proper wiring connectors and crimping tools to ensure secure and reliable connections. Avoid using electrical tape as a permanent solution. Solder and heat shrink tubing are preferred for long-lasting repairs.
- Be Aware of Airbag Systems: The '97 Ranger may have airbags. Be extremely careful when working near airbag components, as accidental deployment can cause serious injury. Consult a service manual before working on airbag systems.
Remember, the fuse is there to protect the electrical system. Bypassing or using a higher amperage fuse can lead to a fire.
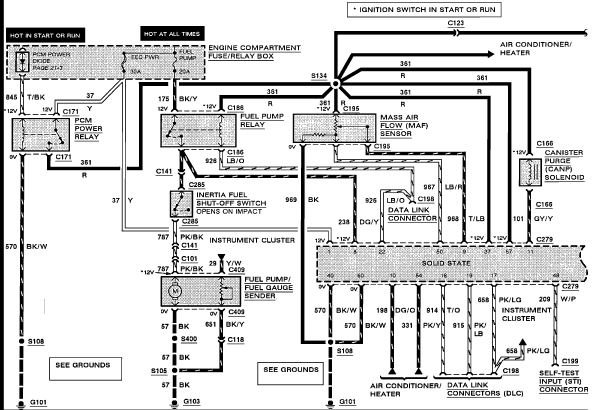
We have the complete 1997 Ford Ranger stereo wiring diagram available for download. This detailed diagram will provide you with the specific wire colors, connector locations, and circuit paths for your truck's audio system. Armed with this diagram and the knowledge you've gained in this guide, you'll be well-equipped to tackle any stereo-related project on your '97 Ranger.