
99 Chevy Silverado Brake Line Diagram
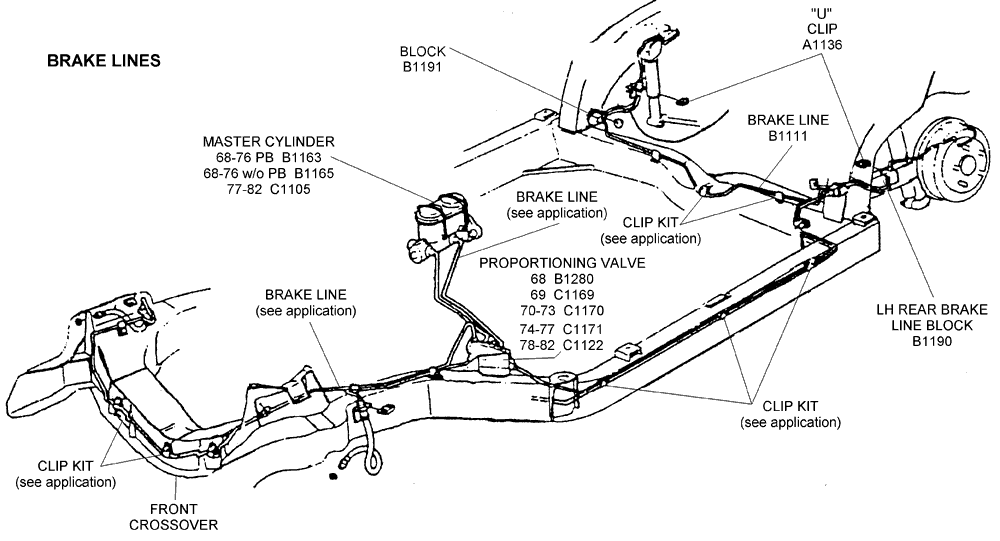
Let's dive deep into the brake system of your 1999 Chevy Silverado. A thorough understanding of the brake line diagram is crucial for anyone tackling repairs, upgrades, or even just routine maintenance. This isn't just about stopping your truck; it's about doing it safely and reliably. This article will provide a detailed breakdown of the 99 Silverado brake line diagram, empowering you to diagnose issues, perform repairs, and enhance your understanding of your vehicle's braking system. We have the diagram available for download to make this process even easier, look for the link at the end of this article.
Purpose of a Brake Line Diagram
The brake line diagram serves as a roadmap for the entire braking system. Its primary purposes include:
- Troubleshooting: Identifying leaks, blockages, or damage within the brake lines.
- Repair: Guiding the correct routing and connections of new or replacement brake lines.
- Upgrades: Planning and executing brake system modifications, such as installing stainless steel lines or larger calipers.
- Understanding: Providing a comprehensive visual representation of how the braking system functions.
Without a clear understanding of the diagram, you risk misconnecting lines, introducing air into the system, or creating other potentially dangerous problems. This document provides a vital aid in safe and effective work on your brake system.
Key Specs and Main Parts
The 1999 Chevy Silverado typically utilizes a hydraulic braking system with ABS (Anti-lock Braking System), although some base models may lack ABS. Understanding the key components and their specifications is essential.
Main Components:
- Master Cylinder: Located under the hood, this is the heart of the system. It converts mechanical force from the brake pedal into hydraulic pressure. Dual master cylinders are common, providing separate circuits for front and rear brakes for added safety.
- Brake Lines: These are steel (or sometimes copper-nickel alloy) tubes that carry brake fluid from the master cylinder to the wheels. They're designed to withstand high pressure.
- Brake Hoses: Flexible rubber (or braided stainless steel) hoses connect the rigid brake lines to the calipers at the wheels. These hoses allow for suspension movement.
- Brake Calipers: These house the brake pads and pistons. When hydraulic pressure is applied, the pistons push the brake pads against the rotors, creating friction and slowing the vehicle.
- Brake Rotors (Discs): These are the rotating discs attached to the wheels, against which the brake pads press.
- Brake Drums (Rear, some models): Some Silverados, especially older models, use drum brakes on the rear wheels. Drums enclose the brake shoes, which are pressed outward against the inner surface of the drum.
- Wheel Cylinders (Rear drum brakes): These small cylinders are located inside the rear brake drums. They convert hydraulic pressure into mechanical force to push the brake shoes outward.
- ABS Module (if equipped): This electronic control unit (ECU) monitors wheel speed and modulates brake pressure to prevent wheel lockup during hard braking. It includes hydraulic accumulators and valves.
- Proportioning Valve: This valve regulates the brake pressure applied to the rear wheels, preventing them from locking up prematurely during hard braking. It ensures a balanced braking force distribution.
Key Specifications:
- Brake Fluid Type: Typically DOT 3 or DOT 4 (refer to your owner's manual or the master cylinder cap for the correct type). Using the wrong fluid can damage the system.
- Brake Line Material: Primarily steel, but some aftermarket upgrades use stainless steel or copper-nickel alloy (CuNi).
- Brake Line Diameter: Varies depending on the section of the line, but common sizes are 3/16" and 1/4".
- Brake Hose Material: Rubber or braided stainless steel. Stainless steel offers improved durability and resistance to expansion under pressure.
Understanding Symbols and the Diagram
Brake line diagrams use a standardized set of symbols to represent different components and connections. Here's a breakdown of common symbols:
- Solid Lines: Represent brake lines carrying hydraulic fluid.
- Dotted Lines: May represent vacuum lines (for power brakes) or electrical connections.
- Circles: Typically indicate connections or junctions.
- Rectangles: Often represent components like the master cylinder, ABS module, or proportioning valve.
- Triangles: May indicate check valves or other specialized components.
While color-coding is not universally standardized, some diagrams use colors to distinguish between different circuits (e.g., front vs. rear brakes). Refer to the legend of the specific diagram you are using.
How the System Works
The brake system operates on the principle of Pascal's Law, which states that pressure applied to a confined fluid is transmitted equally in all directions. Here's a simplified explanation of how the 1999 Silverado's brake system works:
- Pedal Application: When you press the brake pedal, you push a piston in the master cylinder.
- Hydraulic Pressure: This movement creates hydraulic pressure in the brake lines.
- Pressure Transmission: The hydraulic pressure travels through the brake lines and hoses to the calipers (and wheel cylinders in drum brake systems).
- Brake Application:
- Disc Brakes: In disc brakes, the pressure forces the caliper pistons to clamp the brake pads against the rotor, creating friction and slowing the wheel.
- Drum Brakes: In drum brakes, the pressure forces the wheel cylinder pistons to push the brake shoes outward against the inside of the drum, creating friction.
- ABS Intervention (if equipped): If the ABS module detects a wheel locking up, it rapidly modulates the brake pressure to that wheel, preventing skidding and maintaining steering control.
- Proportioning: The proportioning valve adjusts the brake pressure between the front and rear wheels to optimize braking balance and prevent rear wheel lockup.
Real-World Use and Basic Troubleshooting
A brake line diagram is invaluable for diagnosing and repairing brake system problems. Here are a few common issues and how the diagram can help:
- Brake Fluid Leaks: Use the diagram to trace the brake lines and hoses, checking for leaks at connections, cracks, or damage.
- Spongy Brake Pedal: This often indicates air in the brake lines. The diagram helps you identify the bleed screws on the calipers and wheel cylinders for proper bleeding.
- Brake Pedal Goes to the Floor: This could be a sign of a major leak, a failing master cylinder, or a problem with the ABS module. The diagram helps you isolate the faulty component.
- Uneven Braking: This could be caused by a stuck caliper, a faulty proportioning valve, or contaminated brake pads. The diagram can help you trace the lines to each wheel and identify potential problem areas.
Always start with a visual inspection. Look for leaks, damaged lines, and worn components. Use the diagram to guide your inspection and ensure you're checking all relevant areas.
Safety Considerations
Working on brake systems is inherently dangerous due to the high pressures involved and the critical importance of proper function. Here are some key safety precautions:
- Use Proper Tools: Use flare nut wrenches to loosen brake line fittings. Standard wrenches can easily round off the nuts.
- Wear Safety Glasses: Brake fluid is corrosive and can cause serious eye damage.
- Dispose of Brake Fluid Properly: Brake fluid is hazardous waste and should not be poured down the drain.
- Bleed Brakes Thoroughly: Ensure all air is removed from the system after opening any brake line.
- Test Brakes Thoroughly: After any brake work, perform a thorough test in a safe environment to ensure the system is functioning correctly.
- ABS Module Caution: The ABS module contains high-pressure accumulators that can be dangerous if not handled properly. Refer to the service manual for specific instructions on working with the ABS module. Releasing this pressure improperly could result in serious injury.
Brake systems are crucial for safe vehicle operation. If you are not comfortable performing brake work, it's best to consult a qualified mechanic. Always prioritize safety.
We hope this detailed explanation empowers you to better understand and work on your 1999 Chevy Silverado's brake system. Remember, safety is paramount!
Download the 1999 Chevy Silverado Brake Line Diagram: [Insert Download Link Here - Placeholder]