Bulldog Security Remote Start Wiring Diagram
So, you're diving into the world of remote car starters and you've got a Bulldog Security system in mind? Excellent choice. This article will break down the Bulldog Security remote start wiring diagram, acting as your roadmap to a successful installation or a clearer understanding of how your system works. Whether you're troubleshooting an issue, planning a new install, or just want to know what's under the hood, this guide will equip you with the knowledge you need. We’re assuming you’re comfortable with basic automotive electrical concepts – voltage, current, resistance, and the use of a multimeter. If not, brush up on those basics first!
Why This Diagram Matters
A wiring diagram isn't just a pretty picture; it's the Rosetta Stone of your remote start system. Without it, you're essentially flying blind. Here's why it's crucial:
- Installation: The diagram shows exactly where each wire needs to connect in your vehicle's electrical system. Forget guesswork; this is precise and essential.
- Troubleshooting: When your remote start malfunctions, the diagram helps you trace circuits, identify faulty connections, and pinpoint the problem area.
- Customization: If you want to add features or integrate your remote start with other systems, the diagram is the foundation for safe and effective modifications.
- Understanding: Even if you don't plan on doing any work yourself, the diagram provides a deep understanding of how the system interacts with your vehicle.
Key Specs and Main Parts
Before we dive into the visual representation, let's define the key components you'll find on a typical Bulldog Security remote start wiring diagram. These are the main actors in our automotive electrical drama:
- Remote Start Module: The brain of the operation. This unit receives the signal from your remote and controls the starting sequence. It often contains the immobilizer bypass circuitry.
- Wiring Harness: A bundle of wires connecting the remote start module to various points in your vehicle. Each wire is color-coded and serves a specific function.
- Ignition Switch Wires: These wires connect to the ignition switch and provide power to the necessary circuits to start the engine (ignition, starter, accessory). You'll see wires for:
- Ignition 1 & 2: Supplies power to the ignition system when the key is in the "on" or "start" position.
- Starter: Activates the starter motor.
- Accessory: Powers accessories like the radio and wipers.
- Ground Wire: Connects the system to the vehicle's chassis, providing a return path for current. A good, clean ground is critical.
- Power Wires: Usually fused and connected directly to the battery or a constant power source in the vehicle. These provide the necessary power for the module to operate.
- Hood Pin Switch: A safety feature that prevents the remote start from working if the hood is open.
- Brake Shut-off Wire: Another safety feature; pressing the brake pedal deactivates the remote start.
- Tachometer Wire (Tach Signal): This wire monitors the engine's RPM (revolutions per minute) to ensure it's running properly after the remote start sequence. Some newer systems use voltage or data-based tach signals.
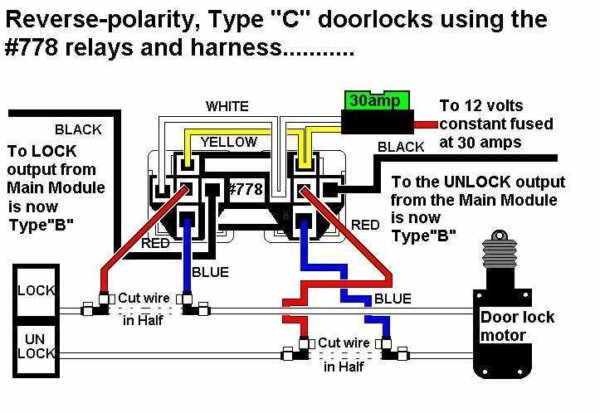
- Door Lock/Unlock Wires (Optional): These wires connect to the vehicle's door lock system, allowing you to control the locks with the remote.
Decoding the Symbols: A Visual Language
Wiring diagrams use standardized symbols to represent electrical components and connections. Understanding these symbols is essential for interpreting the diagram correctly.
- Lines: Lines represent wires. The thickness of the line usually doesn't indicate wire gauge in these types of diagrams.
- Colors: Each wire is assigned a specific color (e.g., red, black, blue, yellow). This color-coding is extremely important for identifying the correct wires in your vehicle. The diagram should have a color code legend.
- Circles/Dots: Where lines intersect with a dot represents a connection. If lines cross without a dot, it means they are simply passing each other and are not electrically connected.
- Rectangles: Typically represent components like the remote start module, relays, or fuses.
- Ground Symbol: Looks like a series of decreasing horizontal lines connected to a vertical line. This indicates a connection to the vehicle's chassis ground.
- Fuse Symbol: A squiggly line inside a rectangle.
- Relay Symbol: Shows the relay coil and the switch contacts.
Pay close attention to the wire colors and their corresponding functions. Mismatched connections can lead to system malfunctions or even damage to your vehicle's electrical system.
Bulldog Security diagrams are generally very straightforward, but always cross-reference with your vehicle's specific wiring information. A resource like the12volt.com can be invaluable.
How It Works: The Remote Start Sequence
Now, let's walk through the typical remote start sequence and how the wiring diagram illustrates it:
- Remote Activation: You press the remote start button on your key fob.
- Signal Transmission: The remote sends a radio frequency (RF) signal to the remote start module.
- Module Activation: The module receives the signal and begins the starting sequence.
- Safety Checks: The module checks the hood pin switch and brake shut-off wire to ensure it's safe to start the vehicle.
- Immobilizer Bypass: If your vehicle has an immobilizer system (which prevents theft by disabling the ignition), the remote start module activates the bypass circuit. The wiring diagram will show how this circuit connects to the vehicle's immobilizer system (often through a separate data module).
- Ignition Activation: The module sends voltage to the ignition 1, ignition 2, and accessory wires, mimicking the turning of the key to the "on" position.
- Starter Activation: The module activates the starter wire, engaging the starter motor to crank the engine.
- Tach Signal Monitoring: The module monitors the tach signal to verify that the engine has started. If the engine doesn't start after a certain number of attempts, the module will stop the sequence.
- Run Mode: Once the engine is running, the module keeps the ignition and accessory wires powered, allowing the vehicle to run until the remote start timer expires or you press the brake pedal.
The wiring diagram shows how each of these steps is implemented through specific wire connections. Trace the circuits on the diagram to understand the flow of electricity and the role of each component.
Real-World Use: Basic Troubleshooting Tips
Remote start systems can be finicky. Here are a few common issues and how the wiring diagram can help you troubleshoot them:
- Remote start doesn't work at all: Check the power and ground connections to the remote start module. Use a multimeter to verify that you have 12V at the power wire and a good ground connection. Also, check the fuse on the power wire.
- Engine cranks but doesn't start: Check the immobilizer bypass circuit. Make sure the bypass module is properly connected and programmed. The tach signal wire connection and programming is also suspect.
- Engine starts and then shuts off immediately: The tach signal may not be properly connected or programmed. Verify the connection to the tach wire and reprogram the tach signal if necessary.
- Remote start works intermittently: Check all wire connections for loose or corroded connections. Pay particular attention to ground connections.
- Hood pin switch issue: If the system only works sometimes, or not at all, check the hood pin switch. Make sure it's properly installed and that the wiring is intact.
Always refer to the wiring diagram to identify the relevant circuits and components for each problem. Use a multimeter to test voltages and continuity to pinpoint the source of the issue. Remember to disconnect the negative battery terminal before working on any electrical components.
Safety First: Handle with Care
Working with automotive electrical systems can be dangerous if you're not careful. Here are some safety precautions to keep in mind:
- Disconnect the Battery: Always disconnect the negative battery terminal before working on any electrical components. This will prevent accidental shorts and electrical shocks.
- Use a Multimeter: A multimeter is your best friend for diagnosing electrical problems. Use it to test voltages, continuity, and resistance.
- Proper Wire Connections: Use proper crimping tools and connectors to ensure secure and reliable wire connections. Avoid using twist-on wire connectors (wire nuts) in automotive applications; they are not designed for the vibration and temperature changes of a vehicle.
- Fuse Protection: Always use fuses of the correct amperage rating to protect circuits from overcurrent. Replacing a blown fuse with a higher amperage fuse can cause a fire.
- Airbag Systems: Be extremely careful when working near airbag systems. Consult your vehicle's service manual for instructions on disabling the airbag system before working in that area. Airbags can deploy unexpectedly and cause serious injury.
- Fuel System: Be aware of the fuel system. Avoid sparks or open flames near fuel lines or the fuel tank.
Working with the vehicle's CAN bus system can be complex and potentially damaging if not done correctly. If your system requires CAN bus integration, consider consulting with a professional installer.
By carefully studying the Bulldog Security remote start wiring diagram and following these guidelines, you can successfully install or troubleshoot your remote start system. Remember to take your time, double-check your connections, and prioritize safety. Good luck!
We have the specific Bulldog Security remote start wiring diagram file (in PDF format). Please contact us if you need it for your car model!