Chevrolet Chevy 4 Wire Alternator Wiring Diagram
For the intermediate car owner or DIY mechanic diving into electrical projects, understanding your alternator wiring is crucial. Specifically, the Chevrolet (Chevy) "4-wire" alternator, a common configuration on many older GM vehicles, presents both opportunities for repair and modification, as well as potential pitfalls if mishandled. This guide will break down the 4-wire alternator wiring diagram, explaining its components, function, and practical applications. We have a downloadable wiring diagram available at the end of this article, feel free to download it.
Purpose of Understanding the Chevy 4-Wire Alternator Diagram
Why bother learning this stuff? Several reasons:
- Troubleshooting Charging Issues: The most common application. Is your battery not charging? Is it constantly being overcharged? Understanding the wiring allows you to pinpoint the problem – a faulty wire, a bad connection, or an issue within the alternator itself.
- Upgrading or Modifying Your Electrical System: Installing a new stereo system, adding auxiliary lighting, or converting to an electric fan can all impact your charging system. Knowing your alternator's wiring lets you safely integrate these modifications.
- Swapping Engines: When swapping engines, particularly across different vehicle platforms, you need to ensure the alternator wiring is compatible with your new setup. Understanding the diagram enables you to make necessary adjustments.
- General Automotive Knowledge: Simply put, understanding the electrical system is a fundamental skill for any serious car enthusiast. The alternator is a vital component.
Key Specs and Main Parts of a 4-Wire Alternator System
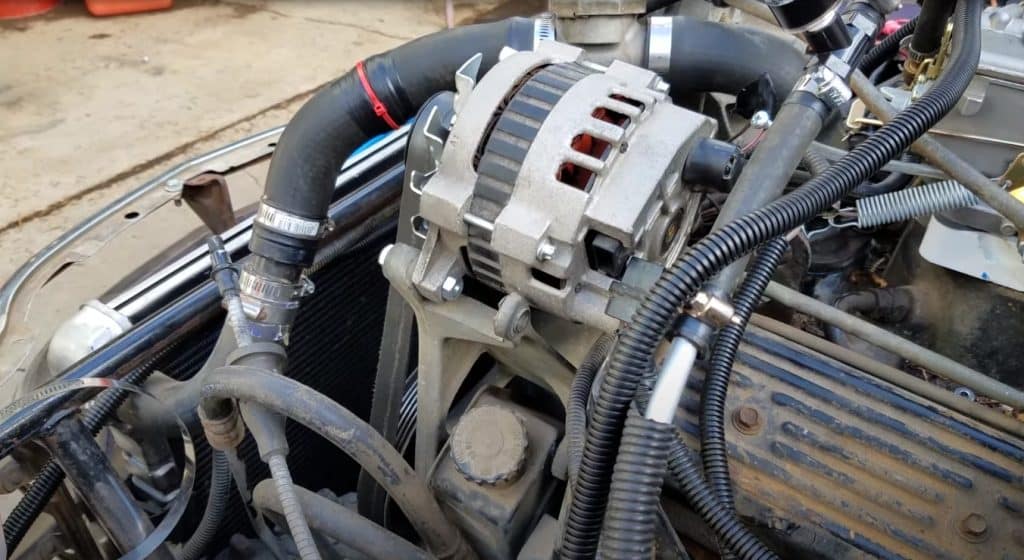
Before diving into the diagram, let's define the key components of a typical Chevy 4-wire alternator system. These alternators, typically a Delco-Remy design, are robust and relatively simple. The "4-wire" designation refers to the number of wires that directly connect to the alternator itself (although other wires may connect to components within the charging circuit).
- Alternator (Generator): The heart of the charging system. It converts mechanical energy from the engine into electrical energy. Inside you'll find the stator (stationary windings), the rotor (rotating windings), diodes (rectifiers), and a voltage regulator.
- Battery: Stores electrical energy and provides power to start the engine and operate accessories when the engine isn't running.
- Voltage Regulator: Controls the alternator's output voltage to prevent overcharging the battery and damaging electrical components. On older vehicles with 4-wire alternators, the regulator is often *external* to the alternator itself. Newer vehicles integrate the regulator internally.
- Ammeter or Voltmeter: Provides a visual indication of the charging system's performance. An ammeter shows current flow (charging or discharging), while a voltmeter shows voltage.
- Wiring Harness: Connects all the components together.
- Fuse Box/Fusible Links: Protects the electrical system from overcurrent.
Key Electrical Specs:
- Voltage: Typically 12 volts DC in automotive applications.
- Amperage: The alternator's output capacity, measured in amps. Common sizes range from 63 amps to 100+ amps depending on the vehicle and application.
- Wire Gauge: The thickness of the wires, crucial for handling the current flow. Too thin, and the wires will overheat and potentially melt. Use the correct gauge wire for each circuit based on the amperage it needs to carry.
Decoding the 4-Wire Alternator Wiring Diagram: Symbols and Conventions
Wiring diagrams use standardized symbols to represent electrical components and connections. Here's a breakdown of common symbols you'll encounter:
- Solid Lines: Represent wires. The thickness of the line *doesn't* necessarily indicate wire gauge, but consult the diagram's legend or footnotes for wire gauge information.
- Dashed Lines: Often indicate ground connections or wiring that is part of a harness.
- Circles: Generally represent connections or terminals.
- Rectangles: Can represent various components like relays, resistors, or the voltage regulator itself.
- Zig-zag Lines: Usually indicate resistors or windings, like those found inside the alternator.
- Ground Symbol (Often a downward-pointing triangle or a series of horizontal lines): Indicates a connection to the vehicle's chassis, which serves as the common ground for the electrical system.
Color Coding:
Wire colors are crucial for identification. While specific colors can vary slightly between manufacturers and model years, some common conventions apply:
- Red: Typically indicates a power wire connected directly to the battery or a fused power source.
- Black: Typically indicates a ground wire.
- Blue/Green/Yellow: Often used for signal wires or control wires.
- Orange/Brown: Often used for accessory power circuits.
Understanding the 4 Wires:
This is where the "4-wire" designation comes in. While the exact naming can vary slightly, these are the common functions:
- Battery (BAT or B+): The main output wire from the alternator, carrying charging current to the battery. This is typically a heavy-gauge red wire.
- Sense (S): This wire connects to a point in the electrical system that represents the system voltage as seen by the battery. The voltage regulator uses this signal to determine how much output the alternator needs to produce. Connecting it as far down the line as possible, and as close to the battery as possible allows the alternator to compensate for any voltage drop along the system.
- Field (F): This wire controls the alternator's magnetic field strength, and thus its output. It is connected to the external voltage regulator.
- Ignition (IGN or #1): This wire provides a small amount of current to initially "excite" the alternator when the ignition is turned on. It tells the alternator to start charging.
How the Chevy 4-Wire Alternator System Works
Here's a simplified explanation of the charging process:
- When the ignition is turned on, the ignition wire (IGN) provides a small current to the alternator's field windings.
- The engine starts, and the alternator begins to spin.
- The spinning rotor creates a magnetic field that induces current in the stator windings.
- The diodes (rectifiers) convert the AC current produced by the stator into DC current.
- The voltage regulator monitors the system voltage via the sense (S) wire.
- If the voltage is too low, the regulator increases the current flowing through the field windings, increasing the alternator's output.
- If the voltage is too high, the regulator decreases the current to the field windings, reducing the alternator's output.
- The battery (BAT or B+) wire carries the charging current to the battery, replenishing its charge.
Real-World Use: Basic Troubleshooting Tips
Here are some common problems and troubleshooting steps:
- Battery Not Charging:
- Check the battery voltage with a multimeter. Should be around 12.6 volts when fully charged.
- Start the engine and check the voltage again. It should increase to around 13.5-14.5 volts. If not, the alternator may not be charging.
- Check the BAT (B+) wire connection at the alternator and the battery. Ensure it's clean and tight.
- Check the fuse or fusible link in the BAT (B+) wire circuit.
- Check the IGN wire for voltage when the ignition is on.
- If you suspect a bad regulator, *carefully* bypass the regulator according to your diagram. This should only be done *momentarily* for testing purposes, as it can damage the alternator and battery if done incorrectly.
- Overcharging (Battery Boils):
- Most commonly a faulty voltage regulator. Replace it.
- Check the sense wire. If the sense wire is not properly connected, the voltage regulator will not properly read the system voltage.
- Warning Light Stays On:
- Indicates a problem in the charging system. Follow the steps above to diagnose.
- Sometimes a bad diode inside the alternator can cause this.
Safety Considerations
Working with electrical systems can be dangerous. Observe these precautions:
- Disconnect the Battery: Always disconnect the negative battery terminal before working on the electrical system to prevent short circuits.
- Use Proper Tools: Use insulated tools to avoid shocks.
- Work in a Well-Ventilated Area: Batteries can produce flammable gases.
- Avoid Water: Never work on the electrical system in wet conditions.
- Capacitors: Be aware that capacitors in some electrical components can store a charge even after the battery is disconnected. Discharge them carefully using a resistor before handling.
- The BAT (B+) wire is a high current circuit: Accidental shorts can cause fires or severe burns. Double check connections.
Understanding the Chevy 4-wire alternator wiring diagram is an invaluable skill for any DIY mechanic. By understanding its function and how to diagnose problems, you'll be able to keep your classic Chevy running smoothly. Remember to always prioritize safety when working with electrical systems. As promised, the wiring diagram is available for download [insert link or instructions for obtaining the file here].