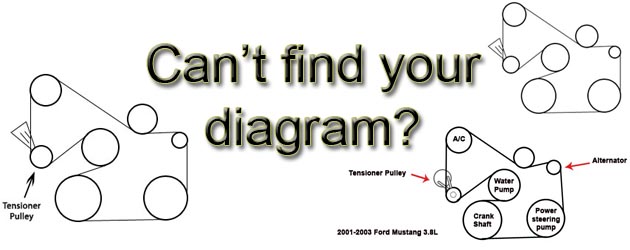
Chrysler 200 Serpentine Belt Diagram
For the experienced DIYer, understanding the serpentine belt system in your Chrysler 200 is crucial for routine maintenance, troubleshooting, and even performance modifications. This article provides an in-depth look at the serpentine belt diagram, its components, and how to use it effectively. We’ll cover the purpose of the diagram, its key components, the symbols used, how the system works, real-world troubleshooting, and essential safety tips. Plus, we have a downloadable diagram to make your life even easier!
Purpose of the Serpentine Belt Diagram
The serpentine belt diagram is a visual representation of the belt's path around various engine components. Its primary purpose is to provide a reference for:
- Replacement: Ensuring you route the new belt correctly after the old one is removed. Incorrect routing can lead to component failure and engine damage.
- Troubleshooting: Identifying potential problems such as misaligned pulleys or a seized component based on belt wear patterns.
- Component Diagnosis: Understanding which components are driven by the belt helps in diagnosing issues with the alternator, power steering pump, air conditioning compressor, and water pump.
- General Understanding: Gaining a deeper knowledge of how the engine's auxiliary systems operate.
Think of it as a roadmap for your serpentine belt. Without it, replacing the belt becomes a guessing game, potentially leading to significant and costly errors.
Key Specs and Main Parts
The serpentine belt system in the Chrysler 200 typically includes the following key components:
- Crankshaft Pulley: This is the driving pulley, connected directly to the engine's crankshaft. It's the source of power for the entire system.
- Alternator Pulley: Driven by the serpentine belt, the alternator generates electrical power for the car. A failing alternator can cause a dead battery.
- Power Steering Pump Pulley: The power steering pump provides hydraulic assistance for steering. Problems here can result in difficult or impossible steering.
- Air Conditioning (A/C) Compressor Pulley: Engages when the A/C is turned on, compressing the refrigerant. Issues here will cause the A/C to blow warm air.
- Water Pump Pulley: Circulates coolant throughout the engine to prevent overheating. A malfunctioning water pump can lead to severe engine damage.
- Idler Pulley(s): Smooth, non-powered pulleys that guide the belt and maintain proper tension.
- Tensioner Pulley: A spring-loaded pulley that automatically maintains the correct tension on the belt. A weak tensioner can cause belt slippage and noise.
- Serpentine Belt: The connecting link, a single, long, multi-ribbed belt that drives all the components.
Key Specs: While the exact belt length and rib count vary depending on the engine (2.4L, 3.6L, etc.) and year of your Chrysler 200, the diagram will illustrate the proper routing for your specific configuration. Always verify the correct belt part number using your VIN at a reputable auto parts store.
Understanding Symbols in the Diagram
Serpentine belt diagrams use standardized symbols to represent the various components and belt routing. Understanding these symbols is crucial for proper interpretation.
- Solid Lines: Represent the portion of the belt that is in direct contact with a pulley.
- Dashed Lines: Usually indicate the belt's path *behind* other components or brackets, showing the overall routing without obscuring the diagram.
- Arrows: Show the direction of belt rotation around each pulley. This is critical for understanding which side of the belt (ribbed or smooth) should contact the pulley.
- Circles: Represent pulleys. They may be labeled with abbreviations indicating their function (e.g., ALT for alternator, P/S for power steering).
- Squares or Rectangles: May represent the tensioner assembly or other mounting brackets.
- Colors: While not always present, some diagrams use color to differentiate between different sections of the belt or to highlight the routing behind specific components. Consult the key or legend accompanying the diagram to understand the meaning of any colors used.
By carefully examining the lines, arrows, and component labels, you can accurately trace the belt's path and ensure correct installation.
How the Serpentine Belt System Works
The serpentine belt system is a relatively simple yet vital part of your Chrysler 200's engine. The crankshaft pulley, connected directly to the engine's crankshaft, rotates as the engine runs. This rotation is transferred to the serpentine belt, which then drives all the other pulleys in the system.
The tensioner pulley maintains the proper tension on the belt, preventing slippage and ensuring efficient power transfer. The idler pulleys simply guide the belt around the system, ensuring the correct angle of contact with each driven pulley.
The serpentine belt's routing is designed to maximize efficiency and minimize space. The use of a single, long belt simplifies the system compared to older designs that used multiple belts.
Proper belt tension is critical. Too loose, and the belt will slip, causing noise and reduced performance of the driven components. Too tight, and it can cause premature wear on the belt and bearings of the pulleys.
Real-World Use: Basic Troubleshooting
The serpentine belt diagram is an invaluable tool for troubleshooting common serpentine belt issues.
- Squealing Noise: Often indicates a loose belt, a worn belt, or a misaligned pulley. Check the tensioner and the belt's condition. Use the diagram to ensure the belt is routed correctly and that all pulleys are properly aligned.
- Cracked or Frayed Belt: Indicates a worn belt that needs replacement. Use the diagram to ensure you install the new belt correctly. Also check for signs of pulley misalignment which may have caused premature wear.
- Loss of Power Steering or A/C: Indicates a slipped or broken belt, or a problem with the driven component. Check the belt's condition and routing. Also, inspect the pulleys for signs of damage or seizure.
- Battery Not Charging: Could indicate a faulty alternator or a slipped or broken belt. Verify the belt is driving the alternator pulley correctly.
Visual Inspection: Before diving into any repairs, carefully inspect the entire system for any signs of damage, wear, or misalignment. Pay close attention to the belt's condition, the pulley surfaces, and the tensioner's operation. A straight edge can be useful to check for pulley alignment.
Safety Considerations
Working on the serpentine belt system involves several potential hazards. Always prioritize safety.
- Disconnect the Battery: Before working on the serpentine belt system, disconnect the negative terminal of the battery to prevent accidental starting.
- Hot Engine: Allow the engine to cool completely before working on the system. The engine components can become extremely hot, causing burns.
- Moving Parts: Never attempt to work on the serpentine belt system while the engine is running. The moving parts can cause serious injury.
- Eye Protection: Wear safety glasses to protect your eyes from debris.
- Proper Tools: Use the correct tools for the job, including a serpentine belt tool for releasing the tensioner. Using the wrong tools can damage the components or cause injury.
The tensioner pulley stores significant spring force and can snap back forcefully if released improperly. Always use the correct tool and follow the manufacturer's instructions carefully when releasing the tensioner.
Remember, if you're uncomfortable performing any of these tasks, consult a qualified mechanic.
We have a detailed serpentine belt diagram for your Chrysler 200 available for download. This diagram will be an invaluable asset when working on your vehicle. Please contact us through our website to request access to the file.