Diagram How To Remove Ignition Lock Cylinder Chevy Without Key
Okay, let's talk about removing a Chevy ignition lock cylinder *without* the key. It's a fiddly job, but definitely doable if you're comfortable with basic automotive tools and have a bit of patience. This article will walk you through the process, explaining the 'how' and 'why' of each step, referencing a diagram that's available for download (link provided at the end). Understanding this procedure is crucial for various scenarios, from replacing a faulty cylinder to bypassing a lost key situation (though always consider legality and ethical implications!), or even just for deeper understanding of your vehicle's mechanics.
Purpose: Why We're Doing This
This procedure isn't just about bypassing a key. Knowing how to remove an ignition lock cylinder without a key is essential for:
- Replacing a Damaged Cylinder: If your ignition cylinder is sticking, broken, or otherwise failing, you'll need to remove it for replacement.
- Key Loss: Sometimes, you simply lose your keys. This method offers a way to start the car after you replace the cylinder and get a new key cut (or programmed, depending on your vehicle).
- Security System Work: Accessing the ignition system is sometimes necessary for installing or troubleshooting aftermarket security systems.
- Learning Automotive Systems: Even if you never need to do this, understanding the ignition system is valuable knowledge for any DIY mechanic.
Key Specs and Main Parts
Before we dive into the removal process, let's identify the critical components and specifications involved. These will be referenced in the diagram.
- Ignition Lock Cylinder: This is the core component, housing the tumblers that engage when the correct key is inserted. It's typically made of hardened steel or brass.
- Steering Column: The structural support housing the steering shaft and ignition system.
- Lock Cylinder Retaining Pin (or Button): This small pin or button secures the cylinder within the steering column. Locating and manipulating this pin is key to removal.
- Steering Wheel Lock Plate: A plate that engages to lock the steering wheel when the key is removed.
- Ignition Switch: Located further down the steering column, the ignition switch is electrically activated by the lock cylinder's rotation.
- Wiring Harness Connector: Connects the ignition switch to the vehicle's electrical system.
Typical Chevy ignition systems operate on a 12-volt DC system. Torque specifications for any re-assembly will be dependent on the specific model year and should always be confirmed using a repair manual.
Diagram Symbols: Understanding the Visual Language
Our accompanying diagram uses standard automotive schematic symbols to represent components and connections. Here's a quick guide:
- Solid Lines: Typically represent mechanical linkages or physical boundaries of components (e.g., the steering column housing).
- Dashed Lines: Usually indicate hidden or internal features, such as the internal workings of the lock cylinder.
- Arrows: Show the direction of movement or force. For example, an arrow might indicate where to apply pressure to release the retaining pin.
- Colors: (If applicable) May indicate the color of wiring, or differentiate components for clarity. For example, red wires usually denote positive power.
- Icons:
- Screwdriver Icon: Indicates where a screwdriver is required.
- Punch/Pin Tool Icon: Indicates where a punch or pin removal tool should be used.
- Magnifying Glass Icon: Highlights a specific area for closer inspection.
Pay attention to the annotations and labels on the diagram; they provide specific instructions and identify individual components.
How It Works: The Removal Process (Without a Key)
This process requires a methodical approach and a few specialized tools, primarily a steering wheel puller (loan-a-tool programs are great for this!), a lock plate compressor tool, and a small punch or pick.
- Disconnect the Battery: Crucially important! Disconnect the negative terminal of the battery to prevent accidental shorts and airbag deployment.
- Remove the Steering Wheel: Use a steering wheel puller to safely remove the steering wheel. These tools are designed to avoid damaging the steering shaft.
- Compress the Lock Plate: Use the lock plate compressor tool to depress the steering wheel lock plate. This will expose the retaining ring. The tool compresses the spring underneath, allowing access to the retaining clip.
- Remove the Retaining Ring: Carefully remove the retaining ring that sits on top of the steering shaft. This ring holds the lock plate in place.
- Remove the Lock Plate and Turn Signal Switch: Once the retaining ring is removed, carefully lift off the lock plate and turn signal switch. Note their orientation for reassembly.
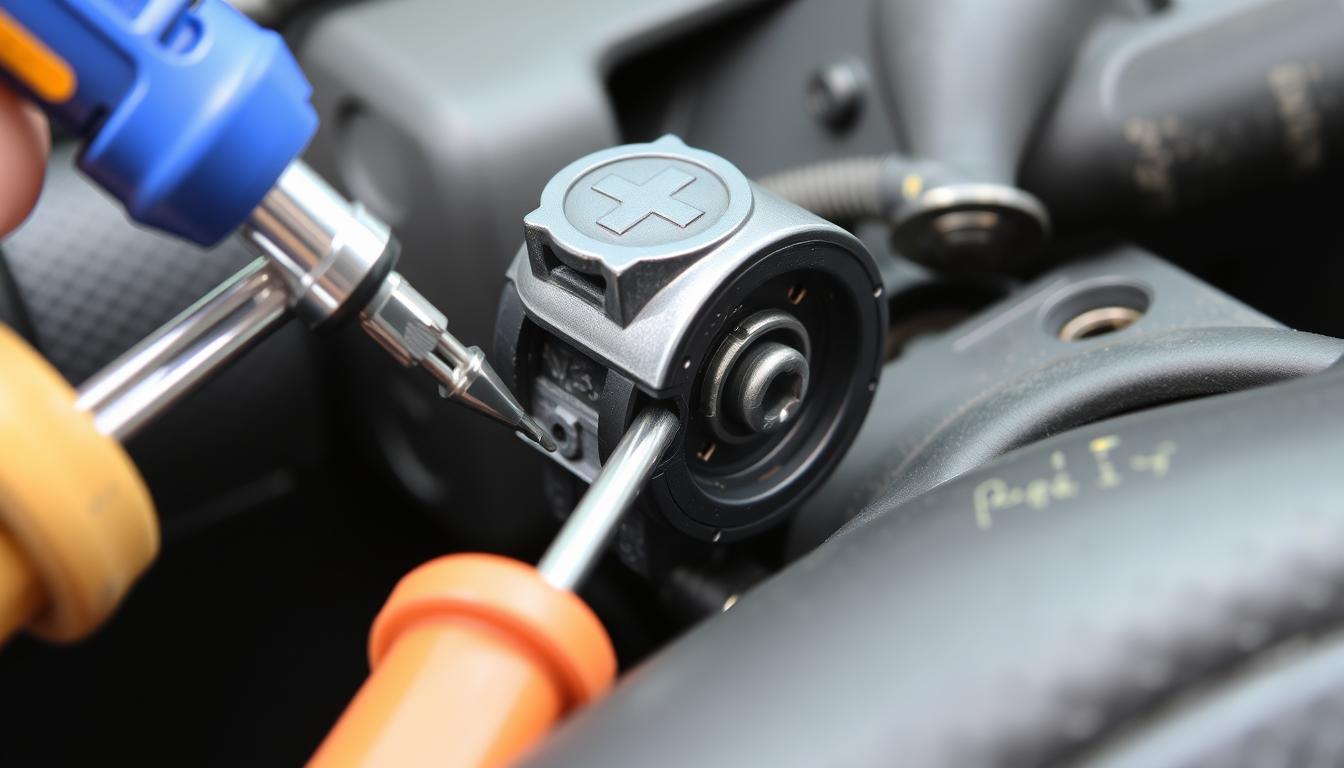
- Locate the Lock Cylinder Retaining Pin: This is where things get tricky. The retaining pin (or button) is typically located on the upper or lower surface of the steering column near the ignition lock cylinder. The diagram will pinpoint its exact location for your specific Chevy model. This pin is often recessed and may be difficult to see.
- Release the Retaining Pin: This is the most critical step. Using a small punch, pick, or even a stiff paperclip, carefully depress the retaining pin *while simultaneously* trying to pull the lock cylinder out. You may need to apply gentle pressure to the cylinder while manipulating the pin. Sometimes, a small amount of lubricant (like WD-40) can help ease the cylinder's removal.
- Remove the Ignition Lock Cylinder: Once the retaining pin is fully depressed, the cylinder should slide out of the steering column. It might require a bit of wiggling, but avoid excessive force.
- Disconnect the Ignition Switch Wiring: Carefully disconnect the wiring harness connector from the ignition switch located further down the column.
Real-World Use: Troubleshooting Tips
- Retaining Pin Stuck: If the retaining pin is stuck, try applying penetrating oil and gently tapping around the cylinder housing. Patience is key.
- Cylinder Won't Budge: Ensure the retaining pin is *fully* depressed. Sometimes, the cylinder is slightly corroded or jammed. Try gently rocking it back and forth while maintaining pressure on the pin.
- Damaged Steering Column Threads: If the steering wheel puller damages the threads on the steering shaft, you'll need to re-tap them or potentially replace the steering shaft.
Safety: Handle with Care!
This procedure involves several potentially hazardous components:
- Airbag System: Always disconnect the battery before working on the steering column. Accidental airbag deployment can cause serious injury.
- Sharp Edges: The steering column and internal components can have sharp edges. Wear gloves to protect your hands.
- Electrical Components: Avoid touching exposed wires or connectors with bare hands while the battery is connected.
- Spring-Loaded Parts: The lock plate compressor tool handles a strong spring. Use the tool correctly and wear eye protection.
Improper reassembly can affect the vehicle's handling and safety features. If you are not completely comfortable with this procedure, seek professional assistance.
Download the Diagram
To further assist you, we have prepared a detailed diagram that visually represents the steps and components discussed in this article. You can download it here: [Link to Diagram - Placeholder, needs to be a real link]. This diagram provides a visual guide, making the removal process much easier to understand.