Diagram Manual Bestway Sand Filter Symbols
Okay, you're diving into the world of sand filters for your pool – good on you. Maintaining one isn't rocket science, but understanding the system is crucial. The Bestway sand filter diagram is your roadmap to keeping your pool crystal clear. Whether you're troubleshooting a cloudy pool, planning preventative maintenance, or simply curious about how this thing works, this article will decode those symbols and get you up to speed.
Purpose: Why Decode the Diagram?
Think of your Bestway sand filter diagram as the equivalent of a wiring diagram for your car. Without it, you're guessing. With it, you can:
- Troubleshoot Effectively: Pinpoint problems faster. Is water flowing where it should? Are you losing pressure? The diagram shows the expected flow.
- Perform Maintenance Confidently: Backwashing, media replacement, cleaning – knowing the system’s layout ensures you're doing it right.
- Replace Parts Correctly: Identifying the exact part number and location from the diagram prevents ordering the wrong components and wasting time.
- Understand the System: Knowledge is power. Knowing how the filter operates allows you to optimize its performance.
Ultimately, understanding the diagram saves you time, money, and frustration. Plus, it gives you the satisfaction of knowing you tackled the problem yourself.
Key Specs and Main Parts
Before diving into the symbols, let's refresh on the major components of a typical Bestway sand filter. Keep in mind, models vary, so always refer to your specific diagram.
Main Components:
- Pump: The heart of the system. Creates the pressure to move water. Specs usually include flow rate (gallons per minute or GPM) and horsepower (HP).
- Filter Tank: Holds the sand (or other filter media).
- Multiport Valve (MPV): This is the control center. It allows you to select different functions like filtering, backwashing, rinsing, and waste.
- Sand Media: The actual filter material. Typically silica sand, but other options exist.
- Laterals: Internal pipes at the bottom of the tank that collect the filtered water.
- Inlet/Outlet Ports: Connections for hoses or pipes to the pool and back to the pool.
- Pressure Gauge: Indicates the pressure within the filter tank. Crucial for monitoring performance.
Key Specs to Look For:
- Flow Rate: Matches the pump to the pool size. Too low, and filtration is inefficient. Too high, and you could damage the filter.
- Filter Area: The surface area of the sand. A larger area means better filtration.
- Sand Capacity: How much sand the filter tank holds. Using the correct amount is vital for proper operation.
Decoding the Symbols: Lines, Colors, and Icons
Now for the nitty-gritty. Diagrams use symbols to represent components and their connections. Here's a breakdown:
Lines:
- Solid Lines: Typically represent water flow paths. Thicker lines often indicate main flow paths, while thinner lines might represent bypass or drain lines.
- Dashed Lines: Can represent electrical wiring or control lines. Also, sometimes, rarely-used flow paths.
- Arrows: Indicate the direction of water flow. Pay close attention to these!
Colors:
- Blue: Generally represents water.
- Black: Can represent piping or structural components.
- Red: Often indicates high-pressure areas or potential hazards.
- Yellow/Green: Usually associated with electrical grounding.
Icons:
These are the visual representations of components. While exact icons may vary slightly, here are common ones:
- Pump: A stylized representation of a pump, often with a curved impeller symbol.
- Filter Tank: A cylindrical or rounded rectangle. Sometimes it includes a representation of the sand media inside.
- Multiport Valve: A circle with arrows indicating different positions (filter, backwash, rinse, etc.). The arrows show which ports are connected in each position.
- Pressure Gauge: A circle with a needle indicating pressure.
- Check Valve: An arrow with a flapper. It allows water to flow in one direction only. Crucial for preventing backflow.
- Union: Two interlocking curved pieces. Represents a connection that can be easily disassembled for maintenance.
Important: Always refer to the legend or key on your specific Bestway sand filter diagram. This legend will define the symbols used in that particular diagram.
How It Works: The Big Picture
The basic principle is simple: water is forced through a bed of sand, trapping debris. Here's the breakdown:
- Water Intake: Pool water is drawn into the pump.
- Pressurization: The pump increases the water pressure.
- Filtration: Pressurized water enters the filter tank and is forced through the sand bed. As the water passes through the sand, dirt, algae, and other particles are trapped.
- Collection: Filtered water is collected by the laterals at the bottom of the tank.
- Return: The filtered water is returned to the pool.
Backwashing: Over time, the sand gets clogged. Backwashing reverses the flow of water through the filter, flushing out the trapped debris. The dirty water is then sent to a waste port.
Rinsing: After backwashing, a short rinse cycle is used to settle the sand bed before returning to normal filtering. This prevents any remaining debris from being flushed back into the pool.
Real-World Use: Basic Troubleshooting
Here are a few common problems and how the diagram can help:
- Low Flow: Check the pump strainer for clogs. The diagram will show you its location. Also, check the pressure gauge. A high reading indicates a clogged filter. Backwash if needed. The diagram illustrates the proper backwash valve position.
- Cloudy Water: Could be inadequate filtration. Ensure the filter is running long enough. Check the sand for channeling (uneven flow). The diagram shows the sand bed layout. If channeling is suspected, replace the sand.
- Water Leaks: Identify the leak source using the diagram. Check unions, hoses, and valve connections. Replace worn O-rings or seals.
- High Pressure Reading: Indicates the sand needs to be backwashed. Verify correct valve position based on the diagram.
Safety: Respecting Risky Components
Water and electricity are a dangerous combination. Always disconnect power to the pump before performing any maintenance or repairs. Capacitors in the pump can store a dangerous charge even after disconnection, so be careful when working around the pump motor. Also, be aware that opening the filter tank under pressure can be extremely dangerous. Relieve the pressure completely before opening.
Warning: Incorrect wiring or handling of electrical components can result in serious injury or death. If you are not comfortable working with electricity, consult a qualified electrician.
Working on the plumbing while water is under pressure can also be hazardous. Always relieve pressure before disconnecting any pipes or fittings.
By now, you should have a solid understanding of your Bestway sand filter diagram. Remember to always consult your specific model's diagram, as variations exist. With this knowledge, you're well-equipped to maintain and troubleshoot your filter, ensuring a clean and enjoyable pool experience.
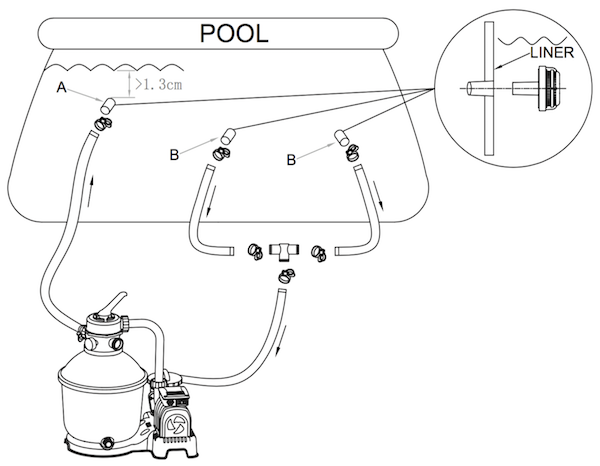
We have a sample diagram file available for download. It provides a visual reference to complement this guide. This allows for further study.