
Exterior Honda Civic Body Parts Diagram
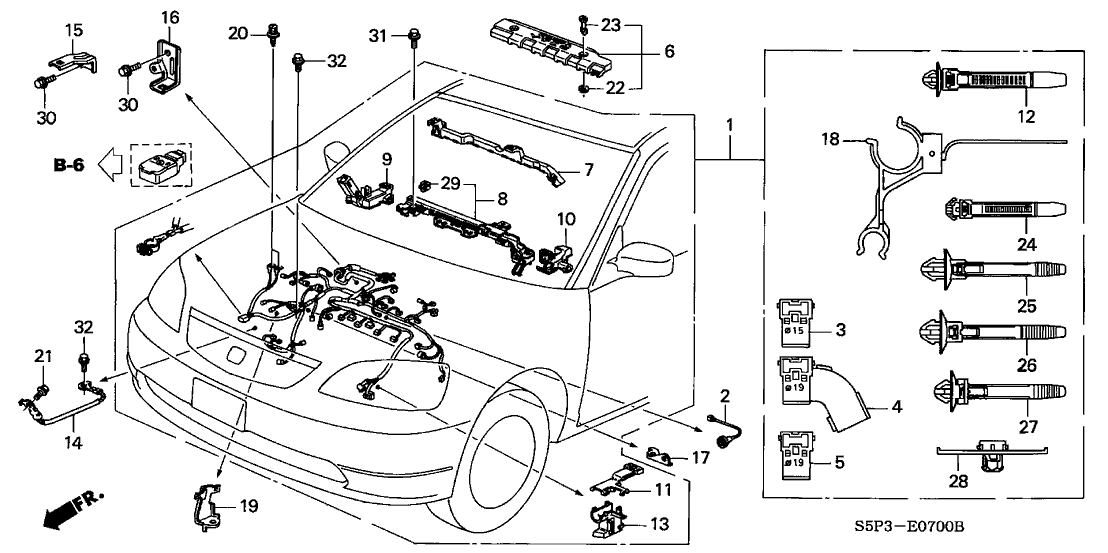
Understanding the exterior of your Honda Civic is crucial for everything from basic maintenance to more involved repairs and modifications. A detailed body parts diagram acts as your roadmap, providing a visual breakdown of each component and its relationship to the whole. This article will guide you through interpreting such a diagram, equipping you with the knowledge to confidently tackle exterior work on your Civic.
Purpose of the Exterior Body Parts Diagram
Why bother with a diagram? Several reasons make it an indispensable tool:
- Repairs and Replacements: Identifying damaged parts precisely. Knowing the official name and location of a panel, trim piece, or molding makes ordering replacements a breeze. No more guessing games!
- Body Work and Modifications: Planning custom modifications like adding aftermarket bumpers, side skirts, or spoilers requires a solid understanding of the existing body structure. The diagram shows mounting points, clearances, and potential conflicts.
- Accurate Part Ordering: When communicating with auto parts stores or online retailers, using the correct terminology from the diagram prevents errors and ensures you get the right parts.
- Troubleshooting: Tracing the root cause of issues like water leaks, rattles, or alignment problems can be simplified by visually mapping out the affected area on the diagram.
- Educational Value: Even if you're not planning immediate repairs, studying the diagram deepens your understanding of your vehicle's construction and how everything fits together.
Key Specs and Main Parts of a Civic Exterior
A comprehensive diagram will cover virtually every visible exterior component. Here's a breakdown of some of the most important:
Front End
- Hood: The hinged panel covering the engine bay. Pay attention to its latching mechanism and hinges in the diagram.
- Fenders (Wings): The panels flanking the hood, covering the front wheels. Diagrams often show the inner fender liner as well.
- Bumper Cover: The plastic or composite piece that forms the front of the car. This is usually shown with its various grills, fog lights, and trim pieces.
- Headlights: The primary illumination source. The diagram may include details of the headlight assembly, including the lens, reflectors, and mounting points.
- Grille: The decorative or functional opening in the front, often with the Honda emblem.
Sides
- Doors: Including the door shell, outer panel, inner panel, hinges, handles, and side mirrors.
- Rocker Panels: The structural panels along the bottom edge of the car, between the front and rear wheels. These are critical for structural integrity.
- Side Skirts (Optional): Add-on panels that enhance the car's appearance.
- Window Glass: Windshield, door windows, and rear window. The diagram may show the seals and moldings.
Rear End
- Trunk Lid (or Hatch): The hinged panel providing access to the cargo area.
- Rear Bumper Cover: Similar to the front bumper, it protects the rear of the car.
- Taillights: Including brake lights, turn signals, and reverse lights.
- Rear Quarter Panels: The panels covering the rear wheels.
- Spoiler (Optional): An aerodynamic device mounted on the trunk lid or hatch.
Beyond these major components, the diagram will also include numerous smaller parts such as moldings, emblems, weather stripping, and fasteners. The level of detail varies depending on the diagram.
Decoding Diagram Symbols
Understanding the symbols used in the diagram is essential for accurate interpretation. Here are some common conventions:
- Solid Lines: Typically represent visible edges or outlines of parts.
- Dashed Lines: Often indicate hidden edges, internal structures, or the path of wiring harnesses.
- Arrows: May point to specific features or indicate the direction of force (e.g., impact direction in a collision repair diagram).
- Colors: Color coding can represent different materials (e.g., metal, plastic, rubber) or different sections of the diagram. Refer to the diagram's legend for specific color meanings.
- Numbers and Letters: These are used to identify individual parts and reference them in a parts list or index. Each number typically corresponds to a specific item available for order.
- Icons: Some diagrams use icons to represent specific features, such as fasteners (screws, bolts, clips) or wiring connectors.
Important: Always consult the diagram's legend or key to understand the specific symbols used. Variations exist between manufacturers and diagram types.
How It Works: Putting the Diagram into Practice
The diagram isn't just a pretty picture; it's a tool. Here's how to use it effectively:
- Identify the Area of Interest: Start by focusing on the specific area you're working on (e.g., front bumper, passenger door).
- Locate the Relevant Parts: Use the diagram to identify the parts involved in that area. Pay attention to their relationships and how they connect.
- Check Part Numbers: Find the part numbers associated with each component. This is crucial for accurate ordering.
- Visualize the Assembly/Disassembly: Use the diagram to visualize the steps involved in removing or installing the parts. Note the location of fasteners and any potential challenges.
- Cross-Reference with Repair Manuals: The diagram is a visual aid. Supplement it with a detailed repair manual for specific instructions, torque specifications, and safety precautions.
Real-World Use: Basic Troubleshooting
Let's say you have a rattle coming from the front of your Civic. You can use the diagram to systematically investigate:
- Visually Inspect: Start by visually inspecting the area around the front bumper, grille, and headlights.
- Consult the Diagram: Refer to the diagram to identify the various components in that area.
- Check Fasteners: Check the tightness of all screws, bolts, and clips that secure the bumper cover, grille, and headlights. The diagram can help you locate all the relevant fasteners.
- Look for Damage: Inspect the components for cracks, breaks, or loose connections. The diagram can help you identify the correct part name if a replacement is needed.
- Isolate the Source: Gently tap on different parts to see if you can reproduce the rattle. The diagram can help you narrow down the source to a specific component.
By combining visual inspection with the diagram, you can effectively troubleshoot and pinpoint the source of the rattle.
Safety Considerations
Working on a vehicle's exterior can involve risks. Be particularly cautious around:
- Airbags: The front bumper area may contain airbag sensors. Disconnect the battery and wait several minutes before working in this area to prevent accidental deployment. Consult your repair manual for specific instructions.
- Electrical Wiring: Headlights, fog lights, and other electrical components have wiring harnesses. Disconnect the battery before working on these components to avoid electric shock.
- Sharp Edges: Body panels can have sharp edges. Wear gloves to protect your hands.
- Glass: Handle glass components carefully to avoid cuts. Use appropriate safety glasses.
Always prioritize safety. If you're unsure about any procedure, consult a qualified mechanic.
This guide provides a solid foundation for understanding Honda Civic exterior body parts diagrams. They're invaluable resources for maintaining, repairing, and modifying your vehicle. Now you are equipped to use these diagrams more confidently.
We have the file, and you can download the diagram.