How Much Does It Cost To Fix Brake Light Wiring
Let's talk about brake light wiring. Whether you're dealing with a faulty brake light, planning a custom lighting setup, or just want to understand your vehicle's electrical system better, knowing how to read a brake light wiring diagram and understanding repair costs is crucial. This guide will break down the components, costs, and troubleshooting involved in fixing brake light wiring issues, assuming you're an intermediate DIYer who isn't afraid to get their hands dirty.
Why Understanding Brake Light Wiring Matters
A clear understanding of brake light wiring is important for several reasons:
- Repairs: Diagnosing and fixing a non-functioning brake light quickly and effectively.
- Customization: Integrating aftermarket lighting solutions, such as LED upgrades or custom tail lights.
- Troubleshooting: Identifying shorts, opens, or other electrical issues affecting the brake light circuit.
- General Car Knowledge: A better understanding of the vehicle's electrical system will enable you to perform other DIY repairs.
Key Specs and Main Parts of a Brake Light System
The core components of a typical brake light system are relatively simple, but understanding their function is key to effective troubleshooting:
- Brake Light Switch: This is the master control. Usually located near the brake pedal, it closes the circuit when the pedal is depressed, sending power to the brake lights. It's a simple electromechanical switch.
- Wiring Harness: The network of wires connecting the brake light switch to the tail lights, including grounds and power feeds.
- Fuses: A critical safety component. Fuses are designed to blow, protecting the wiring and other components from overcurrent conditions. A blown fuse is often the first indicator of a wiring problem.
- Brake Light Bulbs/LEDs: The light source itself. These can be incandescent bulbs or more modern LED assemblies.
- Ground Connection: A solid ground connection is vital for the brake lights to function properly. The ground path provides a return path for the current back to the vehicle's battery.
- Turn Signal Switch/Multifunction Switch: This component may interact with the brake light circuit, especially if the brake lights also function as turn signals (common in many vehicles).
Key Specs to consider:
- Voltage: Typically 12V DC in most modern vehicles.
- Amperage: Each brake light bulb or LED assembly will draw a specific amperage. This determines the appropriate fuse rating.
- Wire Gauge: The thickness of the wires, typically specified in AWG (American Wire Gauge). Thicker wires can handle higher currents.
Understanding Brake Light Wiring Diagram Symbols
Wiring diagrams use standardized symbols to represent electrical components. Here's a quick rundown of common symbols:
- Straight Lines: Represent wires. The thickness of the line *doesn't* necessarily reflect the wire gauge.
- Dashed Lines: May indicate a shielded wire or a connection point that is part of a larger harness.
- Circles with a letter inside (e.g., "B" or "G"): These often indicate the wire color. "B" might represent black, "G" might represent green, etc. A legend on the diagram will explain the color codes.
- Zigzag Line: Represents a resistor.
- Circle with an "X" inside: Represents a light bulb.
- Ground Symbol (often looks like an upside-down Christmas tree): Indicates a connection to ground.
- Rectangle with diagonal lines: Represents a fuse.
- Switch Symbols: Vary depending on the type of switch (e.g., single-pole, single-throw (SPST), single-pole, double-throw (SPDT)). The symbol will show the switch's normal position and how it changes when activated.
Color Codes: Wiring diagrams commonly use color codes to identify wires. You'll need to refer to the diagram's legend to understand what each color represents (e.g., red = power, black = ground, etc.). Colors can also be striped, indicating a secondary wire color.
How the Brake Light Circuit Works
The operation is straightforward. When the ignition is on, the brake light circuit is energized, but the lights are off. Here's the sequence of events:
- The brake pedal is pressed.
- The brake light switch closes, completing the circuit.
- Power flows from the battery, through the fuse, to the brake light switch.
- From the switch, the power travels through the wiring harness to the brake light bulbs/LEDs.
- The electricity flows through the bulbs, causing them to light up.
- The current then flows through the ground wires, completing the circuit back to the vehicle's battery.
Real-World Use: Basic Troubleshooting Tips
Here are some common problems and troubleshooting steps:
- No Brake Lights:
- Check the Fuse: This is always the first step. A blown fuse is the most common cause of brake light failure. Replace the fuse with one of the same amperage rating. If the new fuse blows immediately, there's a short circuit somewhere in the system.
- Check the Bulbs: Inspect the bulbs for a broken filament. Replace if necessary.
- Check the Brake Light Switch: Use a multimeter to test the switch for continuity. When the pedal is depressed, the switch should show continuity (a closed circuit). If it doesn't, the switch is faulty and needs to be replaced.
- Check the Ground Connection: Ensure that the ground connection at the tail light assembly is clean and tight. A loose or corroded ground can prevent the lights from working properly.
- Check the Wiring: Visually inspect the wiring for any signs of damage, such as cuts, frayed insulation, or corrosion. Use a multimeter to check for continuity in the wires.
- One Brake Light Works, the Other Doesn't:
- Check the Bulb: As above, inspect the bulb and replace if necessary.
- Check the Wiring to that Specific Light: Use a multimeter to check for continuity and voltage at the bulb socket.
- Brake Lights Stay On:
- Check the Brake Light Switch: The switch may be stuck in the closed position. Try adjusting the switch or replacing it.
- Wiring Short: A short circuit in the wiring could be causing the brake lights to stay on. This requires careful inspection and tracing of the wiring harness.
Safety Considerations
Working on automotive electrical systems can be dangerous. Here's what to keep in mind:
- Disconnect the Battery: Always disconnect the negative terminal of the battery before working on any electrical components. This will prevent accidental shocks and short circuits.
- Fuses are Safety Devices: Never replace a fuse with one of a higher amperage rating. This can overload the wiring and cause a fire.
- Proper Tools: Use insulated tools designed for electrical work.
- Wiring Shorts: Identifying and repairing wiring shorts can be challenging. If you're not comfortable working with electrical systems, it's best to consult a qualified mechanic. A short circuit can cause a fire.
- Airbags: Be extremely careful when working near airbag modules. Accidentally triggering an airbag can cause serious injury. Consult your vehicle's service manual for specific precautions.
Cost of Repairing Brake Light Wiring
The cost to fix brake light wiring depends on the extent of the damage and whether you do the work yourself or hire a professional. Here's a general breakdown:
- Fuse Replacement: $5 - $10 (DIY).
- Bulb Replacement: $5 - $20 per bulb (DIY). A shop might charge $20-$50 including labor.
- Brake Light Switch Replacement: $20 - $50 for the part (DIY). Labor at a shop can range from $50 - $150.
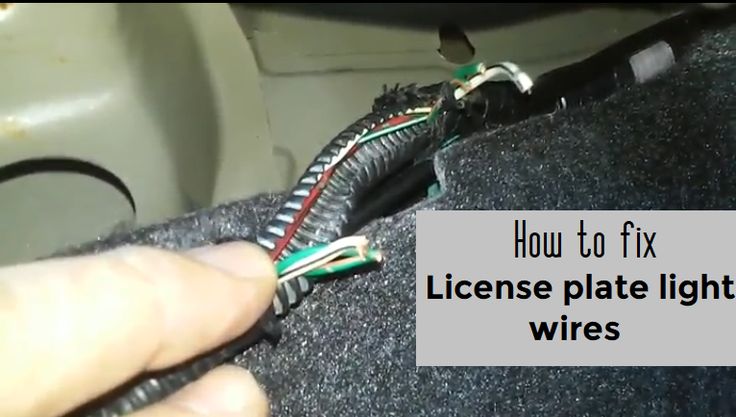
- Wiring Repair: This is where costs can vary significantly.
- Minor Wiring Repair (e.g., patching a damaged wire): $20 - $50 in materials (DIY), or $50-$200 at a shop.
- Major Wiring Repair (e.g., replacing a section of the wiring harness): $50 - $200+ in materials (DIY). Labor at a shop can easily exceed $300-$500, especially if the problem is difficult to diagnose.
Factors that can affect the cost:
- Vehicle Make and Model: Some vehicles have more complex wiring systems than others.
- Location: Labor rates vary depending on your location.
- Shop Rate: Dealerships typically charge higher labor rates than independent repair shops.
- Diagnostic Time: Diagnosing electrical problems can be time-consuming, which can increase the labor cost.
Remember, the above are just estimates. Get a quote from a qualified mechanic before authorizing any repairs. If you're doing the work yourself, be sure to have a wiring diagram for your specific vehicle.
We have a generic wiring diagram available as a helpful starting point. Please feel free to download it.