How Much Does It Cost To Replace Wiring Harness
Let's talk about replacing a wiring harness in your car. It's a job that can range from relatively straightforward to incredibly complex, and the cost can vary just as widely. This article aims to give you, the experienced DIYer, a solid understanding of what's involved in pricing out this type of repair or upgrade, so you can approach the project with confidence.
Purpose: Why Bother Replacing a Wiring Harness?
Why would you need to replace a wiring harness in the first place? There are several reasons, ranging from necessary repairs to performance enhancements. Here's a breakdown:
- Corrosion and Damage: The most common reason. Years of exposure to heat, moisture, and vibration can cause wires to corrode, insulation to crack, and connectors to fail. This can lead to intermittent electrical problems, short circuits, and even fires.
- Rodent Damage: Mice and other rodents love to chew on wiring harnesses, turning your engine bay into their personal buffet.
- Accident Repair: A significant collision can severely damage the wiring harness, making replacement a safer and more reliable option than splicing dozens of wires.
- Modifications and Upgrades: If you're adding significant aftermarket components like a stand-alone engine management system (ECU), a supercharger, or a complex audio system, you might need to modify or even replace sections of the wiring harness to accommodate the new electrical demands.
- Restoration: For classic car restorations, replacing the original, often brittle and unreliable wiring harness is a crucial step in ensuring safe and dependable operation.
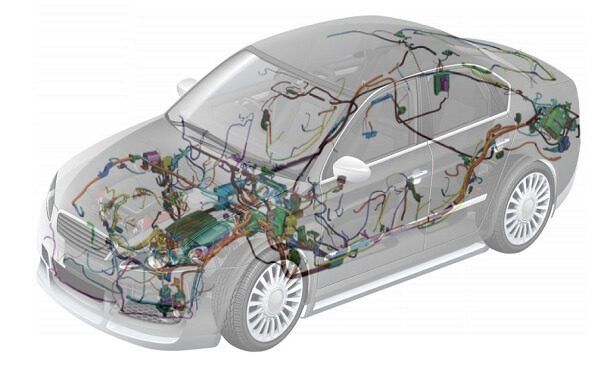
Key Specs and Main Parts of a Wiring Harness
A wiring harness isn't just a bundle of wires; it's a carefully engineered system. Understanding its components is essential for estimating replacement costs:
- Wires: The copper conductors that carry electrical current. Wire gauge (thickness) is critical; thicker wires handle higher amperage. Wire insulation is also crucial for preventing shorts. Common types include GPT, TXL, and GXL, each offering varying degrees of heat and abrasion resistance.
- Connectors: These provide secure and reliable connections between different components. They come in various shapes and sizes, and understanding their pin configuration (the arrangement of wires within the connector) is essential for proper installation. Weatherpack and Metri-Pack connectors are popular choices for their environmental sealing capabilities.
- Terminals: The metal contacts inside the connectors that crimp onto the wires. Choosing the correct terminal for the wire gauge and connector type is crucial for a solid connection.
- Splices: Points where multiple wires are joined together. Properly executed splices are essential for maintaining electrical continuity and preventing corrosion. Heat shrink tubing is often used to protect splices.
- Protective Sleeving and Loom: Plastic tubing, corrugated conduit, or heat-resistant sleeving that protects the wires from abrasion, heat, and chemicals. Split loom tubing is easy to install and remove.
- Ground Straps: Heavy-gauge wires that connect the engine, chassis, and other components to ground, providing a return path for electrical current and preventing voltage differences that can cause electrical noise and damage.
- Relays and Fuses: Not technically part of the harness itself, but they are frequently integrated into the harness design. Relays are electrically operated switches that allow a low-current circuit to control a high-current circuit. Fuses are safety devices that protect the wiring from overcurrent.
The complexity of the harness directly impacts the cost. A simple harness for a basic engine will be significantly cheaper than a complex harness for a modern vehicle with numerous sensors, actuators, and electronic control units (ECUs).
Factors Influencing Replacement Cost
Here's a breakdown of the factors that contribute to the overall cost of replacing a wiring harness:
- Vehicle Make and Model: Luxury vehicles and those with complex electronic systems (e.g., hybrid or electric cars) typically have more expensive and complex harnesses.
- Harness Location: Engine harnesses are usually more expensive than body harnesses or interior harnesses due to the harsh environment they operate in.
- New vs. Used: A new, OEM (Original Equipment Manufacturer) harness is the most reliable option but also the most expensive. Aftermarket harnesses are generally less expensive but may not meet the same quality standards as OEM parts. A used harness is the cheapest option, but its condition is often questionable, and it may have already suffered some degree of degradation.
- OEM vs. Aftermarket: OEM harnesses are made by the vehicle manufacturer or a supplier to the vehicle manufacturer. Aftermarket harnesses are made by third-party companies. OEM harnesses typically cost more, but generally offer better fit, quality, and reliability.
- Complexity of the Harness: As mentioned earlier, the more complex the harness, the higher the cost.
- Labor Costs (if applicable): Replacing a wiring harness can be a time-consuming job, especially if it involves removing interior components or accessing hard-to-reach areas. If you're paying a mechanic to do the work, labor costs can significantly increase the overall price. Expect to pay anywhere from $500 to $2000+ for labor, depending on the vehicle and the complexity of the job.
- Shop Hourly Rate Shop hourly rates can vary widely, affecting labor costs considerably.
- Diagnostic Work Time may be needed to diagnose the extent of the wiring damage.
- Additional Components: You might need to replace connectors, terminals, or other components that are damaged or corroded.
Estimating the Cost: A Realistic Range
So, what's a realistic price range for replacing a wiring harness? Here's a rough estimate:
- Simple Engine Harness (e.g., classic car, basic engine): $200 - $500 (for the harness itself)
- Modern Vehicle Engine Harness: $500 - $1500+
- Body Harness: $300 - $1000+
- Complete Vehicle Harness (rare, but possible): $2000 - $5000+
These are just estimates, and the actual cost could be higher or lower depending on the specific circumstances. It's always a good idea to get quotes from multiple sources before making a decision.
Real-World Use: Basic Troubleshooting Tips
Before you jump into replacing the entire harness, consider these troubleshooting steps:
- Visual Inspection: Carefully inspect the harness for obvious signs of damage, such as cracked insulation, corroded connectors, or chewed wires.
- Continuity Testing: Use a multimeter to check for continuity (a complete electrical path) between two points in the harness. A lack of continuity indicates a broken wire or a faulty connection.
- Voltage Testing: Use a multimeter to check for voltage at various points in the harness. A lack of voltage or an incorrect voltage level can indicate a wiring problem.
- Ground Testing: Ensure that the ground connections are clean and secure. A poor ground connection can cause a variety of electrical problems.
- Scan for Diagnostic Trouble Codes (DTCs): Use an OBD-II scanner to check for DTCs that might indicate a wiring problem.
Safety Considerations
Working with electrical systems can be dangerous. Here are some safety precautions to keep in mind:
- Disconnect the Battery: Always disconnect the negative battery terminal before working on the electrical system. This will prevent accidental shorts and electrical shocks.
- Use Proper Tools: Use insulated tools to prevent electrical shocks.
- Avoid Working in Wet Conditions: Water is a conductor of electricity. Avoid working on the electrical system in wet conditions.
- Be Careful with Airbags: Airbags are electrically activated devices. Follow the manufacturer's instructions carefully when working near airbags. Accidental deployment can cause serious injury.
- Fuel Lines: Be aware of the fuel lines. Damaging a fuel line could cause a fire.
Replacing a wiring harness can be a significant undertaking. By understanding the components involved, the factors that influence cost, and the necessary safety precautions, you can approach this project with confidence and achieve a successful outcome. Remember to take your time, be methodical, and double-check your work.
And remember, we have access to detailed wiring diagrams that can be invaluable for this type of project. Feel free to reach out to download the relevant diagram for your specific vehicle model. Good luck!