
How To Disconnect Car Battery Diagram
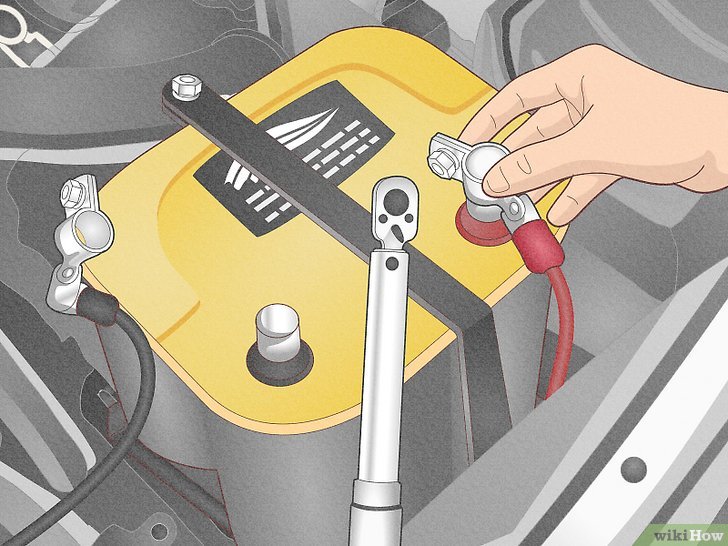
Understanding how to disconnect and reconnect your car battery is a fundamental skill for any DIY mechanic or car owner. While seemingly straightforward, doing it properly is crucial for your safety and the health of your vehicle's electrical system. This article will provide a detailed breakdown of a typical car battery disconnect diagram, explaining its components, symbols, and practical applications. We'll also cover essential safety precautions to minimize risks.
Purpose of the Car Battery Disconnect Diagram
The car battery disconnect diagram serves as a visual guide for safely disconnecting the battery, which is essential in several scenarios:
- Repairs and Maintenance: Disconnecting the battery before working on any electrical component or system is paramount. This prevents accidental shorts, shocks, and damage to sensitive electronic control units (ECUs).
- Storage: If you're storing your car for an extended period, disconnecting the battery prevents parasitic drain, which can deplete the battery and potentially damage it.
- Jump Starting: Understanding the correct polarity and connection points is crucial for safely jump-starting a vehicle.
- Replacing the Battery: Naturally, disconnecting the old battery is the first step in replacement.
- Installing Aftermarket Accessories: When adding electrical accessories like stereos, alarms, or lights, disconnecting the battery ensures no damage occurs during wiring.
- Diagnostic Work: Disconnecting the battery can sometimes reset certain systems, which is useful in diagnosing electrical issues.
Having a clear diagram, especially one specific to your vehicle model, is incredibly valuable, but understanding the general principles applies across most vehicles.
Key Specs and Main Parts
A typical car battery disconnect diagram focuses on these key components:
- Battery (12V DC): The heart of the electrical system. Diagrams usually indicate the battery's voltage (typically 12V) and amp-hour (Ah) rating, which represents its capacity.
- Positive (+) Terminal: Usually marked with a red cover or a plus (+) symbol. This is the positive connection point.
- Negative (-) Terminal: Usually marked with a black cover or a minus (-) symbol. This is the ground connection point.
- Battery Cables: Thick gauge cables that connect the battery to the vehicle's electrical system.
- Terminal Clamps: Connectors that attach the battery cables to the terminals. These often have bolts for tightening.
- Grounding Point: The location where the negative cable connects to the vehicle's chassis (usually a bolt secured to the frame).
- Fuse Box/Distribution Block: While not directly part of the disconnect process itself, the diagram may reference the main fuse box, highlighting the importance of a functioning charging system.
- Battery Management System (BMS): Some newer vehicles have a BMS that monitors battery health. Disconnecting the battery on these vehicles may require specific procedures to avoid errors. The diagram might indicate this.
Symbols Explained
Understanding the symbols used in the diagram is crucial for accurate interpretation:
- Solid Lines: Represent wires or cables. The thickness of the line may indicate the gauge (thickness) of the wire.
- Dashed Lines: May represent shielding or grounding paths.
- Colors: Standard colors are used to denote polarity: Red for positive (+), Black for negative (-), and sometimes green for ground.
- Plus (+) and Minus (-) Symbols: Clearly indicate the polarity of the terminals.
- Ground Symbol (typically three horizontal lines decreasing in size): Indicates the connection to the vehicle's chassis, providing a return path for the electrical current.
- Fuse Symbol (often a zigzag line in a rectangular box): Indicates a fuse protecting a circuit.
- Connector Symbols: Represent the physical connectors used to join wires.
- Arrow Symbols: Can show the direction of current flow.
A good diagram will include a legend explaining each symbol used.
How It Works: The Disconnection Process
The principle behind disconnecting the car battery is simple: break the electrical circuit between the battery and the vehicle's electrical system. Here's a step-by-step breakdown:
- Locate the Battery: Typically found under the hood, in the trunk, or under the rear seat.
- Identify the Terminals: Find the positive (+) and negative (-) terminals.
- Loosen the Terminal Clamps: Use a wrench (usually 10mm or 8mm) to loosen the bolts on the terminal clamps. Always start with the negative (-) terminal.
- Remove the Negative Cable: Carefully remove the negative cable from the negative terminal. Tuck it away so it doesn't accidentally touch the terminal.
- Remove the Positive Cable: Next, remove the positive (+) cable from the positive terminal. Again, secure it away from the terminal.
Why negative first? Disconnecting the negative terminal first prevents the possibility of creating a short circuit. If you accidentally touch the wrench to the vehicle's chassis while disconnecting the positive terminal, you could create a spark and potentially damage the battery or electrical system. By disconnecting the negative terminal first, you eliminate this risk as the chassis is already connected to the negative side of the battery.
Reconnecting the battery follows the reverse order: positive (+) first, then negative (-).
Real-World Use: Basic Troubleshooting Tips
Here are some common issues you might encounter and how to address them:
- Corrosion: If the terminals are corroded, clean them with a battery terminal cleaner or a mixture of baking soda and water before disconnecting. Use a wire brush to remove stubborn corrosion.
- Tight Terminal Clamps: If the clamps are difficult to loosen, try using a penetrating oil to help loosen the bolts.
- Sparking During Reconnection: A small spark is normal when reconnecting the negative terminal, especially if the vehicle has a parasitic drain. However, excessive sparking could indicate a short circuit. Investigate further before proceeding.
- Battery Doesn't Hold a Charge: If the battery constantly drains even after disconnecting it, the battery itself may be faulty and need replacement.
- Vehicle Won't Start After Reconnection: Check that the terminal clamps are securely tightened. Also, check the main fuses and any inline fuses related to the starting system.
- Loss of Radio Presets/ECU Settings: Disconnecting the battery will often reset these. Some vehicles have a battery maintainer port where you can connect a small power source to preserve these settings while the main battery is disconnected.
Always consult your vehicle's repair manual for specific instructions and torque specifications for the terminal clamps.
Safety Precautions
Working with car batteries involves potential hazards. Here's how to stay safe:
- Wear Safety Glasses: Protect your eyes from acid splashes and debris.
- Wear Gloves: Protect your hands from battery acid and corrosion.
- Work in a Well-Ventilated Area: Batteries can release flammable hydrogen gas.
- Avoid Smoking or Open Flames: Hydrogen gas is explosive.
- Do Not Short Circuit the Battery: Avoid touching the positive and negative terminals with a metal object.
- Proper Disposal: Dispose of old batteries responsibly at a recycling center.
- Hybrid/Electric Vehicles: Disconnecting the high-voltage battery in a hybrid or electric vehicle is extremely dangerous and should only be performed by qualified technicians with specialized training and equipment. Do not attempt to disconnect the high-voltage battery yourself.
The battery contains sulfuric acid, which is highly corrosive. If you get battery acid on your skin or in your eyes, flush the affected area immediately with plenty of water and seek medical attention.
By understanding the principles outlined in this article and carefully following safety precautions, you can confidently and safely disconnect and reconnect your car battery for various maintenance and repair tasks. Remember to always refer to your vehicle's service manual for specific instructions related to your make and model.
We have a sample car battery disconnect diagram available for download. Please contact us for the file.