Radio Wiring Diagram For 2008 Chevy Silverado
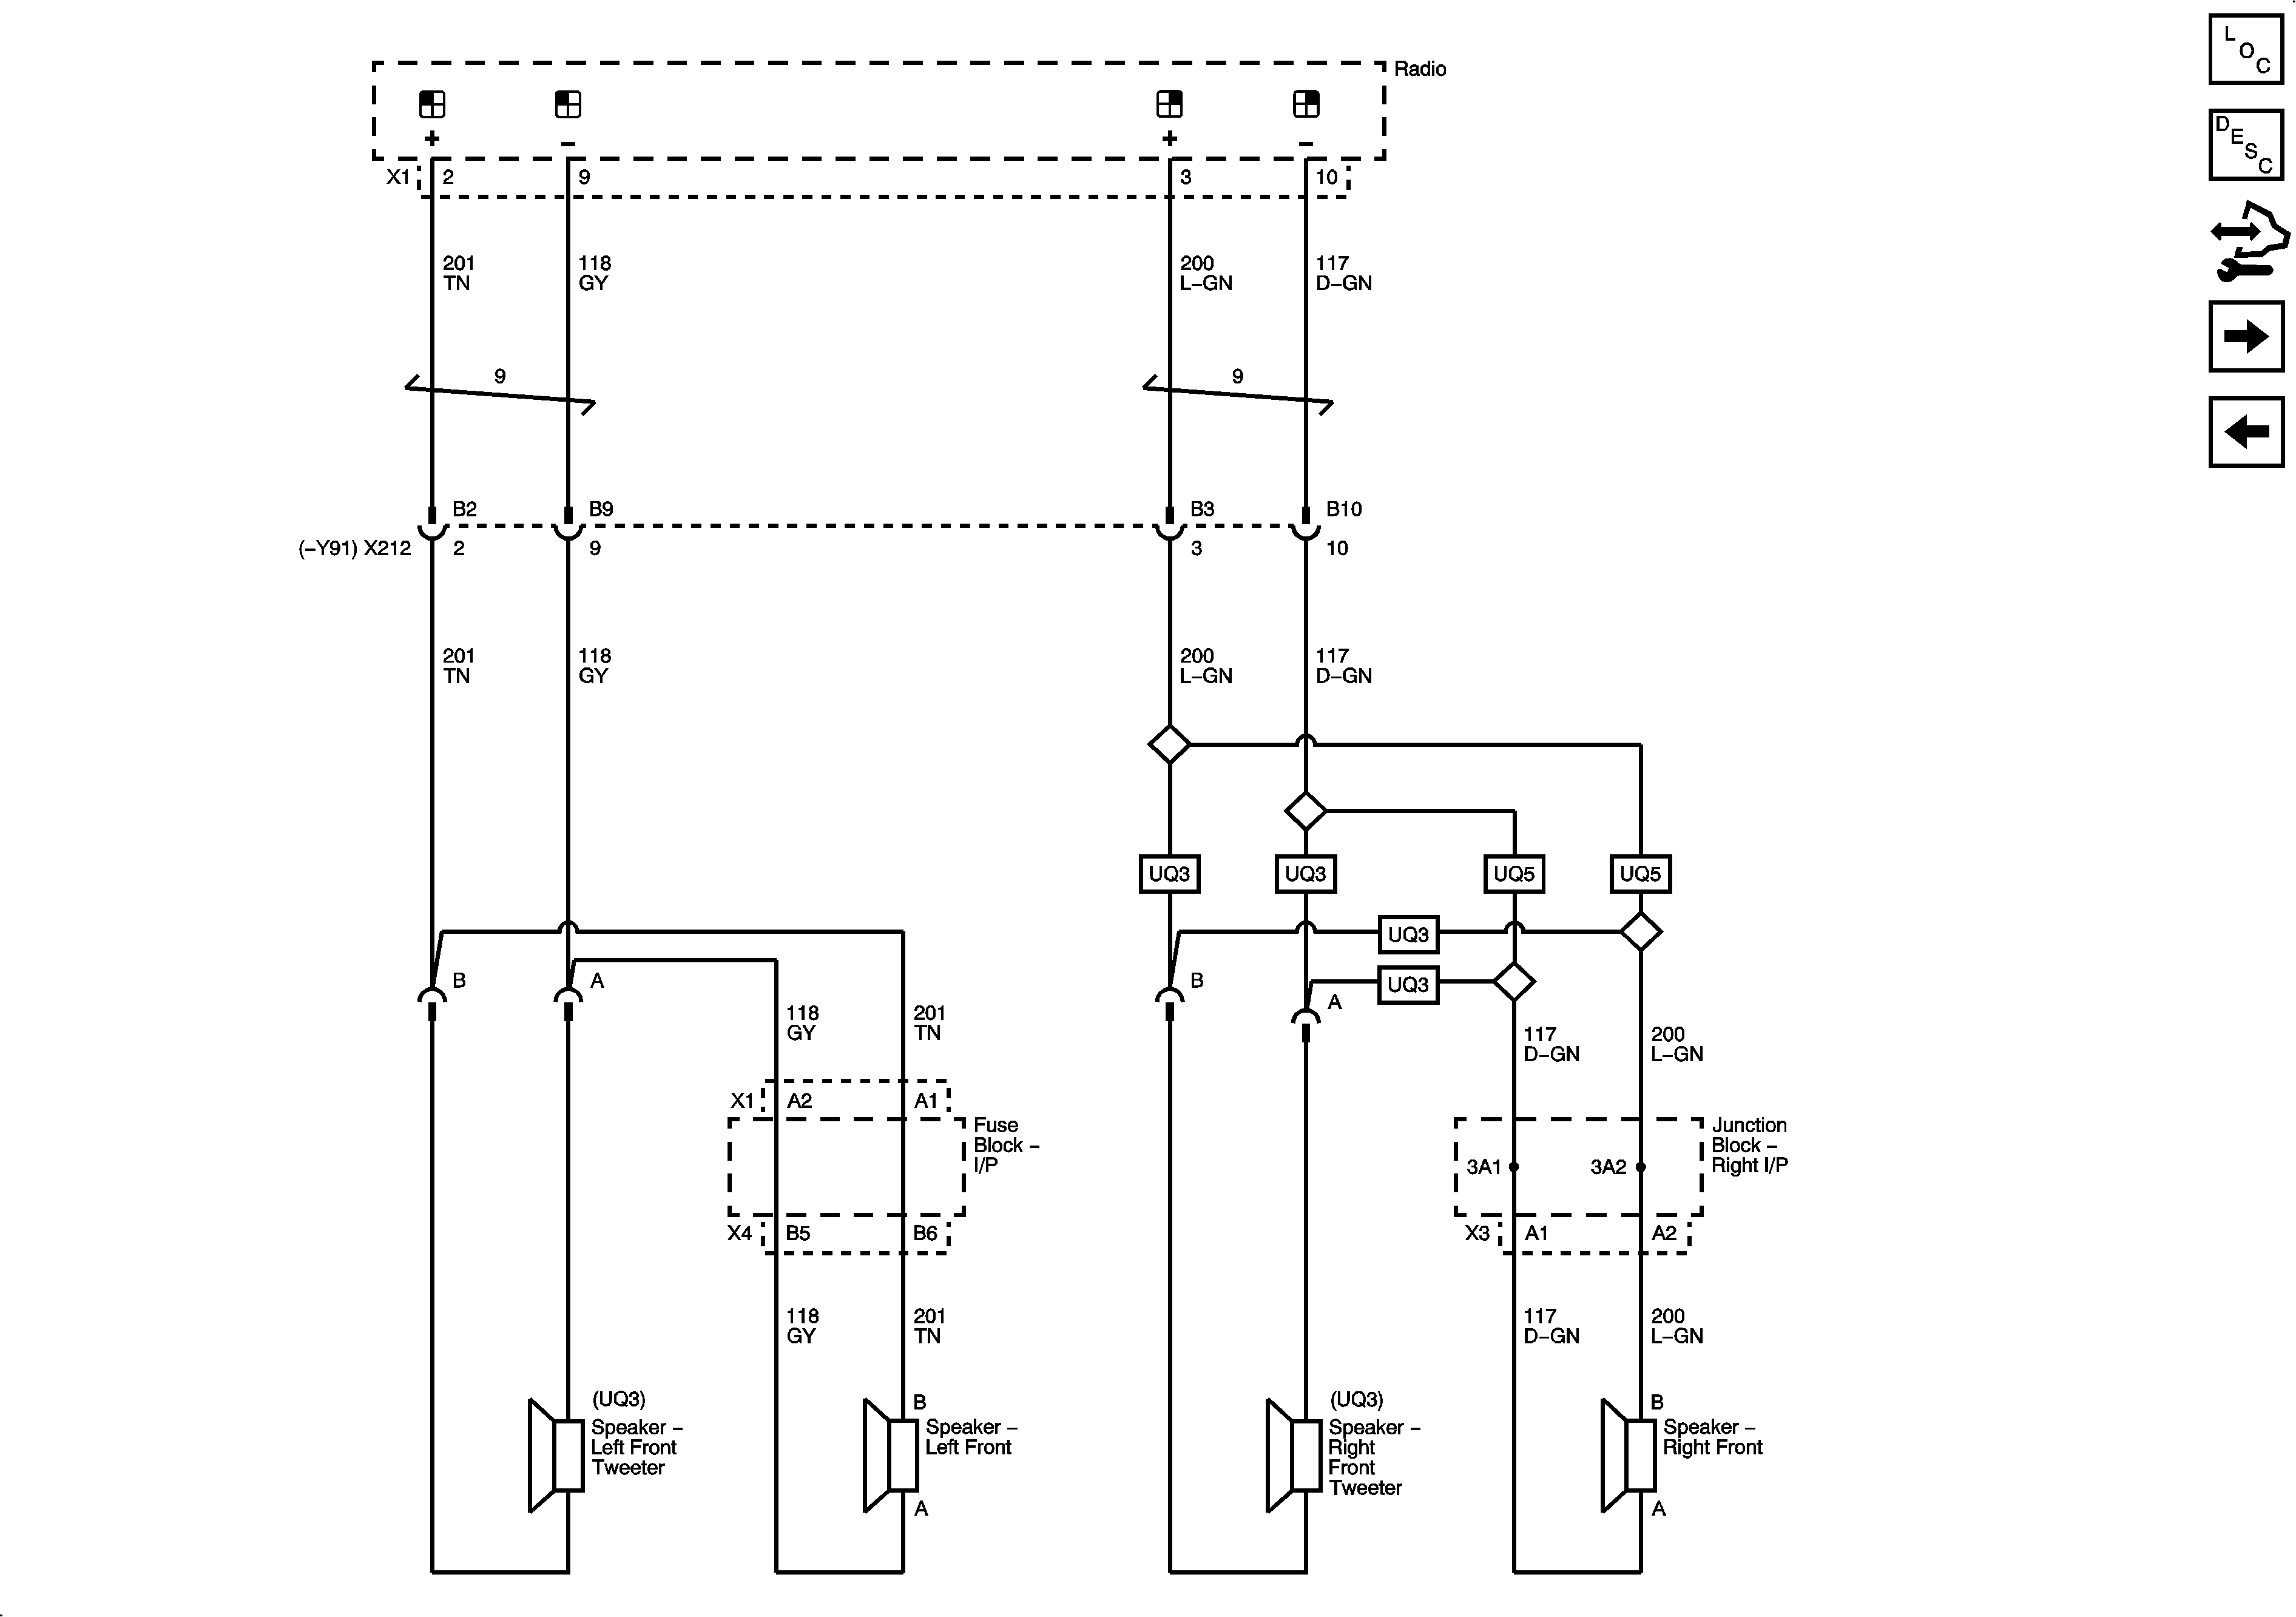
So, you're looking to dive into the radio wiring of your 2008 Chevy Silverado? Whether you're tackling a repair, upgrading your sound system, or just trying to understand how everything's connected, having a clear wiring diagram is absolutely essential. This guide will break down the intricacies of the 2008 Silverado radio wiring, making it accessible even if you're not an electronics wizard. We'll cover the critical components, decipher the symbols, and offer some practical troubleshooting tips.
Why This Diagram Matters
The radio wiring diagram for your 2008 Silverado is more than just a pretty picture. It's the roadmap to your audio system. Here's why it's indispensable:
- Repairs: Identifying a faulty wire or connection is nearly impossible without knowing where it's supposed to go. A wiring diagram lets you trace circuits and pinpoint the source of the problem.
- Upgrades: Installing a new head unit, amplifier, or speakers requires understanding the existing wiring. You'll need to know which wires carry power, ground, and speaker signals to properly integrate the new components.
- Learning: Even if you're not currently working on your radio, studying the diagram can significantly improve your understanding of automotive electrical systems. It provides a concrete example of how various components are interconnected.
Key Specs and Main Parts
Before we dive into the diagram itself, let's familiarize ourselves with the key specs and components involved in the 2008 Silverado's radio wiring. Keep in mind that specific configurations might vary slightly depending on your truck's trim level and optional equipment.
Power Supply
The radio needs power to operate. This typically comes from the truck's 12-volt electrical system. You'll find wires connected to:
- Battery Positive (+12V): Provides the main power source. This is usually a thick gauge wire and is often protected by a fuse.
- Ground: Provides the return path for the electrical current. It's usually connected to the chassis of the truck. A good ground connection is critical for proper operation.
- Accessory/Ignition Wire: This wire provides power to the radio only when the ignition is switched on. This prevents the radio from draining the battery when the truck is off.
Audio Outputs
These wires carry the audio signals to the speakers. Each speaker has two wires: a positive (+) and a negative (-).
- Front Left (+/-): Sends the audio signal to the front left speaker.
- Front Right (+/-): Sends the audio signal to the front right speaker.
- Rear Left (+/-): Sends the audio signal to the rear left speaker (if equipped).
- Rear Right (+/-): Sends the audio signal to the rear right speaker (if equipped).
Other Signals
Beyond power and audio, several other signals might be present, depending on your truck's features:
- Antenna Wire: Connects the radio to the antenna, which receives radio signals.
- Remote Turn-On Wire (Amplifier): If you have a factory or aftermarket amplifier, this wire signals the amp to turn on when the radio is powered up.
- Data Bus Wires (e.g., CAN bus): These wires allow the radio to communicate with other modules in the truck, such as the vehicle's computer (ECU) or steering wheel controls.
- OnStar Wires: Wires related to the OnStar system, allowing for communication and emergency services.
Deciphering the Symbols
A wiring diagram is essentially a symbolic representation of the electrical system. Understanding the symbols is crucial for interpreting the diagram correctly. Here's a breakdown of some common symbols:
- Solid Lines: Represent wires. Thicker lines often indicate higher gauge wires (carrying more current).
- Dotted Lines: May represent shielded wires or connections that are not always present (depending on the vehicle's configuration).
- Circles: Often represent connectors or splices where multiple wires join.
- Squares or Rectangles: Typically represent components, such as the radio, amplifier, or speakers.
- Resistor Symbol (Zigzag Line): Represents a resistor, which limits the flow of current.
- Capacitor Symbol (Two Parallel Lines): Represents a capacitor, which stores electrical energy.
- Diode Symbol (Triangle with a Line): Represents a diode, which allows current to flow in only one direction.
- Fuse Symbol: Represents a fuse, which protects the circuit from overcurrent.
Color Coding: Wire colors are also very important. The diagram will typically indicate the color of each wire. Common colors include red (power), black (ground), and various colors for speaker wires. Refer to the legend on the diagram for the specific color codes.
How It Works
The radio wiring system in your 2008 Silverado is designed to provide power to the radio, receive audio signals from the antenna (or other sources like CD player), process those signals, and then output them to the speakers. When you turn on the ignition, the accessory wire powers up the radio. The radio then tunes into a specific frequency, amplifies the signal, and sends it to the speakers. The volume and tone controls adjust the amplification and equalization of the audio signal.
The data bus wires, if present, allow the radio to communicate with other vehicle systems. For example, the radio might receive information from the vehicle's computer to display vehicle speed or engine RPM on the radio's screen. Steering wheel controls use the data bus to send commands to the radio, such as changing the volume or tuning to a different station.
Real-World Use: Basic Troubleshooting Tips
Here are a few basic troubleshooting scenarios and how the wiring diagram can help:
- No Power to Radio: Use the diagram to trace the power wires back to the fuse box and the battery. Check the fuse first. If the fuse is blown, replace it. If the fuse continues to blow, there's likely a short circuit in the wiring.
- One Speaker Not Working: Use the diagram to identify the speaker wires for the affected speaker. Check the connections at the speaker and at the radio. Use a multimeter to test the continuity of the wires. If the wires are intact, the speaker itself might be faulty.
- Static or Noise: Check the ground connections. A poor ground connection can introduce noise into the audio signal. Use the diagram to identify the ground wires and ensure they are securely connected to the chassis. Also check the antenna connection.
Safety First!
Working with automotive electrical systems can be dangerous. Here are some important safety precautions:
- Disconnect the Battery: Before working on any electrical wiring, disconnect the negative terminal of the battery. This will prevent accidental shorts and potential electrical shocks.
- Use a Multimeter: A multimeter is an essential tool for testing electrical circuits. Learn how to use it safely and effectively to measure voltage, current, and resistance.
- Be Careful with Airbags: Some radio wiring might be located near airbag sensors or modules. Be extremely careful not to damage these components, as it could cause the airbags to deploy unexpectedly. Consult your vehicle's service manual for specific safety precautions related to airbags.
- Fuses are Important Never replace a fuse with one of a higher amperage. This can overload the wiring and cause a fire.
- Avoid Working in Wet Conditions: Water and electricity don't mix. Avoid working on electrical wiring in wet conditions.
Specifically, be very careful around the airbag system. Accidentally triggering an airbag can cause serious injury.
By understanding the components, reading the wiring diagram, and taking necessary safety precautions, you can confidently tackle many radio wiring projects on your 2008 Chevy Silverado. Good luck!
We have the complete radio wiring diagram file available for download. You can use it as you work on your 2008 Chevy Silverado.
Remember to always double-check the specific wiring configuration for your vehicle, as there may be variations depending on the trim level and optional equipment.