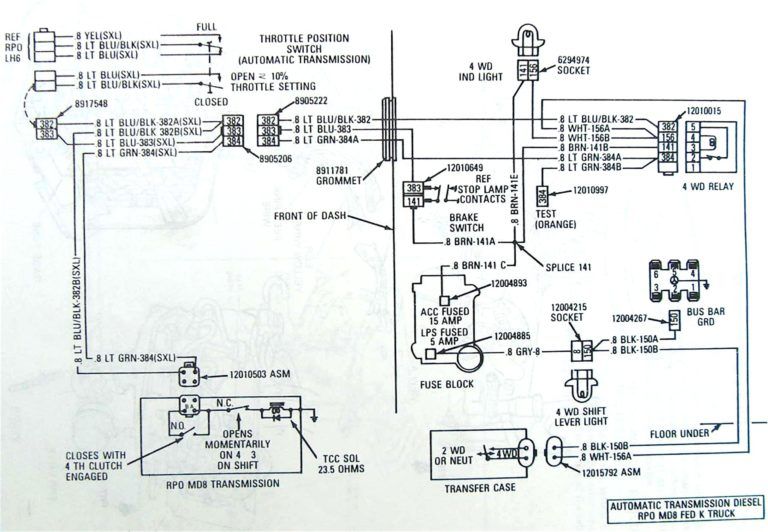
Schematic 4l60e Transmission Wiring Diagram
Understanding the 4L60E transmission wiring diagram is crucial for anyone diving into repairs, modifications, or performance upgrades on vehicles equipped with this popular automatic transmission. This article serves as a comprehensive guide, breaking down the schematic and equipping you with the knowledge to troubleshoot issues, perform swaps, and generally enhance your understanding of your vehicle's powertrain.
Purpose of a 4L60E Wiring Diagram
The 4L60E wiring diagram, often called a schematic, is a roadmap for the electrical system controlling the transmission. It's more than just a picture; it's a precise visual representation of all electrical components and their interconnections. Why is this important? Consider these scenarios:
- Troubleshooting: A malfunctioning shift solenoid? A faulty sensor? The wiring diagram helps you trace the circuit, pinpoint breaks, shorts, or component failures, and verify signal integrity.
- Transmission Swaps: Integrating a 4L60E into a different vehicle requires careful wiring. The diagram is your guide to ensure proper connections to the PCM (Powertrain Control Module), sensors, and power sources.
- Performance Modifications: Some modifications, like adding a transbrake or manual valve body, require altering the electrical system. The diagram allows you to do so safely and effectively.
- Learning: Even if you're not actively repairing something, studying the diagram provides a deeper understanding of how the transmission operates and how the electrical signals influence its behavior.
Key Specs and Main Parts
Before diving into the diagram itself, let's review the critical components and their functions within the 4L60E transmission:
- PCM (Powertrain Control Module): The "brain" of the operation. The PCM receives sensor data and sends commands to the solenoids to control shifting and torque converter clutch engagement.
- Shift Solenoids (Solenoid A and Solenoid B): These electromechanical valves control the flow of transmission fluid to different hydraulic circuits, enabling the transmission to shift between gears. They are pulse-width modulated (PWM), meaning the PCM controls the percentage of time they are 'on' to finely control fluid pressure.
- Torque Converter Clutch (TCC) Solenoid: Controls the engagement of the torque converter clutch, which locks the engine and transmission together for improved fuel economy at highway speeds. This also is typically PWM controlled.
- Transmission Fluid Temperature (TFT) Sensor: Provides the PCM with the temperature of the transmission fluid. This data is used to adjust shift timing and TCC engagement.
- Turbine Speed Sensor (TSS): Located at the front of the transmission, measures the input speed of the turbine shaft. This is sent to the PCM and used to determine shift points.
- Output Speed Sensor (OSS): Located at the rear of the transmission, measures the output speed of the transmission. This information is used by the PCM for shift scheduling and diagnostic purposes.
- Wiring Harness: The collection of wires that connect all the sensors and solenoids to the PCM and power sources.
- Neutral Safety Switch (NSS): (Also known as Transmission Range Sensor) Informs the PCM of the gear selector position. This prevents the engine from starting in gear and allows the PCM to select the appropriate shift schedule.
Symbols: Deciphering the Diagram
Understanding the symbols used in the wiring diagram is essential for interpreting its information. While conventions can vary slightly between manufacturers, the following are common:
- Lines: Solid lines represent wires. Dashed lines may indicate shielded cables or wires bundled together.
- Wire Colors: Wires are typically identified by a two-letter code (e.g., "LT BLU" for Light Blue). These codes are usually listed in a key or legend on the diagram. Pay close attention to the color coding, as it's crucial for accurate identification.
- Circles: Represent connectors. They may include pin numbers to indicate which wire connects to which pin.
- Rectangles: Usually represent components like relays, solenoids, or sensors.
- Ground Symbols: Indicate a connection to the vehicle's chassis ground.
- Voltage Sources: Represented by symbols indicating the voltage level (e.g., +12V).
- Resistors: A zig-zag line represents a resistor.
- Capacitors: Two parallel lines represents a capacitor.
Often the schematic will use small letters and numbers along the wire runs. These reference where the wire goes to and from. They may also note what harness connector is being used.
How It Works: Following the Electrical Path
The 4L60E's electrical system is a closed-loop feedback system. The PCM uses data from the TSS, OSS, TFT, and NSS to determine the optimal shift points and TCC engagement. It then sends electrical signals to the shift solenoids and the TCC solenoid to control the transmission's behavior. The entire system is powered by the vehicle's electrical system, with the PCM regulating the voltage and current supplied to each component.
For example, let's consider a 1-2 shift. The PCM receives data indicating the vehicle has reached the appropriate speed and engine load for a 1-2 shift. It then de-energizes solenoid A and energizes solenoid B. This allows fluid to flow to the appropriate hydraulic circuits, causing the transmission to shift into second gear. The PCM monitors the TSS and OSS to confirm the shift has occurred correctly. The shift solenoids are PWM signals. The PCM does not simply turn them fully on or off; instead, it cycles them on and off rapidly to control the amount of fluid flow.
Real-World Use: Basic Troubleshooting Tips
Here are a few basic troubleshooting tips using the wiring diagram:
- No Shifting: Check the power supply to the PCM and the transmission. Use a multimeter to verify voltage at the appropriate pins on the PCM and transmission connectors. Refer to the wiring diagram to identify the correct pins.
- Erratic Shifting: Could be caused by a faulty sensor. Use a scan tool to read sensor data and compare it to expected values. The TFT sensor is a common culprit. Use the wiring diagram to check the sensor's wiring for shorts or opens.
- TCC Not Engaging: Check the TCC solenoid and its wiring. A common issue is a broken wire or a faulty solenoid. Use an ohmmeter to test the solenoid's resistance. Compare the reading to the specifications in the service manual.
- Check Engine Light: Scan the PCM for diagnostic trouble codes (DTCs). Research the DTCs to understand the potential causes and use the wiring diagram to trace the circuits related to the flagged components.
Always refer to your vehicle's specific service manual for detailed troubleshooting procedures and diagnostic information. A generic wiring diagram will provide you with the layout of the electrical system, but service manuals usually have information with the specific voltages and expected signals.
Safety: Handling High-Risk Components
Working with electrical systems can be dangerous. Always disconnect the battery before working on the wiring. High voltage and shorts can cause serious injury or damage to your vehicle. Be especially careful when working with the following components:
- PCM: The PCM is sensitive to static electricity. Use proper grounding techniques when handling it.
- Wiring Harness: Inspect the wiring harness for damage, such as frayed wires or cracked insulation. Repair any damage before reconnecting the battery.
- Connectors: Ensure connectors are clean and properly seated. Use dielectric grease to protect connectors from corrosion.
When testing circuits, use a multimeter with appropriate voltage and current ratings. Never use a test light on circuits connected to the PCM, as it can damage the module.
Diagram Availability
We have a detailed 4L60E wiring diagram available for download. This diagram provides a comprehensive overview of the electrical system and will be a valuable resource for your troubleshooting and repair efforts.