
Serpentine Belt Diagram For 6.6 Duramax
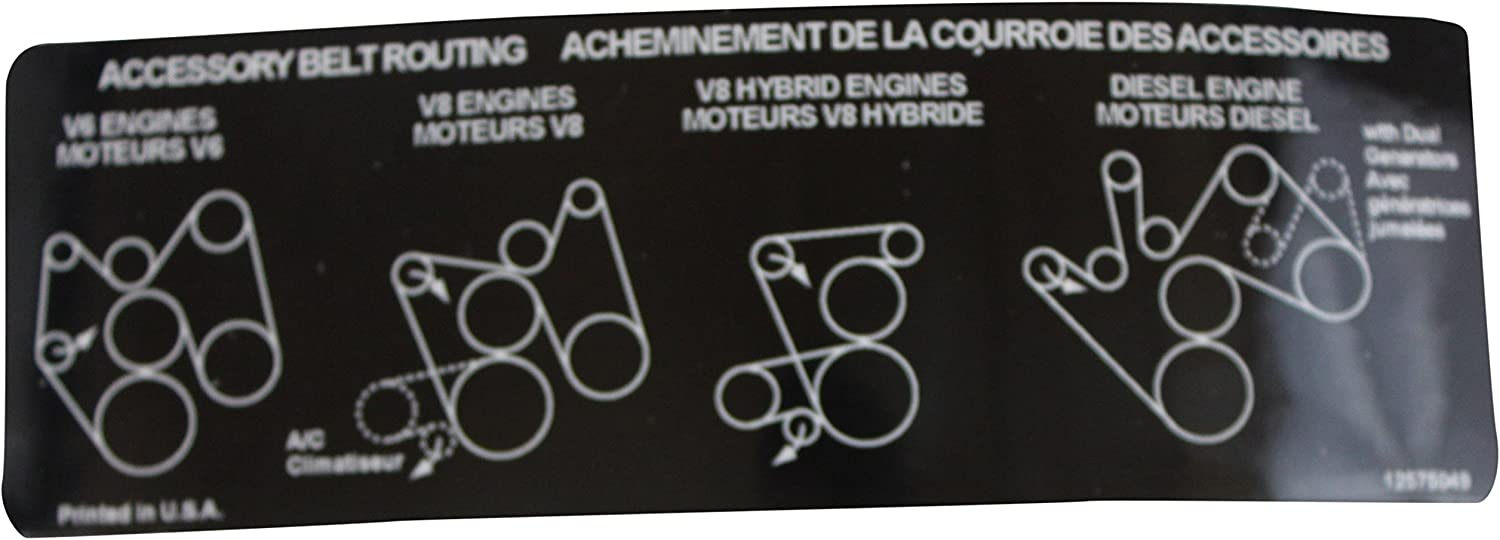
Alright, let's dive into the serpentine belt system on your 6.6 Duramax. Whether you're tackling a repair, upgrading some components, or just want to understand how it all works, having a clear understanding of the serpentine belt diagram is crucial. This article will break down everything you need to know, from the purpose of the diagram to troubleshooting common issues.
Purpose of the Serpentine Belt Diagram
The serpentine belt diagram is essentially a roadmap for the accessory drive system of your Duramax. Its primary purposes are:
- Accurate Belt Routing: The most important function. A misrouted belt will lead to immediate component failure and potentially serious engine damage.
- Component Identification: Helps you quickly identify each component driven by the belt, which is essential for diagnostics and parts replacement.
- Troubleshooting: A visual reference to help you trace the belt's path and identify potential sources of noise, slippage, or component failure.
- Preventive Maintenance: Allows you to inspect the belt and pulleys for wear and tear, and plan for timely replacement.
Think of it as the "cheat sheet" for your engine's accessory drive. Without it, you're flying blind.
Key Specs and Main Parts of the 6.6 Duramax Serpentine Belt System
The 6.6 Duramax, depending on the model year and specific configuration, will have slight variations in the accessory drive layout. However, the core components remain largely the same. Here's a rundown of the key players:
- Crankshaft Pulley (Harmonic Balancer): This is the driving force of the entire system. It's connected directly to the crankshaft and provides the rotational power to the belt. It also acts as a harmonic balancer, damping torsional vibrations in the crankshaft.
- Alternator: Charges the battery and provides power to the vehicle's electrical system. It's driven by the serpentine belt.
- Power Steering Pump: Provides hydraulic pressure to assist with steering. Again, driven by the belt.
- Air Conditioning Compressor: Compresses refrigerant to cool the cabin air. This puts a significant load on the belt when engaged.
- Water Pump: Circulates coolant through the engine block and radiator to regulate engine temperature. Crucially important for preventing overheating.
- Idler Pulley(s): Smooth, bearing-mounted pulleys that guide the belt and maintain proper tension. They don't drive any components themselves.
- Tensioner Pulley: An adjustable pulley with a spring-loaded mechanism that maintains proper belt tension. This is vital for preventing slippage and premature belt wear. The tensioner often includes a marked range for acceptable belt tension.
- Serpentine Belt: A single, long, multi-ribbed belt that wraps around all the pulleys. Made from a durable rubber compound, but it's still subject to wear and tear.
Important Note: Specific components and their layout can differ between different model years (LB7, LLY, LBZ, LMM, LML, L5P) of the Duramax. Always consult the diagram specific to your vehicle's year and engine code.
Understanding Serpentine Belt Diagram Symbols
Deciphering a serpentine belt diagram is straightforward once you understand the common symbols used:
- Solid Lines: Represent the belt itself. The path of the solid line shows how the belt should be routed around the pulleys.
- Arrows: Indicate the direction of belt rotation. This is crucial for understanding which side of the belt (ribbed or smooth) contacts each pulley.
- Pulleys: Represented as circles or ovals. Some diagrams might have icons inside the pulley to indicate which component it drives (e.g., a lightning bolt for the alternator, a steering wheel for the power steering pump).
- Ribbed vs. Smooth Sides: Diagrams typically illustrate whether the ribbed or smooth side of the belt is in contact with a given pulley. This is extremely important; the ribbed side always engages grooved pulleys (like the crankshaft, alternator, AC compressor), while the smooth side usually contacts idler pulleys and the tensioner pulley.
- Tensioner Indicator: The tensioner pulley is usually depicted with an arrow or line indicating the allowable range of movement. This helps you determine if the tensioner is functioning correctly and if the belt is properly sized.
- Color Coding: Some diagrams use color coding to differentiate between different sections of the belt path or to highlight specific components. However, this is less common.
Pay close attention to the arrows indicating belt direction. Reversing the belt's direction, even slightly, can cause serious issues.
How the Serpentine Belt System Works
The serpentine belt system is a remarkably efficient way to transfer power from the engine's crankshaft to various accessories. Here's the basic principle:
- The crankshaft pulley, driven by the engine, spins, transferring rotational energy to the serpentine belt.
- The belt, under tension provided by the tensioner pulley, wraps around the other pulleys connected to the alternator, power steering pump, air conditioning compressor, water pump, and any idler pulleys.
- As the crankshaft pulley turns, it forces the belt to move, rotating the pulleys of the other components.
- Each rotating component performs its specific function: the alternator generates electricity, the power steering pump provides hydraulic pressure, the AC compressor compresses refrigerant, and the water pump circulates coolant.
The tensioner pulley is essential for maintaining consistent belt tension. As the belt stretches over time, the tensioner automatically adjusts to compensate, preventing slippage and ensuring optimal performance of the accessories.
Real-World Use: Basic Serpentine Belt Troubleshooting
Here are a few common issues related to the serpentine belt system and how a diagram can help you troubleshoot:
- Squealing Noise: Often caused by a loose belt or a worn pulley. The diagram helps you identify all the pulleys the belt contacts. Check each pulley for play or roughness in its bearings. A failing tensioner can also cause squealing. Inspect the tensioner's range of motion to ensure it's within spec.
- Belt Slippage: Indicated by a loss of power from one or more accessories (e.g., weak power steering, poor AC performance). Slippage can be caused by a worn belt, a faulty tensioner, or a contaminated pulley (oil or coolant). The diagram helps you visually inspect the belt's path and check for alignment issues.
- Belt Breakage: Usually caused by excessive wear, misalignment, or a seized component. Inspect all pulleys for free rotation. A seized pulley will quickly destroy the belt.
- Component Failure: If a component (like the alternator or water pump) fails, it can put undue stress on the belt and lead to premature wear or breakage. Use the diagram to check for proper belt routing after replacing a component.
Pro Tip: Before replacing a serpentine belt, take a picture of the existing belt routing. This serves as a backup in case you lose or misinterpret the diagram.
Safety Considerations
Working on the serpentine belt system can be dangerous if you're not careful. Here are a few key safety precautions:
- Disconnect the Battery: Always disconnect the negative battery cable before working on any electrical components, including the alternator.
- Engine Off and Cool: Never work on the serpentine belt system while the engine is running or hot. Let the engine cool down completely before starting any repairs.
- Keep Hands and Fingers Clear: The serpentine belt system contains moving parts that can cause serious injury. Keep your hands and fingers clear of pulleys and the belt while the engine is running.
- Eye Protection: Wear safety glasses to protect your eyes from debris.
- Be Aware of the Radiator Fan: Even with the engine off, the radiator fan can sometimes cycle on unexpectedly. Disconnect the fan's electrical connector if possible.
The tensioner pulley is under significant spring pressure. Use the correct tool to relieve the tension before removing the belt. Releasing the tension suddenly can cause injury.
We have a detailed, printable serpentine belt diagram specific to the 6.6 Duramax engine available for download. This diagram will provide a clear and accurate visual reference for your specific engine configuration. It includes detailed labeling of all components and clear routing instructions.