
Serpentine Belt Diagram Honda Odyssey
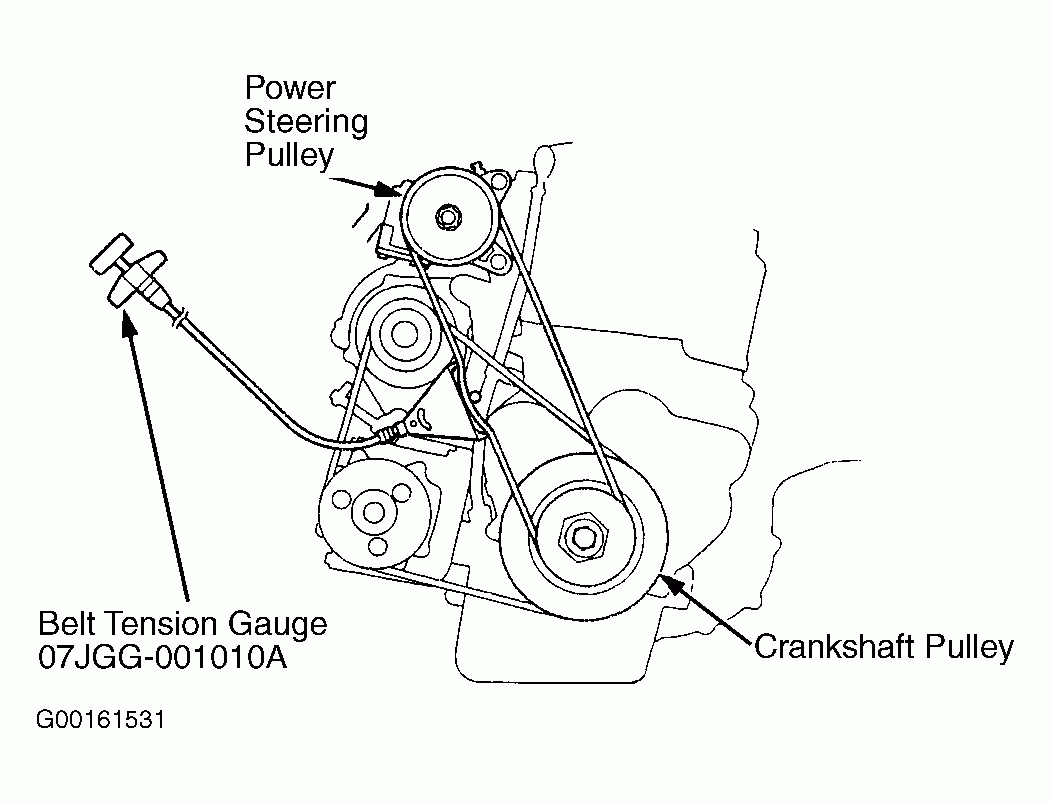
For the experienced DIY mechanic tackling repairs or maintenance on a Honda Odyssey, understanding the serpentine belt diagram is absolutely crucial. Think of it as the roadmap for your van's accessory drive system. Without it, replacing a belt, diagnosing a squeal, or even just identifying the components involved can be a frustrating, time-consuming guessing game. This article will break down the diagram, explain its significance, and equip you with the knowledge to use it effectively.
Purpose of the Serpentine Belt Diagram
The serpentine belt diagram illustrates the routing of the serpentine belt around various engine components. The purpose of having access to such a diagram is multi-faceted:
- Belt Replacement: The most common reason. You need to know the exact path of the belt to properly install a new one. An incorrectly routed belt will fail quickly, and may damage components.
- Troubleshooting: A squealing belt can indicate a failing component. The diagram helps you identify each pulley the belt touches, enabling you to pinpoint the source of the noise.
- Component Inspection: Inspecting the pulleys and accessories driven by the belt for wear, damage, or misalignment is easier with the diagram as a visual aid.
- Understanding Accessory Drive System: Even if you're not actively working on the system, studying the diagram allows you to understand how the various components (alternator, power steering pump, A/C compressor, etc.) are driven by the engine.
- Modifications/Upgrades: If you're considering upgrading any accessory (e.g., a high-output alternator), understanding the belt path is essential to ensure compatibility and proper operation.
Key Specs and Main Parts
Let's consider a common Honda Odyssey, say, a 2005-2010 model with the J35A6 or J35A7 3.5L V6 engine. While the exact belt routing may vary slightly depending on the specific year and options (e.g., with or without rear A/C), the core components remain consistent. Important specs to note for purchasing a new belt include length and number of ribs. Always consult your vehicle's owner's manual or a parts catalog to determine the correct belt specification for your Odyssey's year and engine.
Main Parts:
- Crankshaft Pulley: Driven directly by the engine's crankshaft, this pulley provides the rotational force for the entire serpentine belt system.
- Alternator Pulley: The alternator generates electrical power for the vehicle.
- Power Steering Pump Pulley: The power steering pump provides hydraulic assistance for steering.
- A/C Compressor Pulley: The A/C compressor circulates refrigerant in the air conditioning system.
- Idler Pulley(s): Smooth, ungrooved pulleys that guide the belt and maintain proper tension.
- Tensioner Pulley: This spring-loaded pulley automatically adjusts belt tension to compensate for wear and temperature changes. Crucially important for belt longevity.
- Water Pump Pulley: Driven by the serpentine belt, the water pump circulates coolant through the engine to prevent overheating. Note: some Odyssey models may have the water pump driven by the timing belt, not the serpentine belt. Check your vehicle's specifications.
Symbols and Diagram Interpretation
Serpentine belt diagrams use standardized symbols to convey information effectively:
- Solid Lines: Represent the path of the belt itself. The line thickness generally doesn't have specific meaning beyond visual clarity.
- Pulleys: Represented by circles. The diameter of the circle may be proportional to the actual pulley size but should not be relied upon for accurate measurements.
- Arrows: Indicate the direction of belt rotation around each pulley. Very important for proper routing!
- Tensioner Symbol: A stylized representation of the tensioner assembly, often including an arrow indicating the direction of tension application. This is crucial for understanding how the tensioner works when replacing the belt.
- Color Coding: While not universally standardized, some diagrams use colors to highlight specific sections of the belt path or to differentiate between different engine configurations.
A proper diagram will clearly show the belt wrapping around each pulley in the correct direction. Pay close attention to how the belt wraps around the tensioner; this is often the most confusing part.
How It Works: The Accessory Drive System
The serpentine belt acts as a torque transfer mechanism. The engine's crankshaft rotates, turning the crankshaft pulley. This rotation is then transferred to all the other pulleys in the system via the serpentine belt. Each component (alternator, power steering pump, A/C compressor) requires a certain amount of torque to operate. The belt must maintain sufficient tension to prevent slippage, ensuring that each component receives the necessary torque. The tensioner pulley plays a vital role in maintaining this tension. Insufficient tension leads to belt slippage, resulting in reduced performance of the driven accessories (e.g., dim headlights, weak power steering, poor A/C performance) and premature belt wear.
The design of the serpentine belt system allows for a compact and efficient way to drive multiple accessories from a single belt, simplifying maintenance and reducing the number of components needed compared to older, multi-belt systems.
Real-World Use and Basic Troubleshooting
Here's how the diagram helps in real-world situations:
- Squealing Belt: A squealing belt often indicates slippage. Use the diagram to identify the components the belt wraps around. Check each pulley for signs of damage, excessive play, or contamination (e.g., oil leaks). A misaligned pulley can also cause squealing.
- Belt Jumping Off: If the belt repeatedly jumps off the pulleys, suspect a misalignment issue, a worn tensioner, or a damaged pulley. The diagram helps you verify the correct belt routing and inspect each component for damage.
- Difficulty Installing a New Belt: The diagram is your primary reference. Double-check that you're routing the belt correctly around each pulley before applying tension. Ensure the belt is seated properly in all the grooves.
- Diagnosing Accessory Problems: If an accessory isn't functioning correctly (e.g., alternator not charging), use the diagram to confirm that the belt is properly engaging the accessory's pulley.
Safety Considerations
The serpentine belt system involves moving parts and potentially high temperatures. Here are crucial safety precautions:
- Always disconnect the negative battery cable before working on the serpentine belt system. This prevents accidental starting of the engine.
- Never put your hands near the belt or pulleys while the engine is running. Serious injury can occur.
- Be extremely careful when releasing the tensioner. The spring-loaded tensioner can snap back forcefully. Use the correct tool to relieve tension slowly and safely.
- Allow the engine to cool down before working on the belt system. Components can become very hot during operation.
- Wear eye protection to prevent debris from entering your eyes.
The tensioner spring can deliver a significant blow if released carelessly. Be especially attentive when working with the tensioner pulley assembly.
By understanding the diagram and following these safety precautions, you'll be well-equipped to tackle serpentine belt-related tasks on your Honda Odyssey confidently and safely. We have the file with the Serpentine Belt Diagram available for download if you need it.