Toyota Corolla 2010 Fuse Box Diagram
The 2010 Toyota Corolla, a reliable and ubiquitous vehicle, relies on a complex electrical system for its various functions. At the heart of this system lies the fuse box, a critical component responsible for protecting the wiring and electrical components from overcurrent. Understanding the 2010 Corolla fuse box diagram is essential for anyone performing electrical repairs, modifications, or even just basic troubleshooting. This article provides a detailed breakdown of the diagram, its components, and how to use it effectively.
Purpose of the Fuse Box Diagram
The fuse box diagram is essentially a roadmap of your Corolla's electrical system. It shows the location of each fuse and relay, and indicates which circuit each protects. This knowledge is crucial for several reasons:
- Troubleshooting Electrical Problems: When an electrical component fails (e.g., a headlight, the radio, or a power window), the first step is usually to check the corresponding fuse. The diagram tells you exactly which fuse to examine.
- Performing Electrical Repairs: If a fuse blows repeatedly, it indicates a problem within the circuit. The diagram helps you identify all the components connected to that circuit, narrowing down the potential source of the issue.
- Adding Aftermarket Accessories: When installing aftermarket accessories like amplifiers, lights, or alarms, you'll need to tap into the car's electrical system. The diagram helps you identify suitable points for power and ground connections, minimizing the risk of damaging the existing wiring.
- General Understanding: Even if you're not actively working on your car, understanding the fuse box diagram provides valuable insight into how its electrical systems are organized and protected.
Key Specs and Main Parts of the 2010 Corolla Fuse Box
The 2010 Toyota Corolla typically has two fuse box locations:
- Interior Fuse Box: Located underneath the dashboard on the driver's side. It usually houses fuses for interior components like the radio, lights, power windows, and climate control.
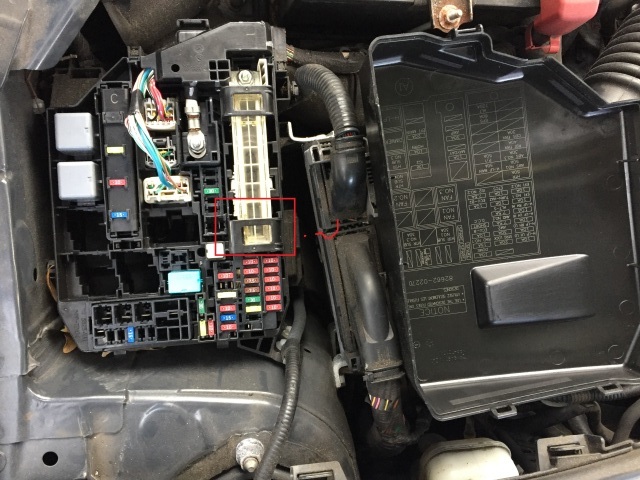
- Engine Compartment Fuse Box: Situated in the engine bay, typically near the battery. It contains fuses and relays for essential engine components like the fuel pump, ignition system, and cooling fan, as well as fuses for the headlights and other exterior lighting.
The key components within each fuse box include:
- Fuses: These are the sacrificial elements that protect the circuits. Each fuse has a specific amperage rating (measured in amps, or A), which indicates the maximum current it can handle before blowing. Common amperage ratings include 5A, 7.5A, 10A, 15A, 20A, 25A, and 30A. Fuses come in various physical sizes and types, usually ATO/ATC blade-type fuses in the Corolla.
- Relays: Relays are electrically operated switches. They allow a low-current circuit (e.g., a switch on the dashboard) to control a high-current circuit (e.g., the headlights). Relays are often used for components that draw a significant amount of power.
- Fuse Puller: A small plastic tool usually located within the fuse box. It's used to safely remove fuses without damaging them or the fuse box itself.
- Fuse Box Cover: The cover protects the fuses and relays from dirt, moisture, and physical damage. It also usually contains a simplified diagram of the fuse layout. However, this simplified diagram is often less detailed than the complete fuse box diagram.
Understanding Fuse Box Diagram Symbols
Fuse box diagrams use a variety of symbols to represent different components and circuits. Here's a breakdown of the most common symbols:
- Lines: Solid lines represent wires connecting the various components. Dashed lines may indicate grounding points or connections to other modules.
- Colors: Wire colors are often indicated on the diagram using abbreviations (e.g., "BL" for Blue, "R" for Red, "W" for White, "G" for Green, "Y" for Yellow, "BK" for Black). These colors help trace wires and identify specific circuits.
- Fuse Symbols: Fuses are typically represented by a simple rectangle or a line with a squiggle through it. The amperage rating is usually indicated next to the symbol (e.g., "15A").
- Relay Symbols: Relays are often depicted as a coil of wire connected to a switch. The diagram usually indicates the function of the relay (e.g., "Headlight Relay," "Fuel Pump Relay").
- Component Symbols: Various symbols are used to represent electrical components like lights, motors, sensors, and switches. The specific symbol used may vary depending on the component.
- Ground Symbols: Typically represented by a series of downward-pointing lines, indicating a connection to the vehicle's chassis ground.
How It Works: A Simple Example
Let's say your 2010 Corolla's cigarette lighter/accessory power outlet isn't working. Here's how you would use the fuse box diagram to troubleshoot the problem:
- Locate the Interior Fuse Box: Open the driver's side door and look underneath the dashboard. You'll find the fuse box cover.
- Consult the Fuse Box Diagram: Either on the cover or the downloaded diagram, locate the fuse labeled "CIG" or "ACC" (or something similar indicating the cigarette lighter or accessory power outlet).
- Identify the Fuse Location: The diagram will show the physical location of this fuse within the fuse box.
- Inspect the Fuse: Use the fuse puller to remove the fuse. Visually inspect it. A blown fuse will have a broken filament inside.
- Replace the Fuse: If the fuse is blown, replace it with a new fuse of the same amperage rating. Never use a fuse with a higher amperage rating, as this could damage the circuit.
- Test the Cigarette Lighter: Turn on the ignition and test the cigarette lighter/accessory power outlet. If it now works, the problem was a blown fuse. If it still doesn't work, there's a more serious problem in the circuit that requires further investigation.
Real-World Use: Basic Troubleshooting Tips
Here are some additional troubleshooting tips when using the 2010 Corolla fuse box diagram:
- Document Everything: Before removing any fuses or relays, take a picture of the fuse box with your phone. This helps you remember the correct location of each component.
- Use the Correct Fuse: Always replace a blown fuse with a fuse of the same amperage rating and type. Using the wrong fuse can damage the circuit or even cause a fire.
- Check for Shorts: If a fuse blows repeatedly, it indicates a short circuit in the wiring. A short circuit is when a wire accidentally comes into contact with ground, causing excessive current to flow. Identifying and repairing the short circuit is essential.
- Test with a Multimeter: A multimeter can be used to test for voltage and continuity in the circuit. This can help you identify the source of a problem.
- Consult a Professional: If you're not comfortable working with electrical systems, or if you're unable to diagnose the problem, it's best to consult a qualified mechanic.
Safety Precautions
Working with automotive electrical systems can be dangerous. Here are some important safety precautions to keep in mind:
- Disconnect the Battery: Before working on any electrical system, disconnect the negative terminal of the battery. This will prevent accidental short circuits.
- Avoid Working with Live Wires: Never work on electrical circuits with the ignition turned on, unless absolutely necessary for testing.
- Wear Safety Glasses: Protect your eyes from sparks or debris.
- Be Careful with Fuel and Other Flammable Materials: Avoid working near fuel lines or other flammable materials.
- Be Aware of Airbag Systems: Airbag systems contain high-voltage components that can be dangerous if mishandled. If you need to work near the airbag system, consult a qualified mechanic.
- High-Current Circuits: Be especially cautious when working with high-current circuits, such as the starter motor and alternator circuits. These circuits can deliver a powerful electrical shock. Always disconnect the battery before working on these circuits.
We have the complete and high-resolution 2010 Toyota Corolla fuse box diagram available for download. This detailed diagram will provide you with a clear and accurate representation of your vehicle's electrical system, making troubleshooting and repairs easier than ever before. Please note that accessing and using this resource is subject to our terms and conditions.