
Toyota Tundra Serpentine Belt Diagram
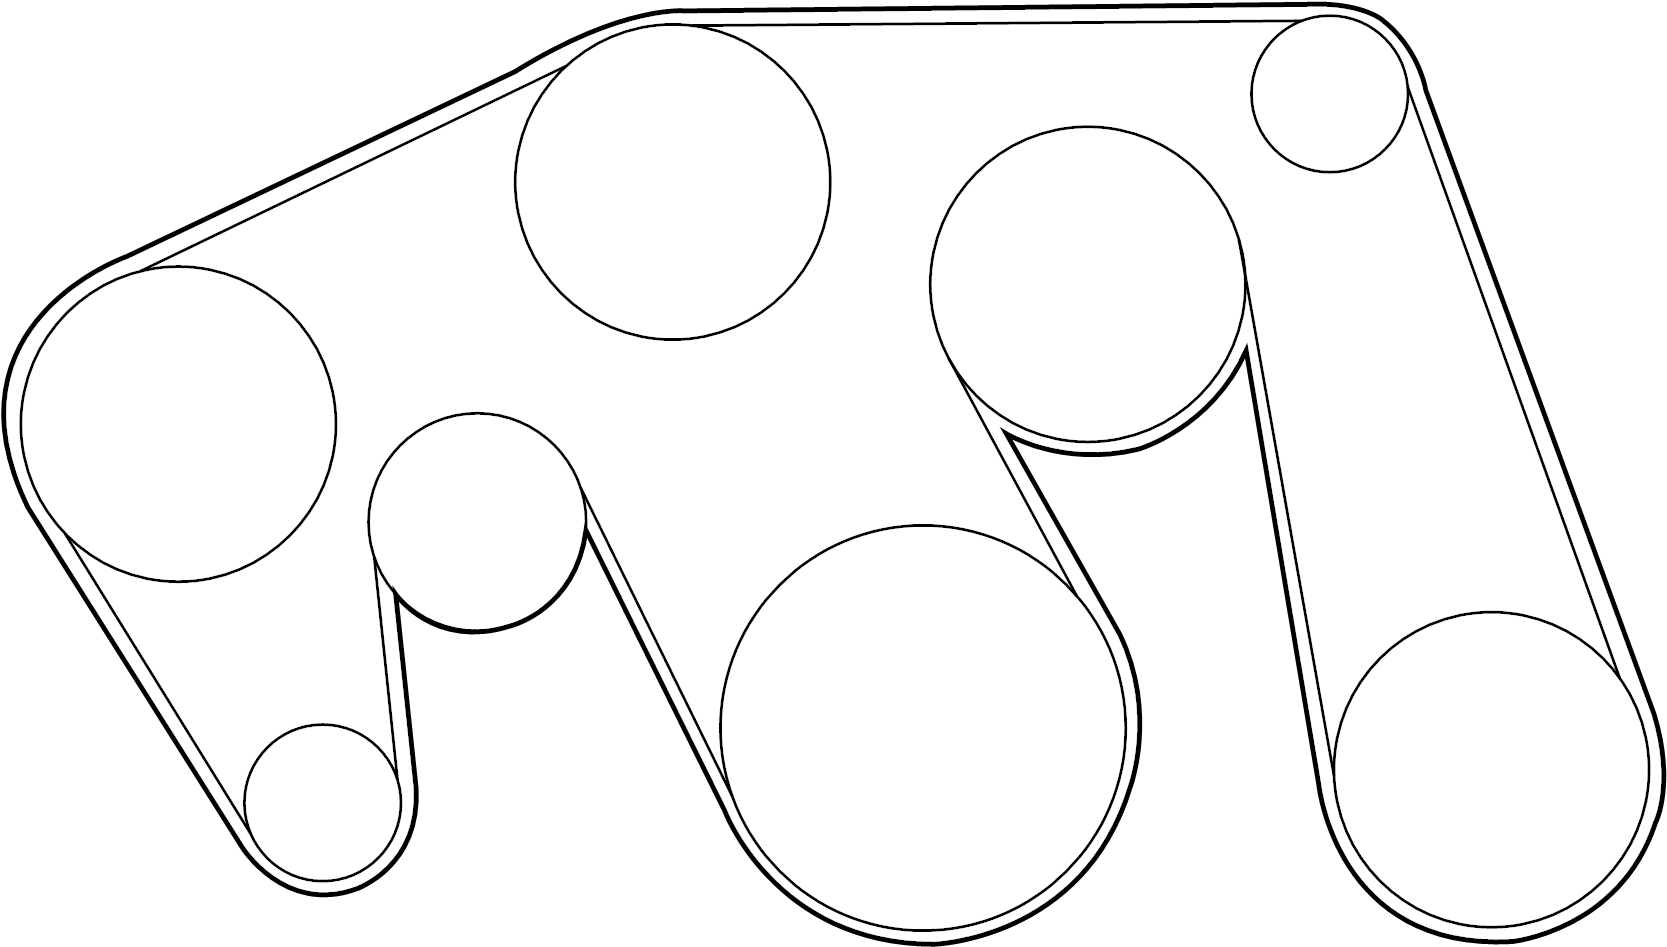
The serpentine belt in your Toyota Tundra is a crucial component, responsible for powering several vital engine accessories. Understanding its path and condition is paramount for preventative maintenance, accurate troubleshooting, and performing necessary repairs. This article will delve into the intricacies of the Tundra's serpentine belt diagram, equipping you with the knowledge to confidently tackle belt-related tasks.
Purpose of the Serpentine Belt Diagram
A serpentine belt diagram is essentially a roadmap illustrating the exact routing of the serpentine belt around various pulleys in your Tundra's engine bay. This diagram is invaluable for several reasons:
- Replacement: When replacing a worn or broken serpentine belt, the diagram ensures correct installation. An improperly routed belt can lead to accessory malfunctions, belt slippage, and even engine damage.
- Troubleshooting: By visually referencing the diagram, you can quickly identify which accessories are driven by the belt. This helps in diagnosing issues like a non-functioning air conditioner, power steering failure, or alternator problems.
- Preventative Maintenance: Regularly inspecting the belt's condition and its routing against the diagram can help you spot potential problems before they escalate. Look for signs of wear, cracks, fraying, or misalignment.
- Learning and Familiarization: Studying the diagram provides a deeper understanding of your Tundra's engine layout and how its various components interact.
Key Specs and Main Parts
While the specific layout may vary slightly depending on the Tundra's engine (e.g., 4.0L V6, 4.6L V8, 5.7L V8) and model year, the fundamental components and their function remain consistent. Here's a breakdown:
- Serpentine Belt: A single, long, multi-ribbed belt made of rubber or synthetic materials that transmits power from the crankshaft to various engine accessories.
- Crankshaft Pulley (Crank Pulley): Connected directly to the crankshaft, this pulley is the driving force behind the entire serpentine belt system. It receives rotational power from the engine and transfers it to the belt.
- Alternator Pulley: The alternator generates electrical power for the vehicle. The serpentine belt spins this pulley, driving the alternator's internal components.
- Power Steering Pump Pulley: The power steering pump provides hydraulic assistance for easier steering. The belt drives this pulley, powering the pump.
- Air Conditioning (A/C) Compressor Pulley: The A/C compressor is responsible for cooling the cabin air. The belt spins this pulley, engaging the compressor.
- Water Pump Pulley: The water pump circulates coolant throughout the engine to prevent overheating. The belt drives this pulley, ensuring proper coolant flow.
- Tensioner Pulley: This spring-loaded pulley maintains the correct tension on the serpentine belt. It automatically adjusts to compensate for belt stretch and wear. A faulty tensioner can cause belt slippage or premature wear.
- Idler Pulley: Smooth, non-driven pulleys that guide the belt and change its direction. They help optimize belt routing and prevent interference with other engine components.
Understanding the Diagram's Symbols
Serpentine belt diagrams use a set of standardized symbols to represent different components and belt routing. Familiarizing yourself with these symbols is crucial for accurate interpretation.
- Solid Lines: Represent the path of the serpentine belt. The width of the line may vary, but generally, a thicker line indicates the front (ribbed) side of the belt, while a thinner line represents the back (smooth) side.
- Dashed Lines: Sometimes used to indicate the belt's path behind other components or to show the belt wrapping around a pulley.
- Circles: Represent pulleys. The size of the circle is generally proportional to the pulley's actual size.
- Labels: Each pulley is typically labeled with an abbreviation indicating its function (e.g., ALT for alternator, P/S for power steering, A/C for air conditioning, WP for water pump, CRK for crankshaft, TEN for tensioner, IDL for idler).
- Arrows: Indicate the direction of belt rotation around each pulley. Following the arrows will help you visualize the belt's path and ensure correct installation.
- Tensioner Symbol: The tensioner pulley is often represented with a symbol that indicates its spring-loaded mechanism, typically a small spring or arrow pointing towards the belt.
How It Works: The Serpentine Belt's Operation
The serpentine belt system is a relatively simple yet vital mechanism. The engine's crankshaft provides the rotational power. This power is transferred via the crankshaft pulley to the serpentine belt. The belt, in turn, wraps around and drives the pulleys of various engine accessories, such as the alternator, power steering pump, air conditioning compressor, and water pump. The tensioner pulley maintains the correct belt tension, ensuring consistent power delivery to each accessory. Without the serpentine belt, these essential accessories would not function, leading to a non-operational vehicle.
The serpentine belt is designed to withstand significant stress and heat, but it is still a wear item. Over time, it can stretch, crack, fray, or even break. A broken serpentine belt will immediately disable several critical vehicle systems, potentially leaving you stranded.
Real-World Use: Basic Troubleshooting Tips
Here are some basic troubleshooting tips related to the serpentine belt:
- Squealing Noise: A squealing noise, especially when the engine is cold or under load, often indicates a loose or worn serpentine belt. Check the belt tensioner and the belt's condition.
- Accessory Malfunction: If a specific accessory is not functioning (e.g., weak A/C, hard steering), check the serpentine belt and its routing. A slipped or broken belt can cause individual accessories to fail.
- Visible Cracks or Fraying: Visually inspect the belt for signs of wear. Cracks, fraying, or missing chunks indicate the need for replacement.
- Belt Slippage: Look for signs of belt dust or debris around the pulleys. This can indicate belt slippage, which can reduce accessory performance.
- Refer to the Diagram: Always refer to the serpentine belt diagram before attempting any repairs or replacements. This will ensure correct belt routing and prevent potential damage.
Safety Considerations
Working around the serpentine belt system requires caution. Here are some safety tips:
- Disconnect the Battery: Before working on the serpentine belt, disconnect the negative battery cable to prevent accidental starting of the engine.
- Hot Engine: Never work on the serpentine belt system when the engine is hot. Allow the engine to cool down completely before starting any repairs.
- Moving Parts: Be aware of moving parts when the engine is running. Keep your hands and clothing away from the serpentine belt and pulleys.
- Belt Tensioner: The belt tensioner is spring-loaded and can snap back forcefully. Use the correct tools to release the tension before removing the belt. Follow the manufacturer's instructions carefully. The tensioner stores a lot of potential energy.
- Eye Protection: Wear safety glasses to protect your eyes from debris.
- Follow Service Manuals: Always consult the Toyota Tundra service manual for specific instructions and torque specifications.
By understanding the serpentine belt diagram and following proper safety procedures, you can confidently perform basic maintenance and repairs on your Toyota Tundra's serpentine belt system. This will help ensure the reliable operation of your vehicle and prevent costly breakdowns.
We have the Toyota Tundra serpentine belt diagram available for download.