Trailer Hitch Wiring Harness Installation Near Me
So, you're thinking about adding a trailer hitch wiring harness. Smart move! Whether you're hauling a utility trailer, a camper, or just need to power some lights on a bike rack, having a properly wired harness is crucial for safety and, in many places, legally required. Finding a reputable installer "near me" is always an option, but if you're comfortable tackling this yourself, this guide will walk you through understanding trailer hitch wiring harnesses, focusing on the essential components, how they function, and some troubleshooting tips to ensure a successful installation.
Understanding the Basics: Why Bother with a Wiring Harness?
The purpose of a trailer hitch wiring harness is simple: to transfer electrical signals from your tow vehicle's lighting system (brake lights, turn signals, running lights) to the trailer's corresponding lights. Without it, you're essentially driving with an unlit trailer, which is a major safety hazard, especially at night or in low-visibility conditions. It's also a surefire way to attract the attention of law enforcement. A proper harness ensures your trailer's lights function in sync with your vehicle, making your presence on the road clear to other drivers. Having a good understanding of the wiring schematic can be incredibly useful, not only during the initial installation, but also for future repairs, modifications, or just expanding your overall automotive knowledge.
Key Specs and Main Parts of a Trailer Hitch Wiring Harness
Before diving into installation, let's break down the key components you'll encounter:
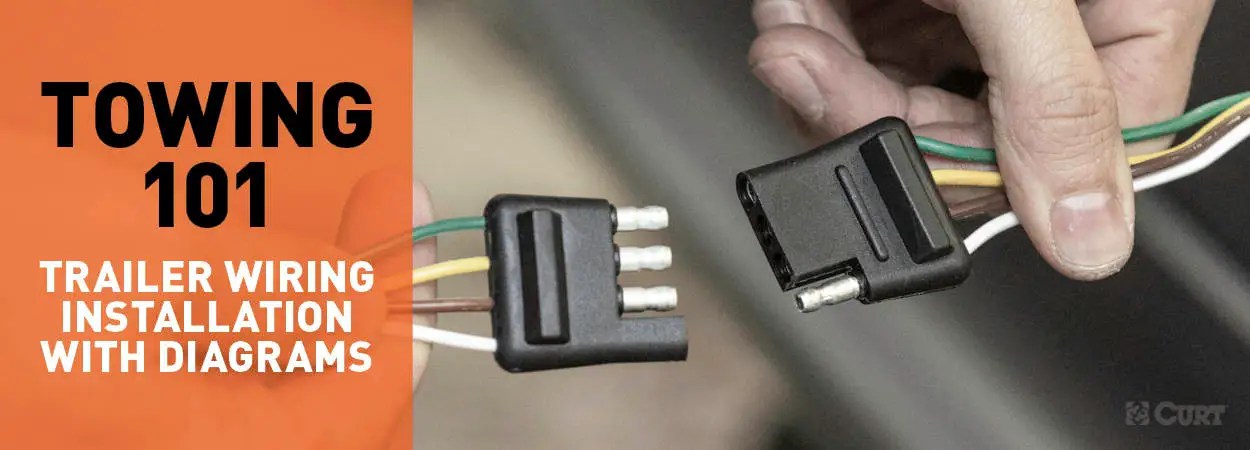
- Trailer Connector: This is the part that physically connects to the trailer's wiring. The most common types are the 4-way flat connector (typically used for smaller trailers without brakes) and the 7-way round connector (used for larger trailers with electric brakes and auxiliary functions like a 12V power supply).
- Vehicle-Specific Wiring Harness (T-Connector): This is the ideal solution. A T-connector harness is designed to plug directly into your vehicle's existing wiring, usually at the tail lights. These harnesses avoid cutting or splicing into your vehicle's wiring, minimizing the risk of electrical problems.
- Control Module (if applicable): Some vehicles, particularly those with complex electrical systems or LED lighting, require a control module. This module isolates the trailer wiring from the vehicle's wiring to prevent overloading or damaging the vehicle's electrical system. It typically taps into a power source (often the battery) and provides buffered outputs for the trailer lights.
- Power Wire: This wire (usually heavy-gauge) provides power to the control module (if present) or directly to the trailer connector for certain functions like brake controllers or auxiliary power. It usually runs from the vehicle's battery.
- Ground Wire: A crucial component! This wire provides a return path for the electrical current. It must be securely connected to the vehicle's frame to ensure proper operation.
- Fuses: The harness will often include inline fuses to protect the vehicle's and trailer's electrical systems from shorts or overloads.
Decoding Wiring Harness Symbols and Colors
Understanding the wiring diagram is essential for a successful installation and for future troubleshooting. Here's a breakdown of common symbols and color codes:
- Lines: Lines represent wires. Thicker lines often indicate larger gauge wires, such as the power or ground wires. Dashed lines might indicate connections that are optional or dependent on the trailer's features.
- Color Codes: Colors are used to identify the function of each wire. While the specific colors may vary slightly depending on the manufacturer, common color codes include:
- Yellow: Left turn signal and brake light
- Green: Right turn signal and brake light
- Brown: Tail lights/Running lights
- White: Ground
- Blue: Electric brakes (typically on 7-way connectors)
- Red/Black: 12V power (typically on 7-way connectors)
- Symbols: You'll see various symbols representing components like fuses, relays, connectors, and ground points. A ground symbol usually looks like a series of decreasing horizontal lines connected to a single vertical line. Fuses are often represented by a wavy line enclosed in a rectangle.
Think of the diagram as a map. It shows you where each wire starts, where it connects, and what function it serves. Take your time to trace the wires and understand the flow of electricity.
How a Trailer Hitch Wiring Harness Works
The fundamental principle is simple: When you activate a light in your vehicle (e.g., turn signal, brake light), the corresponding signal is sent through the wiring harness to the trailer's lights.
In a system with a vehicle-specific T-connector, the harness plugs directly into the vehicle's tail light wiring. When you activate your turn signal, for instance, the vehicle's computer sends a signal to the tail light assembly. The T-connector "taps" into this signal and sends a duplicate signal through the corresponding wire in the trailer wiring harness to the trailer's turn signal. The control module (if present) acts as an intermediary, monitoring the vehicle's electrical system and providing a clean, isolated signal to the trailer lights.
The ground wire is crucial for completing the circuit. Without a proper ground connection, the electrical current cannot flow, and the lights will not function.
Real-World Use: Basic Troubleshooting Tips
Even with a careful installation, problems can sometimes occur. Here are some basic troubleshooting tips:
- No Lights: Start by checking the fuses. A blown fuse is a common culprit. Next, verify the ground connection. Ensure it's clean, tight, and connected to bare metal on the vehicle's frame. Use a multimeter to check for continuity between the ground wire and the vehicle's chassis.
- Dim Lights or Flickering: This often indicates a poor ground connection or a loose connection in the wiring. Inspect all connections for corrosion or damage.
- One Light Not Working: Check the bulb first. If the bulb is good, trace the wiring from the connector back to the source, looking for breaks or loose connections. Use a test light or multimeter to check for voltage at each point.
- Trailer Lights Affecting Vehicle Lights: This could indicate a problem with the control module (if present) or a short circuit in the wiring. Disconnect the trailer and test the vehicle's lights independently. If the problem persists, the issue is likely in the vehicle's wiring.
Always disconnect the battery before working on any electrical wiring. This will prevent accidental shorts and potential damage to your vehicle's electrical system.
Safety Considerations: Highlighting Risky Components
Working with electrical systems always carries some risk. Here are some key safety points to keep in mind:
- Battery: The vehicle's battery is a high-current source. Accidental shorts can cause sparks, fires, and damage to your vehicle. Always disconnect the negative terminal of the battery before starting any electrical work.
- Wiring: Damaged or frayed wires can create short circuits and pose a fire hazard. Inspect all wiring carefully before installation and repair any damage.
- Fuses: Never replace a fuse with a higher amperage fuse. This can overload the circuit and cause a fire. Use only the correct amperage fuse as specified in the wiring diagram.
- Control Modules: If your harness includes a control module, follow the manufacturer's instructions carefully. Incorrect wiring can damage the module or the vehicle's electrical system.
Always wear safety glasses when working with electrical wiring. Use insulated tools to prevent accidental shocks.
Installing a trailer hitch wiring harness is a manageable DIY project for the experienced car owner. By understanding the components, the wiring diagram, and the safety precautions, you can save money and gain valuable experience. However, if you are unsure about any aspect of the installation, it's always best to consult a qualified mechanic.
We have a sample wiring diagram available for download. This diagram provides a visual representation of a typical trailer hitch wiring harness setup and can be a valuable reference during your installation. Contact us and we will send you the file.