Trailer Wiring Harness For 2014 Honda Pilot
Understanding the trailer wiring harness for your 2014 Honda Pilot is crucial whether you're planning on towing, troubleshooting existing electrical issues, or simply expanding your automotive knowledge. This article provides a detailed overview of the 2014 Pilot's trailer wiring system, offering insights into its purpose, components, function, and basic troubleshooting tips. Knowing this information empowers you to confidently handle repairs and modifications, saving you time and money.
Purpose and Importance
The primary purpose of a trailer wiring harness is to provide a safe and reliable electrical connection between your 2014 Honda Pilot and a trailer. This connection allows the Pilot to control the trailer's lights, including:
- Tail lights: Essential for visibility during nighttime driving.
- Brake lights: Communicate when the Pilot is braking, alerting drivers behind the trailer.
- Turn signals: Indicate intended lane changes or turns.
- Running lights (clearance lights): Enhance visibility, particularly for larger trailers.
- Reverse lights: Illuminate the area behind the trailer when backing up.
Without a functioning trailer wiring harness, towing legally and safely is impossible. Malfunctions can lead to accidents and legal penalties. Understanding the wiring system allows for quicker diagnosis and repair of any issues, ensuring a safe and compliant towing experience.
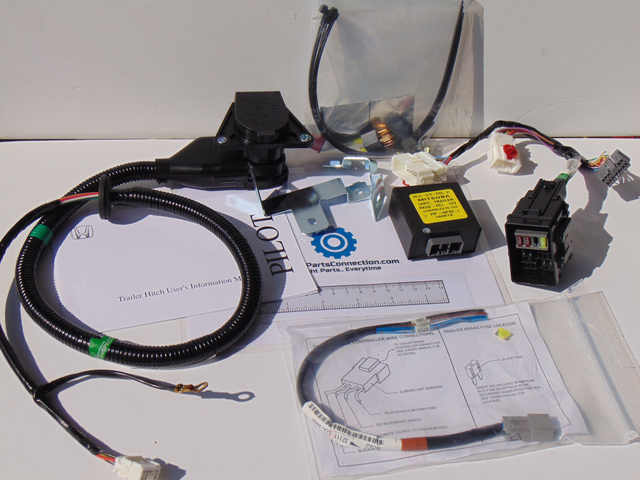
Key Specifications and Main Parts
The 2014 Honda Pilot typically utilizes a 7-way RV blade connector or a 4-way flat connector for trailer wiring.
- 7-Way RV Blade Connector: This connector is more versatile and supports a wider range of trailer functions, including electric brakes (if the trailer is equipped). It includes pins for:
- Ground
- Tail Lights
- Left Turn/Brake Light
- Right Turn/Brake Light
- Electric Brakes
- Auxiliary Power (12V+)
- Reverse Lights
- 4-Way Flat Connector: This simpler connector supports only basic lighting functions:
- Ground
- Tail Lights
- Left Turn/Brake Light
- Right Turn/Brake Light
The trailer wiring harness itself consists of a bundle of color-coded wires that run from the Pilot's electrical system to the trailer connector. Key components include:
- Wiring Harness: The insulated wires that carry the electrical signals.
- Trailer Connector: The physical connector (7-way or 4-way) that plugs into the trailer.
- Fuse Box/Relays: Protects the Pilot's electrical system from overloads and controls the power flow to the trailer lights. These are often located in the under-hood fuse box or a dedicated trailer wiring module.
- Trailer Wiring Module (if equipped): Some Pilots have a separate module that manages the trailer wiring, providing enhanced functionality and protection.
Symbols, Lines, and Colors
A trailer wiring diagram uses specific symbols and color codes to represent different components and circuits. Here's a breakdown of common symbols and their meanings:
- Solid Lines: Represent wires. The thicker the line, the higher the current capacity of the wire.
- Dashed Lines: Often indicate grounds or connections to the vehicle's chassis.
- Circles: Can represent connectors, junctions, or components like lights.
- Squares/Rectangles: Typically represent relays, fuses, or modules.
- Ground Symbol: A series of horizontal lines decreasing in length, indicating a connection to ground.
Color coding is also crucial for identifying wires. While there can be slight variations, common color codes include:
- White: Ground.
- Brown: Tail lights and running lights.
- Yellow: Left turn signal and brake light.
- Green: Right turn signal and brake light.
- Blue: Electric brakes (7-way connector).
- Red: Auxiliary power (12V+) (7-way connector).
- Black: Reverse Lights (7-way connector)
Note: Always refer to the specific wiring diagram for your 2014 Honda Pilot as color codes can vary.
How It Works
The trailer wiring system integrates with the Pilot's existing electrical system. When you activate a turn signal or apply the brakes in the Pilot, a signal is sent to the corresponding wire in the trailer wiring harness. This signal then activates the corresponding light on the trailer.
For example, when you press the brake pedal, the brake light switch activates, sending power to the brake lights on the Pilot and, through the wiring harness, to the brake lights on the trailer. The same principle applies to turn signals and tail lights. The ground wire provides a return path for the electrical current, completing the circuit.
If equipped with electric brakes (7-way connector), the Pilot's brake controller sends a signal to the trailer's electric brakes, allowing for synchronized braking and enhanced control, especially when towing heavier loads. The auxiliary power wire provides a constant 12V power supply to the trailer, which can be used to charge a trailer battery or power other accessories within the trailer.
Real-World Use and Basic Troubleshooting
Here are some common issues and basic troubleshooting steps:
- No Lights on the Trailer: Start by checking the fuses related to the trailer wiring in the Pilot's fuse box. Also, inspect the trailer connector for corrosion or damage. Use a multimeter to check for voltage at the connector pins when the corresponding lights are activated in the Pilot. A missing ground is a frequent culprit; ensure the ground connection is clean and secure.
- One Light Not Working: Use a test light or multimeter to check for power at the light socket on the trailer. If there's power but the light doesn't illuminate, replace the bulb. If there's no power, trace the wiring back to the connector, checking for breaks or loose connections.
- Blinking Issues: If the trailer lights blink erratically or at a different rate than the Pilot's lights, it could indicate a grounding issue or a problem with the trailer wiring module (if equipped). Check the ground connections and inspect the module for damage.
- Electric Brake Problems: If the electric brakes aren't functioning correctly, check the brake controller settings in the Pilot and inspect the wiring to the trailer connector. Use a multimeter to check for voltage at the electric brake pin on the connector when the brake pedal is applied. Also, inspect the trailer's brake magnets and wiring.
When troubleshooting, always disconnect the trailer connector from the Pilot to isolate the problem. This helps determine whether the issue lies with the Pilot's wiring or the trailer's wiring.
Safety Considerations
Working with electrical systems can be dangerous. Here are some safety precautions:
- Disconnect the Battery: Before working on any electrical components, disconnect the negative terminal of the Pilot's battery to prevent accidental shorts and electric shock.
- Use Proper Tools: Use insulated tools designed for automotive electrical work.
- Avoid Working in Wet Conditions: Water conducts electricity, increasing the risk of electric shock.
- Identify High-Risk Components: Be especially careful around the battery, alternator, and any high-voltage circuits.
- Fuses: When replacing fuses, always use the correct amperage rating. Using a fuse with a higher amperage rating can damage the electrical system.
This detailed explanation provides a foundation for understanding and working with the 2014 Honda Pilot trailer wiring system. Remember that precise diagnostics often require specific tools and expertise. If you're uncomfortable performing any of these procedures, it's best to consult a qualified mechanic.
We have a detailed wiring diagram file specifically for the 2014 Honda Pilot trailer wiring harness. You can download it to have a visual aid for your troubleshooting and repair efforts.