Vw Beetle Wiring Harness Replacement
So, you're tackling a wiring harness replacement on your classic VW Beetle, eh? Excellent choice! While it might seem daunting, understanding the wiring harness is crucial for proper restoration, troubleshooting electrical gremlins, or even customizing your Bug. This article will break down the VW Beetle wiring harness, explaining its purpose, components, how it functions, and offer some real-world troubleshooting tips. Think of this as your comprehensive guide to conquering that electrical beast.
Purpose of the Wiring Harness and Why Understanding It Matters
The wiring harness is essentially the nervous system of your Beetle. It's a structured set of wires, connectors, and terminals designed to distribute electrical power from the battery and alternator to various components throughout the car. These components include the headlights, taillights, starter motor, ignition system, radio, and more. Without a functioning wiring harness, your Beetle will be a stationary piece of metal.
Understanding the wiring harness is vital for several reasons:
- Repairs: Tracing shorts, fixing broken wires, or replacing damaged components requires a solid understanding of the harness layout.
- Restoration: If you're restoring a Beetle, especially one that's been sitting for years, the wiring harness is often brittle and corroded, necessitating replacement or significant repairs.
- Customization/Modifications: Adding aftermarket accessories, like a modern stereo system or electronic ignition, involves integrating them into the existing wiring, which requires knowledge of the harness.
- Troubleshooting: Electrical problems are common in older vehicles. Understanding the wiring diagram and the harness itself allows you to systematically diagnose and resolve these issues.
Key Specs and Main Parts of a Beetle Wiring Harness
VW Beetle wiring harnesses vary slightly depending on the year of manufacture. However, certain key components and specifications remain consistent:
- Voltage: Primarily 6V or 12V DC, depending on the year. Older Beetles typically used 6V systems, while later models transitioned to 12V. Make sure you're using the correct voltage components throughout your system.
- Wire Gauge: The thickness of the wires varies based on the current they carry. Thicker wires (lower gauge number) are used for high-current circuits like the starter motor and battery cables, while thinner wires are used for low-current circuits like the lights.
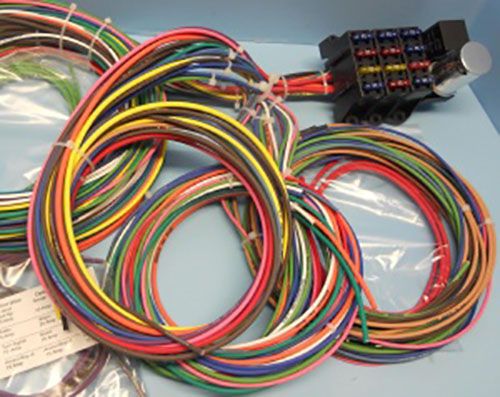
- Connectors: A variety of connectors are used, including bullet connectors, spade connectors, and multi-pin connectors. These connectors allow for easy connection and disconnection of components.
- Fuse Box: The fuse box is a critical component that protects the electrical system from overloads. Each circuit has its own fuse, which will blow if the current exceeds a certain limit.
- Ground Straps: Essential for proper electrical grounding. They connect various components to the chassis, providing a return path for the current. Poor grounding is a common cause of electrical problems.
- Wiring Diagram: The holy grail! A schematic representation of the entire electrical system, showing the connections between all components. We have a downloadable version available for you.
Main Parts of the Harness:
- Main Harness: This is the largest part of the harness, running from the front to the back of the car and connecting to most of the major components.
- Headlight Harness: A separate harness that connects to the headlights, turn signals, and parking lights.
- Taillight Harness: Connects to the taillights, brake lights, and rear turn signals.
- Engine Harness: Connects to the engine components, such as the distributor, coil, and starter motor.
- Dash Harness: Connects to the instruments, switches, and controls on the dashboard.
Understanding Wiring Diagram Symbols
Decoding a wiring diagram is essential. Here's a breakdown of common symbols you'll encounter:
- Lines: Represent wires. A solid line indicates a direct connection. Dashed lines may indicate optional connections or wires that are part of a sub-harness.
- Colors: Each wire is typically identified by a color code (e.g., Brown, Red, Black, Blue). This is crucial for tracing wires and identifying their function. Always double-check color codes with the diagram.
- Circles: Often represent connection points or terminals.
- Rectangles: Can represent components like relays, switches, or resistors.
- Fuses: Typically shown as a line with a squiggly line inside a rectangle. The amperage rating is usually indicated next to the fuse symbol.
- Ground Symbol: Looks like an upside-down triangle with horizontal lines. This indicates a connection to the chassis ground.
A good wiring diagram will also include a legend explaining the symbols and color codes used. Spend time familiarizing yourself with the diagram before you start working on the harness.
How It Works: Electricity Flow in a Beetle
The basic principle is simple: electricity flows from the battery, through the wiring harness, to the various components, and then back to the battery through the ground.
Here's a simplified overview:
- The battery provides the initial electrical power.
- When you turn the ignition key, the starter motor draws a large amount of current from the battery through heavy-gauge wires.
- The alternator charges the battery while the engine is running, ensuring a constant supply of power.
- Other circuits, such as the lights, are powered through the fuse box, which protects them from overloads.
- Switches control the flow of electricity to various components, allowing you to turn them on and off.
- Ground straps provide a return path for the current, completing the circuit.
Real-World Use: Basic Troubleshooting Tips
Electrical problems are common in vintage Beetles. Here are a few troubleshooting tips:
- No Power: Check the battery terminals for corrosion and ensure they are properly connected. Verify the main ground strap is secure. Check the main fuse.
- Blown Fuses: If a fuse blows repeatedly, there's likely a short circuit in that circuit. Disconnect components on that circuit one by one until the fuse stops blowing.
- Dim Lights: Could indicate a poor ground connection or a weak battery. Clean and tighten all ground connections.
- Intermittent Problems: Often caused by loose connections or corroded terminals. Carefully inspect all connectors and terminals, cleaning them with electrical contact cleaner.
- Use a Multimeter: A multimeter is an indispensable tool for electrical troubleshooting. Use it to check voltage, continuity, and resistance. Learn how to use it safely and effectively.
Safety: Highlight Risky Components
Working with electrical systems can be dangerous. Always take the following precautions:
- Disconnect the Battery: Before working on the wiring harness, always disconnect the negative terminal of the battery to prevent accidental short circuits.
- Work in a Well-Lit Area: Good lighting is essential for seeing what you're doing and avoiding mistakes.
- Use Proper Tools: Use insulated tools to prevent electrical shocks.
- Avoid Working in Wet Conditions: Water and electricity don't mix.
- Respect Capacitors: Some components, like capacitors in the ignition system, can store a charge even after the battery is disconnected. Discharge them carefully before handling them.
- Fuel Lines: Be extremely careful around fuel lines. Any spark can ignite fuel vapors.
- High Voltage: The ignition coil generates very high voltage. Avoid touching the coil terminals when the engine is running.
Working on the electrical system of your Beetle can be rewarding, but always prioritize safety. If you're unsure about something, consult a qualified mechanic.
Remember, this information is a starting point. The specific wiring harness in your Beetle may vary slightly depending on the year and model. We have the complete wiring diagram file to assist you further in this task, and you can download it from our site!