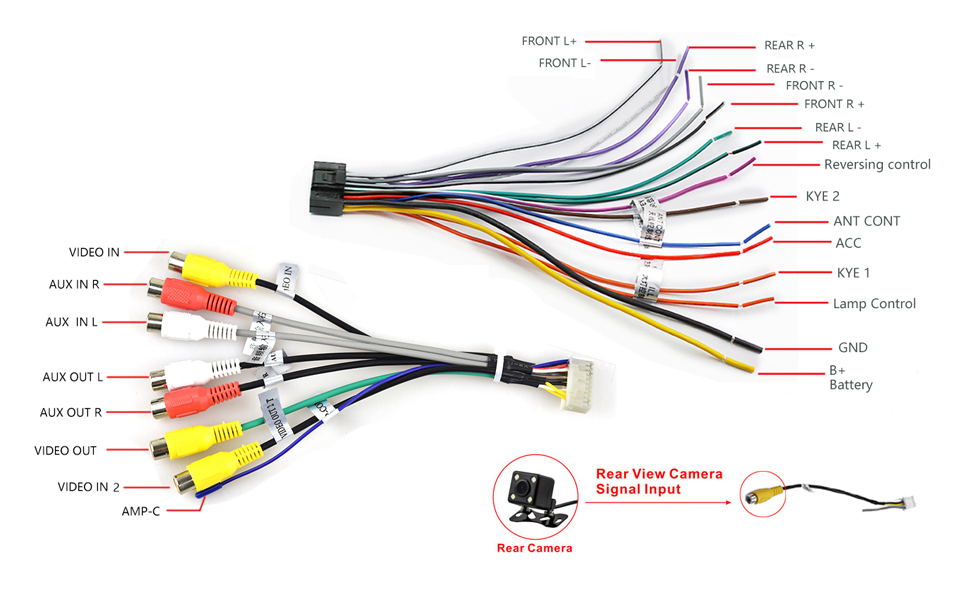
Wiring Diagram For A Dual Car Stereo
So, you're tackling a dual car stereo wiring project, eh? Whether you're upgrading an older setup, replacing a faulty unit, or just trying to understand how your audio system ticks, a clear wiring diagram is your best friend. This article will break down the essential elements of a dual car stereo wiring diagram, empowering you to confidently navigate the wires and connections. We’re assuming here you’re dealing with a standard head unit connected to speakers, power, and potentially an external amplifier or subwoofer. Without a solid understanding, you can end up with damaged equipment, a non-functional system, or even electrical fires – none of which are desirable!
Purpose of a Wiring Diagram
A car stereo wiring diagram serves several critical purposes:
- Installation: The most obvious use is guiding the initial installation of a new head unit. It shows you exactly which wire connects to which, ensuring proper functionality.
- Troubleshooting: When your stereo isn't working correctly – no sound, intermittent power, blown fuses – a diagram helps you trace the wiring and pinpoint the problem area. Instead of blindly guessing, you can methodically check connections and components.
- Modification & Upgrade: If you’re adding an amplifier, subwoofer, or other aftermarket components, the wiring diagram becomes indispensable. It helps you determine where to tap into existing circuits and how to properly integrate the new equipment.
- Learning & Understanding: Even if you're not currently working on your stereo, studying the diagram can improve your understanding of automotive electrical systems in general. It helps you grasp concepts like power distribution, grounding, and signal flow.
Key Specs and Main Parts
Before diving into the diagram itself, let's define the main components and their typical specifications:
- Head Unit (Receiver): The brain of the system. It provides the user interface, processes audio signals, and sends power to the speakers. Typical specifications include:
- Power Output: Measured in Watts RMS (Root Mean Square) per channel. This indicates the continuous power the unit can deliver to the speakers. Example: 50W x 4 channels.
- Impedance: Usually specified as 4 Ohms. This is the electrical resistance of the speakers the head unit is designed to drive.
- Voltage: Typically 12V DC, matching the car's electrical system.
- Speakers: Convert electrical signals into sound waves. Key specs:
- Impedance: Usually 4 Ohms, but some are 2 Ohms or 8 Ohms. Matching speaker impedance to the head unit is critical.
- Power Handling: Measured in Watts RMS and Peak. Indicates how much power the speaker can handle without damage.
- Wiring Harness: A bundle of wires that connects the head unit to the car's electrical system and speakers. Aftermarket harnesses often use standardized color codes for easier installation.
- Fuse(s): Protect the head unit and other components from overcurrent. The fuse rating (e.g., 10A, 15A) is crucial and should *never* be replaced with a higher value fuse.
- Ground Wire: Provides a return path for the electrical current. A solid, clean ground connection is essential for proper operation and to prevent noise.
- Remote Turn-On Wire (Amplifier Turn-On): Sends a 12V signal to turn on an external amplifier when the head unit is powered on.
- Antenna Wire: Connects the head unit to the car's antenna for radio reception.
Understanding Symbols in a Wiring Diagram
Wiring diagrams use a standardized set of symbols to represent components and connections. Here's a breakdown of common symbols:
- Solid Lines: Represent wires. The thickness of the line usually doesn't indicate wire gauge (size).
- Dashed Lines: May represent shielded cables or connections that are not directly wired (e.g., a control signal).
- Colors: Wires are often color-coded (e.g., red for power, black for ground). The diagram will usually include a key or legend that explains the color codes. Standard color codes exist, but always verify with your specific vehicle and head unit.
- Circles/Dots: Indicate a wire connection (splice or terminal).
- Rectangles: May represent components like the head unit, amplifier, or other modules.
- Ground Symbol (often looking like an inverted triangle or a series of horizontal lines): Indicates a connection to the vehicle's chassis ground.
- Fuse Symbol (a wavy line enclosed in a rectangle): Represents a fuse. The diagram may indicate the fuse rating.
Important: Pay close attention to the labeling next to each wire. It will indicate the wire's function (e.g., "Left Front Speaker +", "12V Constant", "ACC Ignition").
How It Works: Tracing the Circuit
Let’s walk through how a typical dual car stereo wiring system functions. Essentially, it’s a power delivery and signal transmission system.
- Power Source: The head unit receives power from the car's battery via two main wires:
- 12V Constant (Battery +): Provides continuous power to the head unit for memory and clock functions. This is *always* hot, even when the ignition is off.
- 12V Switched (ACC or Ignition): Receives power only when the ignition switch is in the accessory (ACC) or on position. This turns the head unit on and off with the car.
- Ground: The black ground wire connects the head unit to the vehicle's chassis, providing a return path for the current. A poor ground can cause all sorts of problems, from noise to complete failure.
- Signal Processing: The head unit processes audio signals from various sources (e.g., radio, CD player, Bluetooth) and amplifies them.
- Speaker Output: The amplified audio signals are sent to the speakers through the speaker wires. Each speaker requires two wires: a positive (+) and a negative (-). These wires are typically twisted pairs to reduce interference.
- Amplifier Integration (Optional): If you have an external amplifier, the head unit will have RCA outputs (low-level audio signals) that connect to the amplifier's inputs. The remote turn-on wire from the head unit signals the amplifier to power on when the head unit is active.
The diagram shows these connections, allowing you to trace the flow of electricity and audio signals from the power source to the speakers (or amplifier). Understanding this flow is essential for troubleshooting.
Real-World Use: Basic Troubleshooting Tips
Here are a few basic troubleshooting scenarios and how a wiring diagram can help:
- No Power: Check the fuses (both the in-line fuse on the head unit and the car's fuse panel). Use the diagram to identify the power and ground wires. Use a multimeter to verify that the 12V constant and 12V switched wires are receiving power. Also, confirm the ground connection is solid.
- No Sound from One Speaker: Use the diagram to identify the speaker wires for that speaker. Check the connections at both the head unit and the speaker. Use a multimeter to check for continuity (a complete circuit) between the head unit and the speaker.
- Excessive Noise or Distortion: A common cause is a poor ground connection. Use the diagram to locate the ground wire and ensure it's securely connected to a clean, unpainted metal surface on the vehicle's chassis. Check for loose or damaged speaker wires.
- Amplifier Not Turning On: Verify the remote turn-on wire is properly connected from the head unit to the amplifier. Use a multimeter to confirm the remote turn-on wire is receiving a 12V signal when the head unit is powered on.
Pro Tip: Invest in a good quality multimeter. It's an indispensable tool for diagnosing electrical problems.
Safety: Highlight Risky Components
Working with automotive electrical systems can be dangerous if you're not careful. Here are some key safety precautions:
- Disconnect the Battery: Before working on any wiring, disconnect the negative (-) terminal of the car's battery. This prevents accidental shorts and potential damage to the electrical system.
- Handle Fuses Carefully: Never replace a fuse with a higher amperage fuse. This can overload the circuit and cause a fire.
- Proper Insulation: Ensure all wire connections are properly insulated with electrical tape or heat shrink tubing. Exposed wires can cause shorts and fires.
- Avoid Working on Live Circuits: If you must work on a live circuit, use extreme caution. Use insulated tools and avoid touching any exposed metal parts.
- Airbags: Be very careful when working near airbags. Accidental deployment can cause serious injury. Consult your vehicle's service manual for airbag deactivation procedures.
Warning: Improper wiring can damage your head unit, speakers, or even the car's electrical system. If you're not comfortable working with electrical systems, consult a professional installer.
By understanding the purpose, components, symbols, and operation of a dual car stereo wiring diagram, you'll be well-equipped to tackle your next audio project with confidence. This isn't just about plugging wires; it’s about understanding the flow of electricity and the delicate balance of your car’s audio system.
We have a detailed dual car stereo wiring diagram available for download. Contact us and we will gladly provide the file. With this resource and the information in this article, you'll be well on your way to achieving your desired audio setup.