
Wiring Harness Adapter For Car Stereo
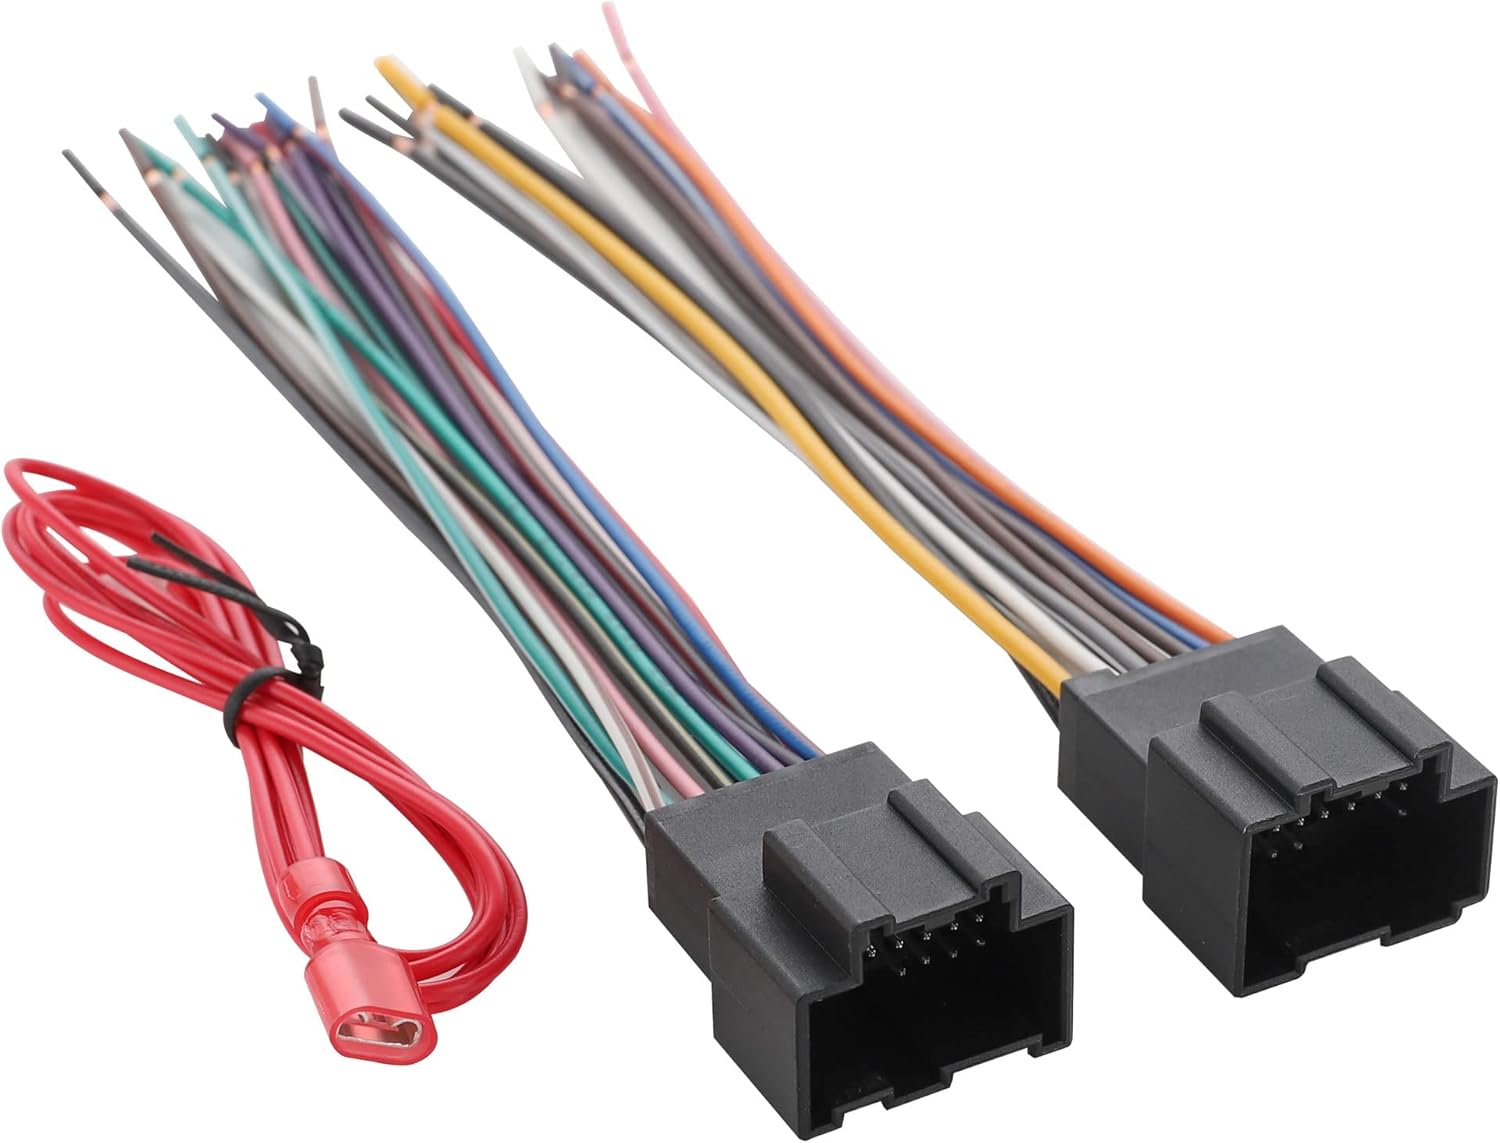
So, you're tackling a car stereo upgrade, huh? Smart move. The factory sound system is often the first thing many car owners want to improve. But before you start snipping wires and hoping for the best, let's talk about a crucial component that can save you a massive headache: the wiring harness adapter. We're going to delve into a detailed explanation of these adapters, focusing on the hows and whys, and how to use a wiring diagram to your advantage.
Purpose of a Wiring Harness Adapter
Why should you care about these little plastic connectors? Simple: to avoid butchering your car's original wiring. The primary purpose of a wiring harness adapter is to provide a plug-and-play connection between your new aftermarket car stereo and your car's factory wiring harness. Think of it as a translator, bridging the communication gap between two different wiring languages. Without it, you'd have to cut and splice wires, which can lead to all sorts of problems down the road, including electrical shorts, blown fuses, and even damage to your car's sensitive electronics. Furthermore, using an adapter maintains the resale value of your car by keeping the original wiring intact. It allows you to easily revert to the factory stereo if you ever decide to sell or trade in your vehicle.
Key Specs and Main Parts
A wiring harness adapter typically consists of two main connectors:
- Vehicle-Specific Connector: This connector is designed to plug directly into your car's factory stereo wiring harness. It's usually a custom shape and pin configuration unique to your vehicle's make, model, and year. Identifying the correct adapter is crucial – check online databases or consult with a car audio specialist if you're unsure.
- Aftermarket Stereo Connector: This connector is a standardized shape (usually an ISO connector) that plugs directly into the back of your new aftermarket car stereo. These connectors are generally universal across different stereo brands.
Within the harness itself, you'll find various wires, each designated for a specific function, such as:
- Power (12V Constant): Provides constant power to the stereo for memory functions (e.g., station presets).
- Ground (GND): Provides a return path for the electrical current.
- Ignition (12V Switched): Provides power to the stereo only when the ignition is turned on.
- Illumination: Dims the stereo display when the headlights are turned on.
- Remote Turn-On (Amp Turn-On): Sends a signal to turn on an external amplifier.
- Speaker Wires: Carries the audio signal to the car's speakers (typically four pairs for front left/right and rear left/right).
Understanding Wiring Diagram Symbols
A wiring diagram is your roadmap for understanding how the adapter connects everything. Here's a breakdown of common symbols:
- Lines: Represent wires. The thickness of the line doesn't typically indicate wire gauge in these simple diagrams, but in more comprehensive vehicle schematics it can.
- Colors: Each wire is usually color-coded (e.g., red for power, black for ground). The diagram will include a legend indicating which color corresponds to which function. Consistency between the diagram, the adapter wires, and (ideally) your car's factory wiring, is key.
- Connectors: Represented by squares, circles, or other geometric shapes, indicating where wires connect. The diagram will show how the vehicle-specific connector maps to the aftermarket stereo connector.
- Ground Symbol: Typically a series of descending horizontal lines, indicating a connection to the chassis ground.
- Fuse Symbol: Represented by a wavy line inside a rectangle or circle, indicating the location of a fuse.
Understanding these basic symbols will allow you to trace the connections and ensure that each wire is properly connected.
How It Works: The Flow of Electricity
Let's break down the electrical flow. Power comes from the car battery, typically protected by a fuse in the fuse box. The 12V constant wire receives power directly from the battery, allowing the stereo to retain its memory settings even when the car is off. The ignition wire receives power only when the ignition is turned on, signaling the stereo to power up. The ground wire provides a return path for the electricity, completing the circuit. When the stereo is on, it sends audio signals through the speaker wires to the car's speakers. The remote turn-on wire signals an external amplifier to power on, ensuring that the amp only draws power when the stereo is active. The wiring harness adapter simply reroutes these signals from the car's factory wiring to the corresponding inputs on the aftermarket stereo, without requiring any cutting or splicing.
Real-World Use: Basic Troubleshooting
Even with a wiring harness adapter, things can sometimes go wrong. Here are some common issues and troubleshooting tips:
- No Power: Check the fuses (both in the car and on the stereo itself). Verify that the 12V constant and ignition wires are receiving power using a multimeter. Ensure the ground wire is securely connected to a clean metal surface.
- Stereo Turns Off When Car Is Turned Off: The 12V constant wire may not be properly connected or receiving power.
- No Sound: Double-check the speaker wire connections. Make sure the speaker wires are not shorted to ground. Try swapping the front and rear speaker connections to see if the problem is with a specific speaker or wire.
- Stereo Works But No Bass: Check the polarity of the speaker wires (+ and -). Incorrect polarity can cause phase cancellation, resulting in weak bass response.
- Remote turn-on not working: Make sure to connect the radio's remote turn-on lead to the aftermarket amplifier's remote turn-on lead. Verify that the amplifier is receiving proper power and ground.
A multimeter is your best friend when troubleshooting electrical issues. It allows you to measure voltage, current, and resistance, helping you pinpoint the source of the problem. If you're not comfortable using a multimeter, consult a professional.
Safety Considerations
Working with car electrical systems can be dangerous. Here are some important safety precautions:
- Disconnect the Negative Battery Terminal: This is the most important step. Always disconnect the negative battery terminal before working on any electrical components. This will prevent accidental shorts and potential damage to your car's electrical system.
- Use Proper Tools: Use crimping tools to securely attach connectors to wires. Use wire strippers to avoid damaging the wires.
- Avoid Working in Wet Conditions: Water can conduct electricity and increase the risk of electric shock.
- Be Careful with Airbags: If you're working near airbags, be extra cautious. Accidental deployment of an airbag can cause serious injury. It's generally best to have a professional handle any work involving airbags.
Pay special attention to the 12V constant wire. Even with the ignition off, this wire is always live and can cause a short if it comes into contact with ground.
Using a wiring harness adapter simplifies the installation of an aftermarket car stereo and protects your car's factory wiring. By understanding the purpose, components, and wiring diagram, you can confidently tackle this upgrade yourself. Remember to always prioritize safety and consult a professional if you're unsure about any aspect of the installation.
We have a detailed wiring diagram file available for download. It includes specific pinouts and color codes for a wide range of vehicles. This diagram will be an invaluable resource as you navigate your car stereo installation project.